
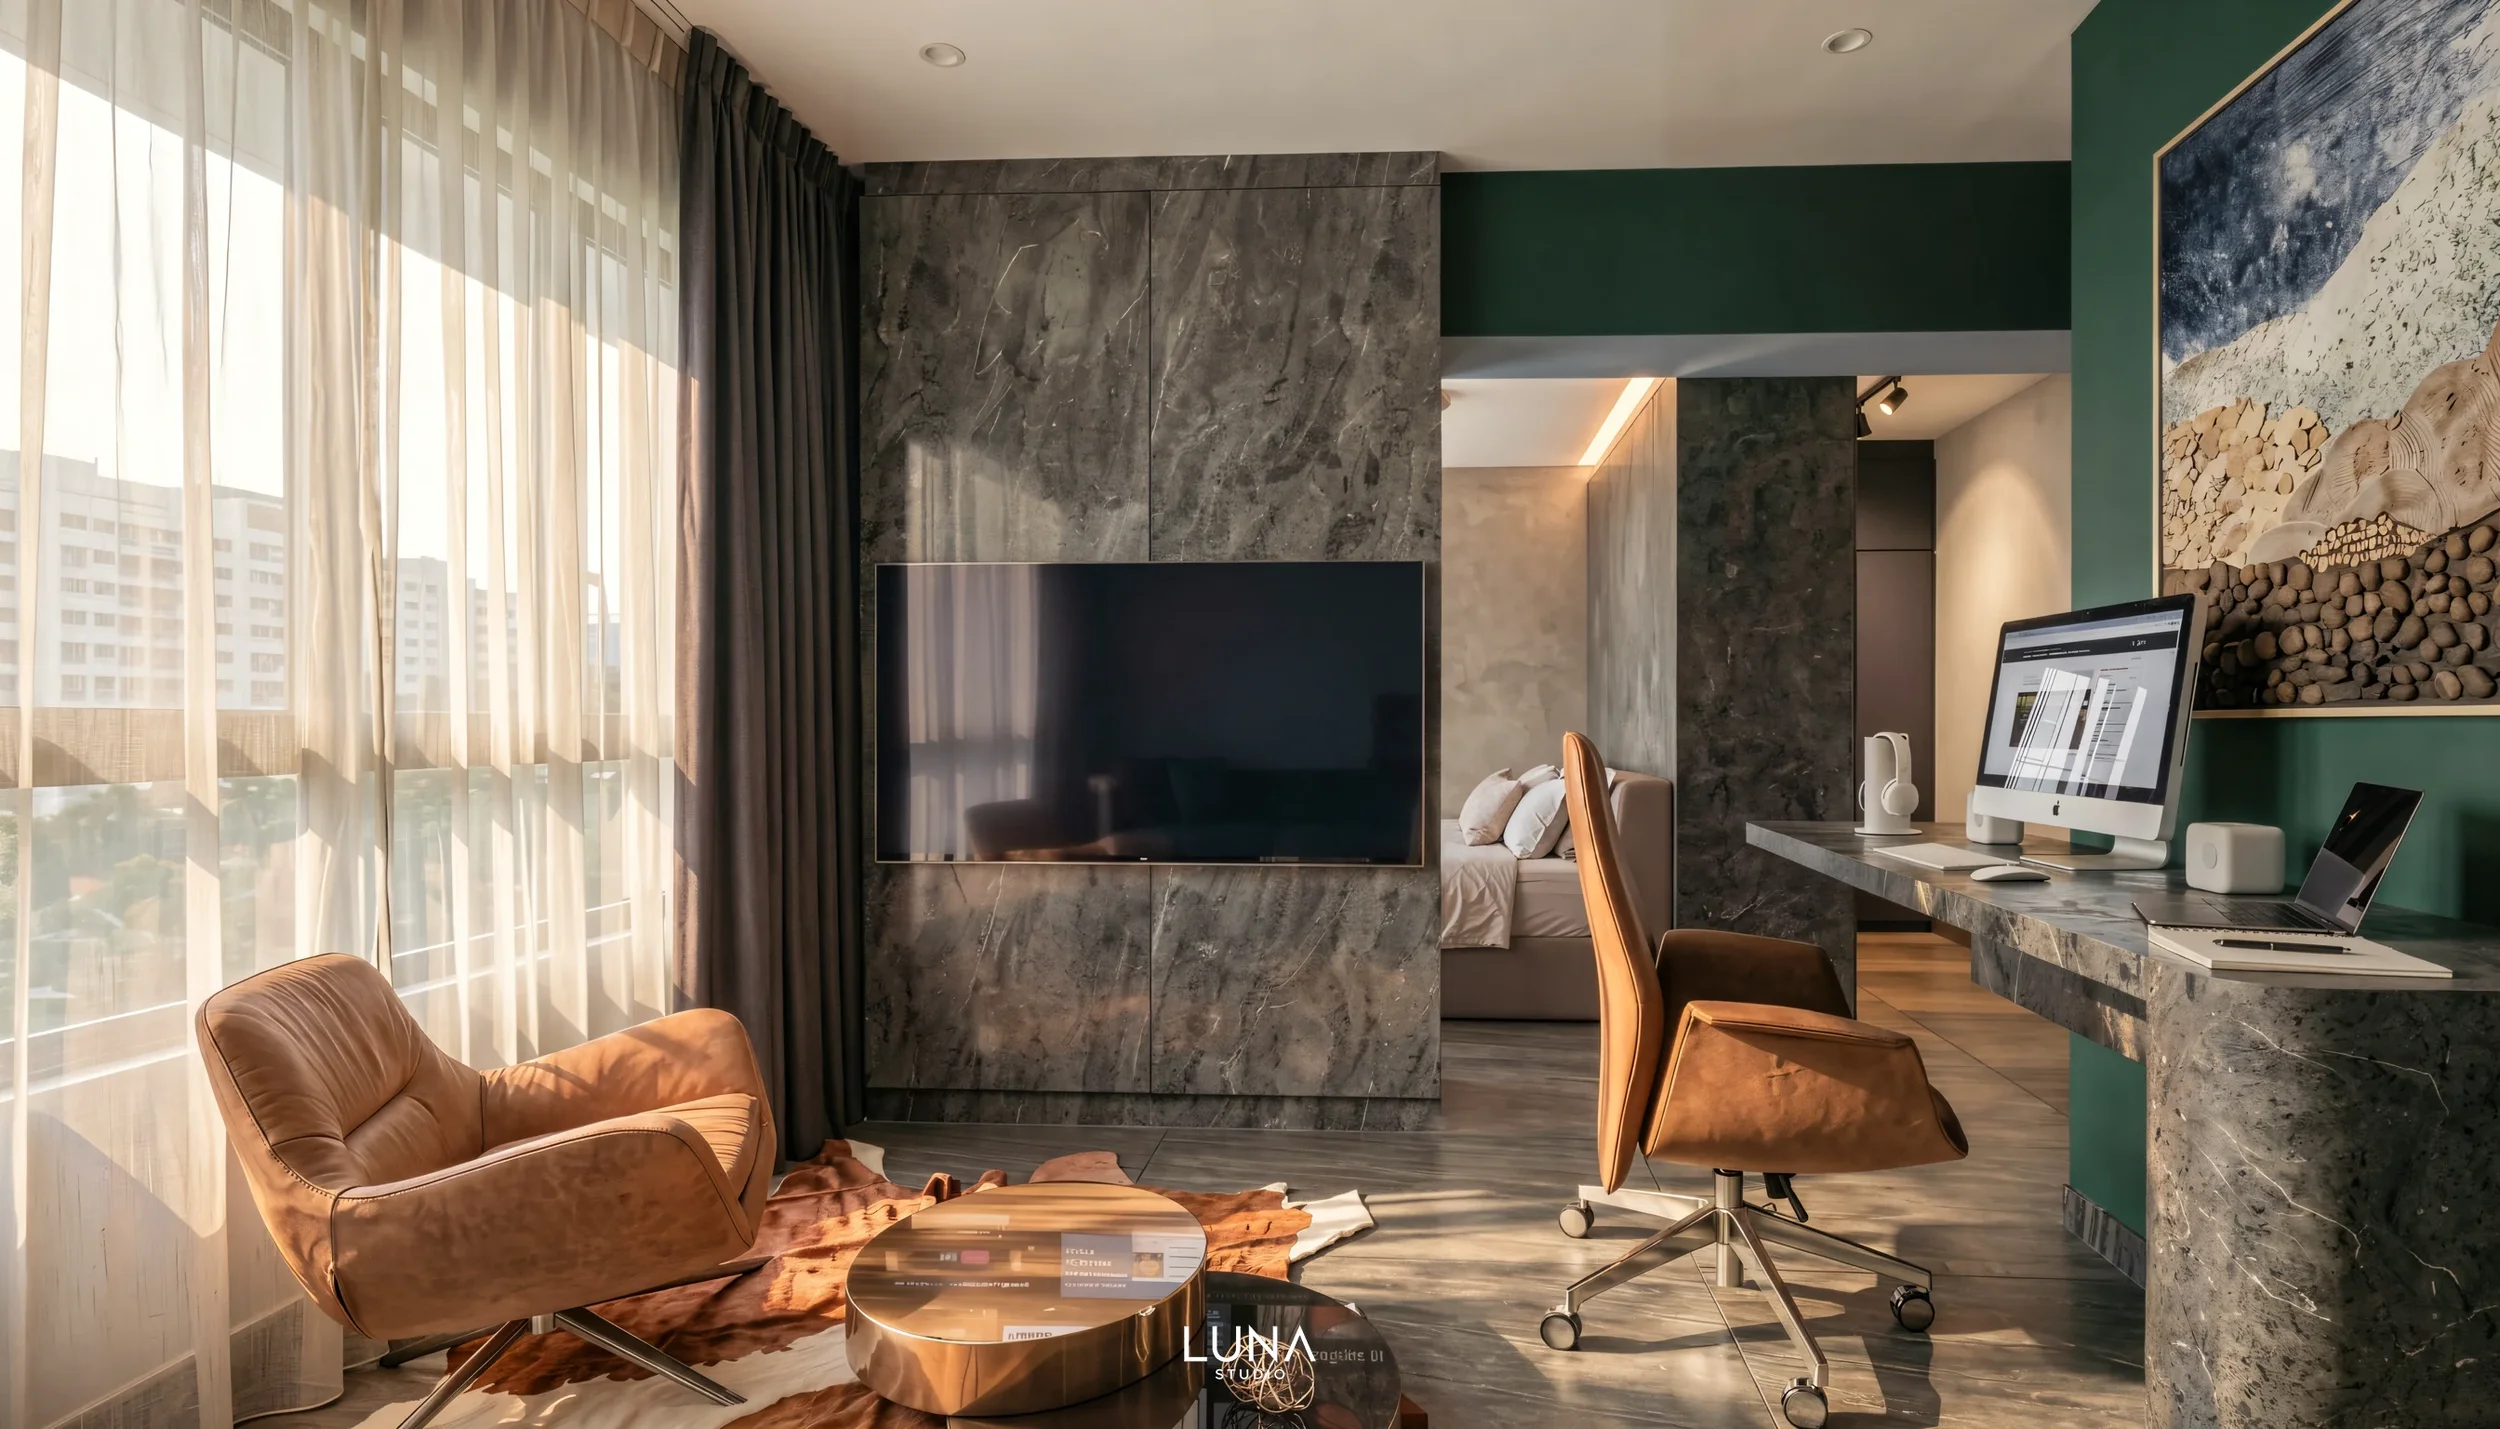
The Living Room Moved Inward.
Two bedrooms were combined to create a larger private suite with its own living room and study. The original living room was released to dining, giving the front of the home the space it needed for hosting.
The unusual part was not removing the wall. It was making the enlarged suite function as a complete private living environment.
The living room was given away.
The existing plan followed a familiar arrangement: living at the front, private rooms behind. But the priority here was different. The front of the home needed to accommodate a large dining table for guests, rather than dividing the space between dining and a conventional sofa-and-TV arrangement.
That created a simple but difficult question: if the living room was no longer needed at the front, where should living happen?
Where does living happen when the dining room needs the space?
Move it inward.
Reallocation, not addition.
The apartment did not gain new floor area. The existing floor area was reassigned.
Dining moved forward. Living moved inward. Two bedrooms became one larger private domain, allowing the new room to absorb sleeping, lounging, working and dressing within the same footprint.
Dining / Hosting
The public wing prioritised for guests.
Sleep / Lounge / Work / Dress
The consolidated private programme.
First, make the room exist.
The reconfiguration began with a 2,400mm L-shaped dividing wall between the two bedrooms. Its removal transformed two separate rooms into one continuous private volume.
The existing structure remained fixed; the intervention was therefore about understanding exactly which boundaries could be removed and what had to remain. On-site conditions and reinforced-concrete elements dictated the limits of the demolition.
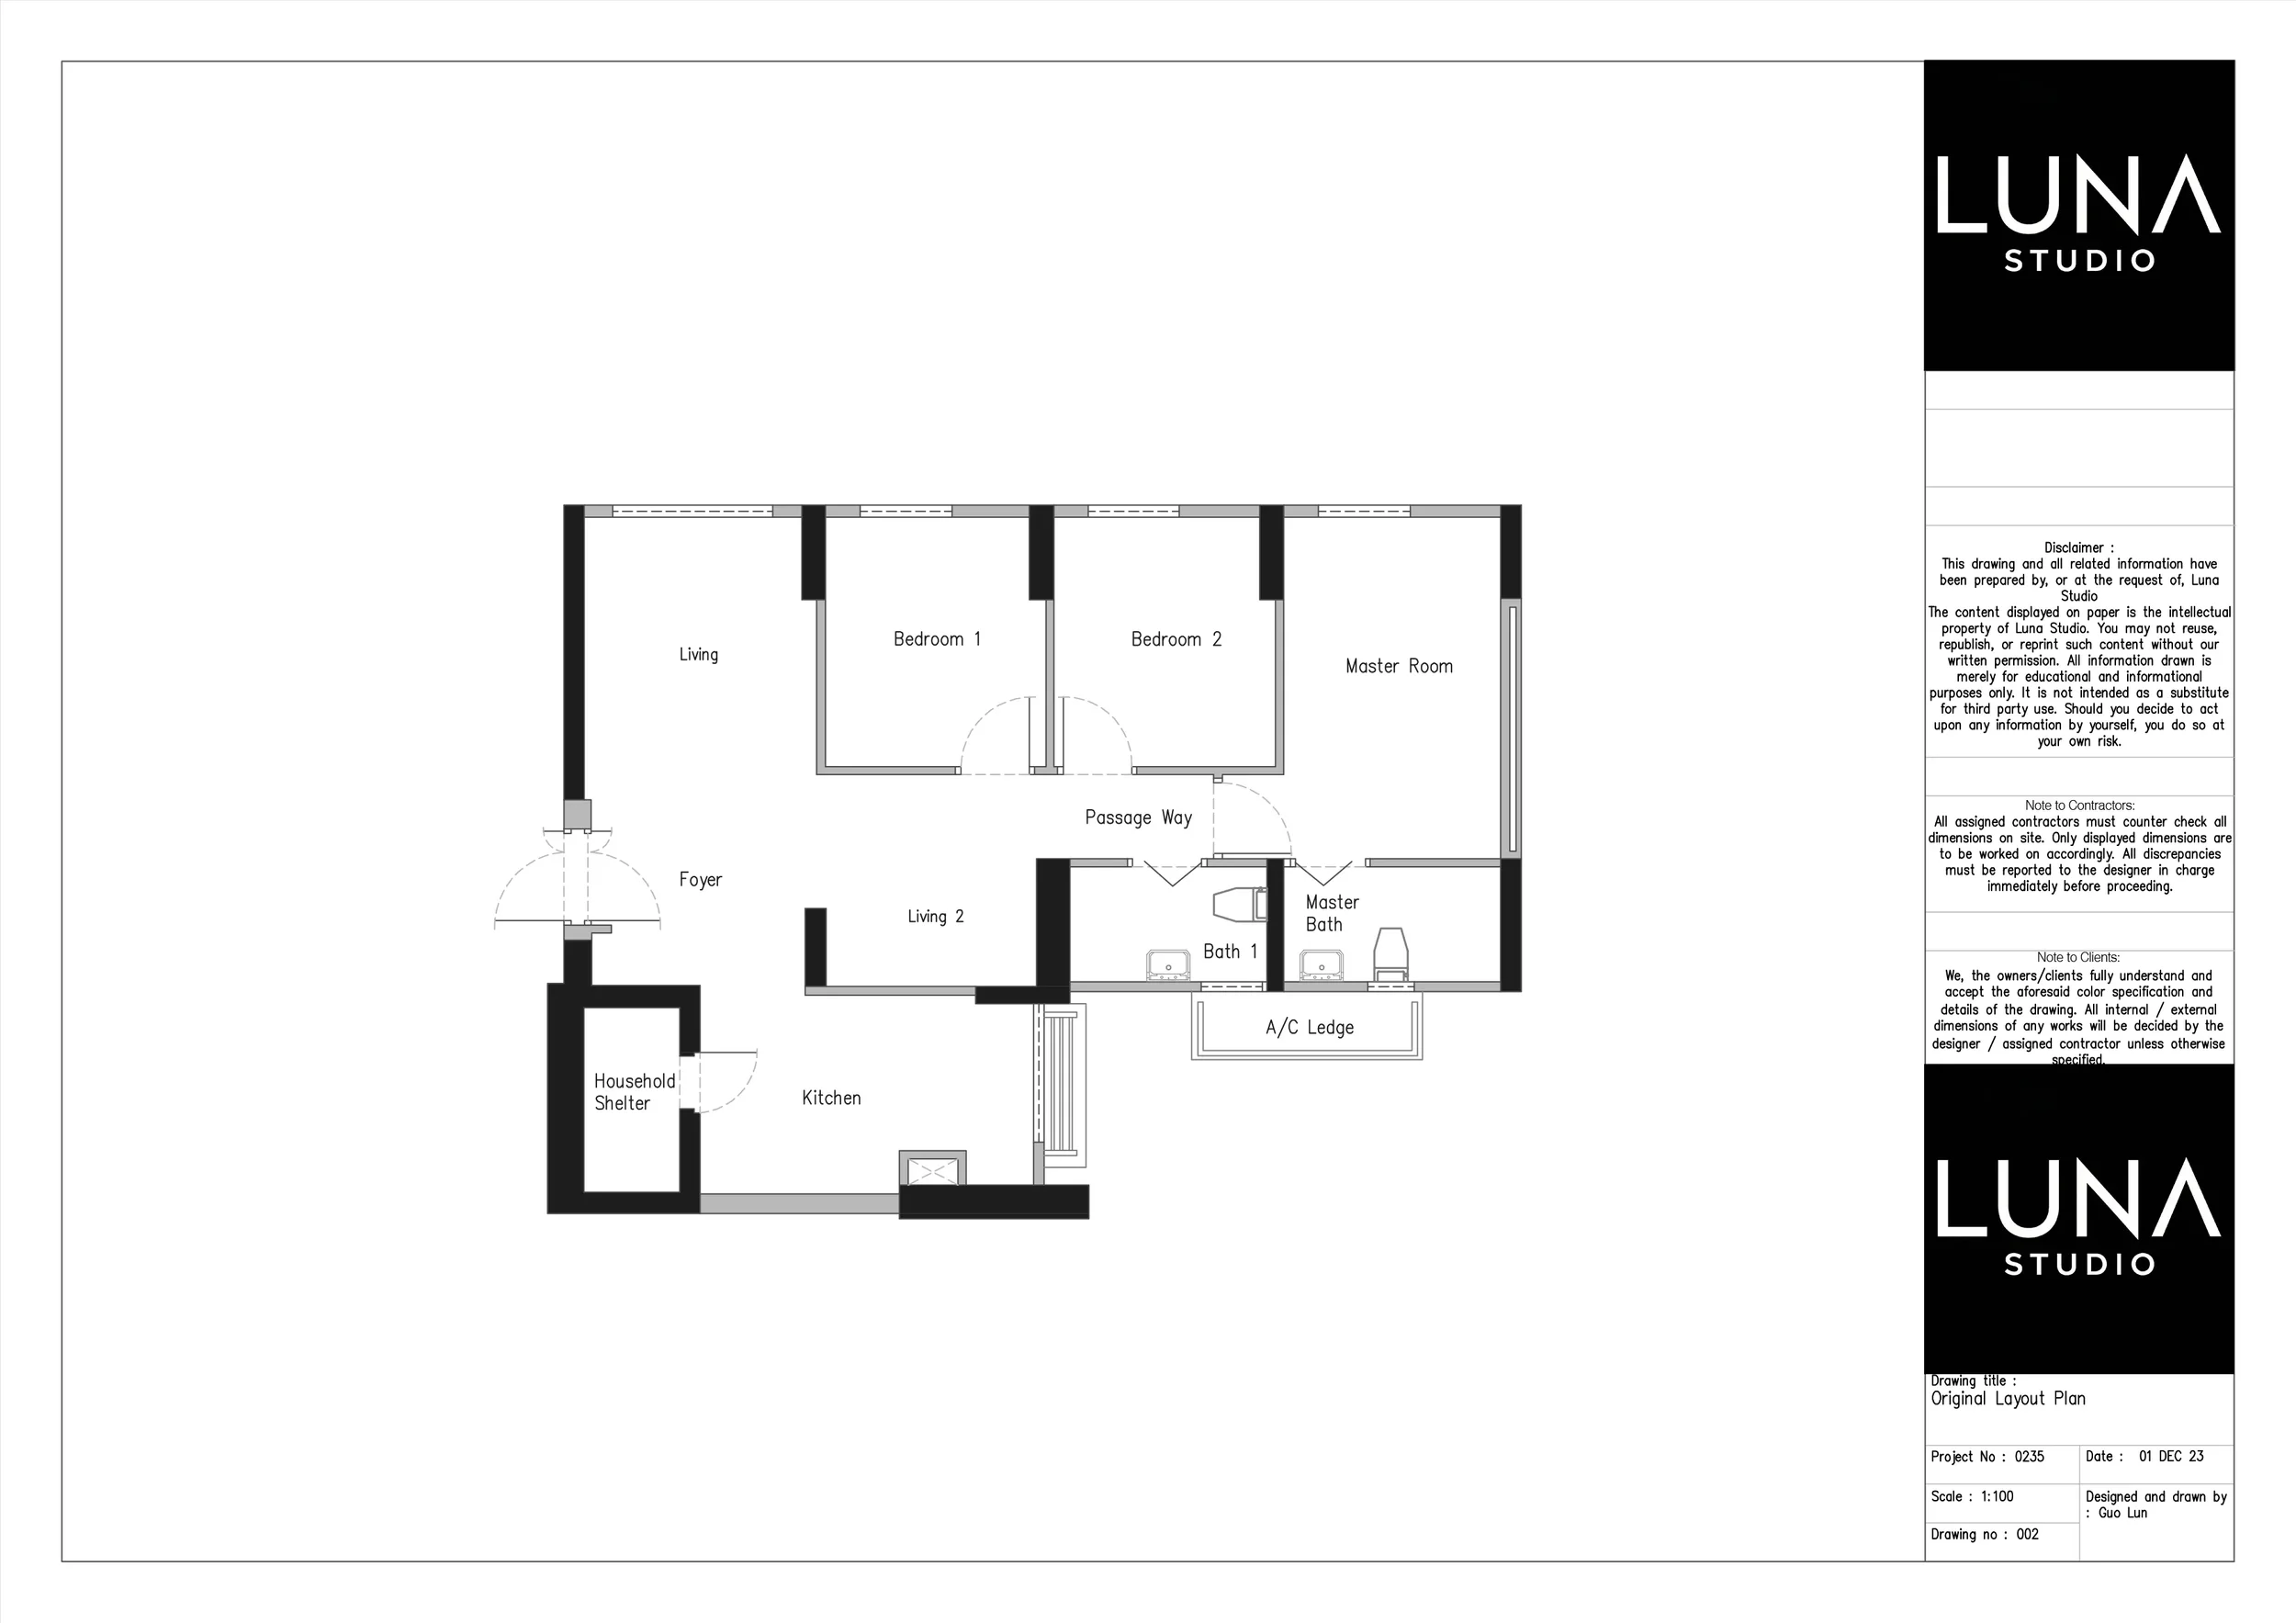
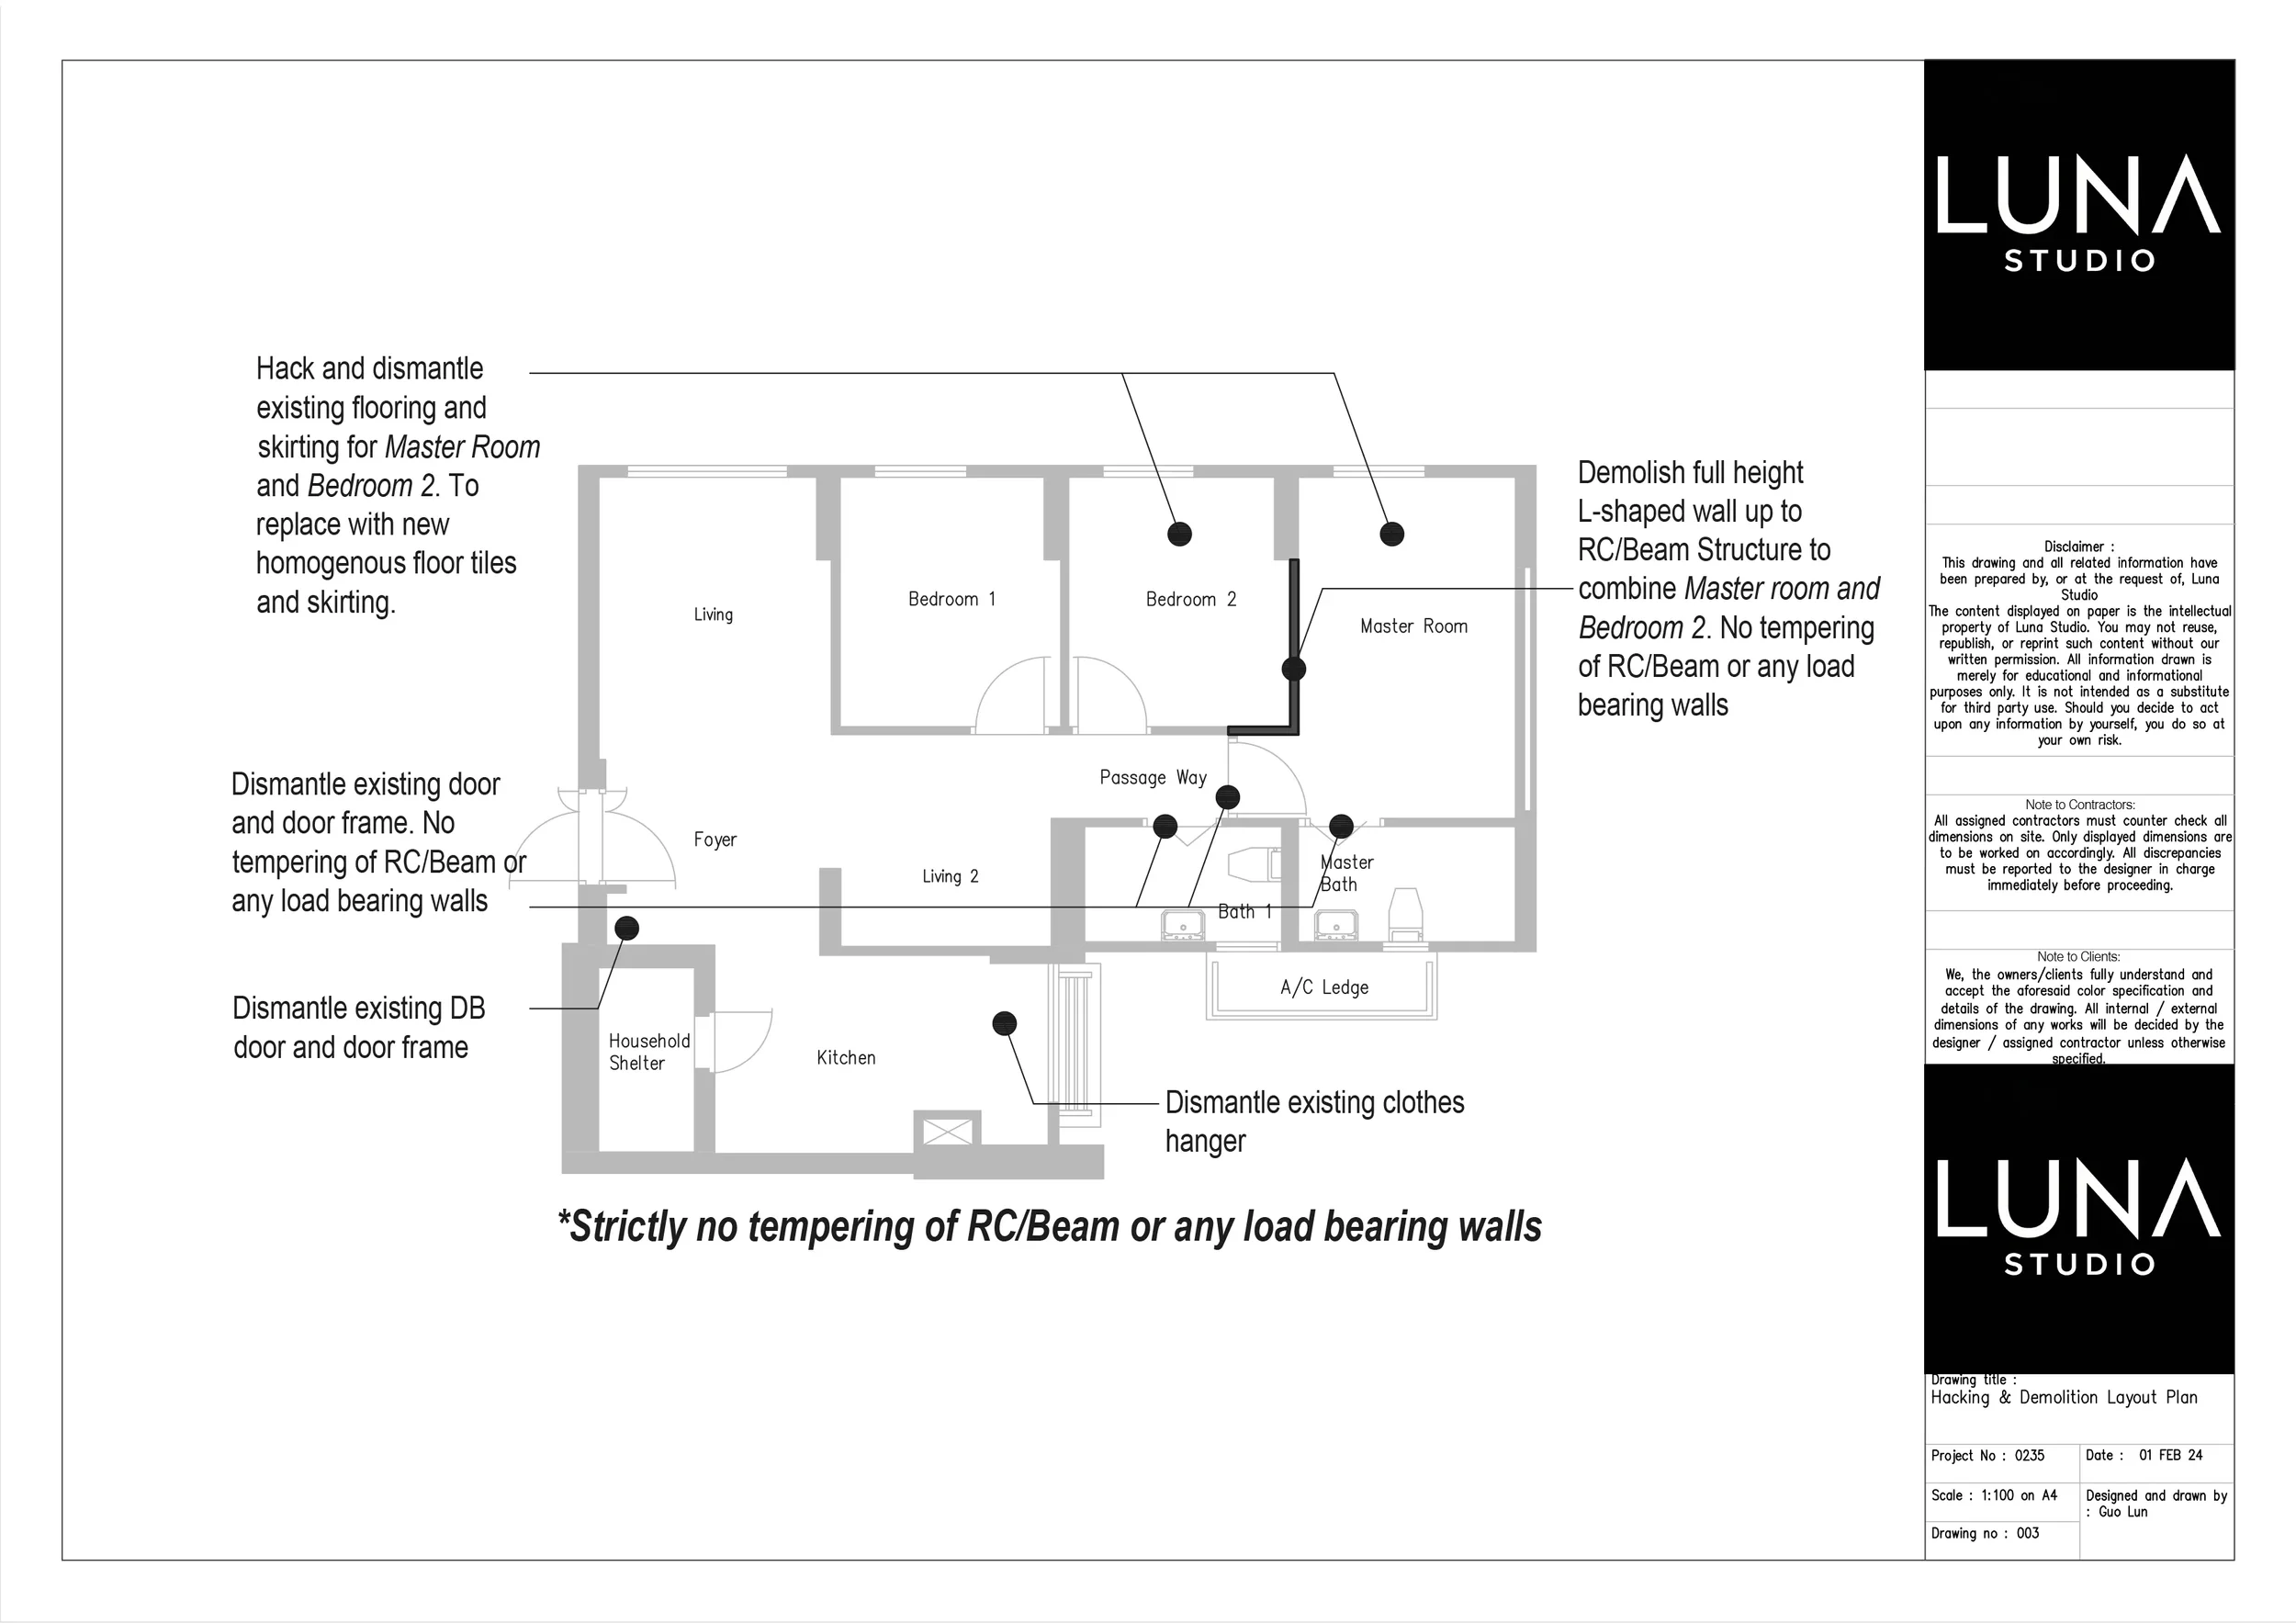
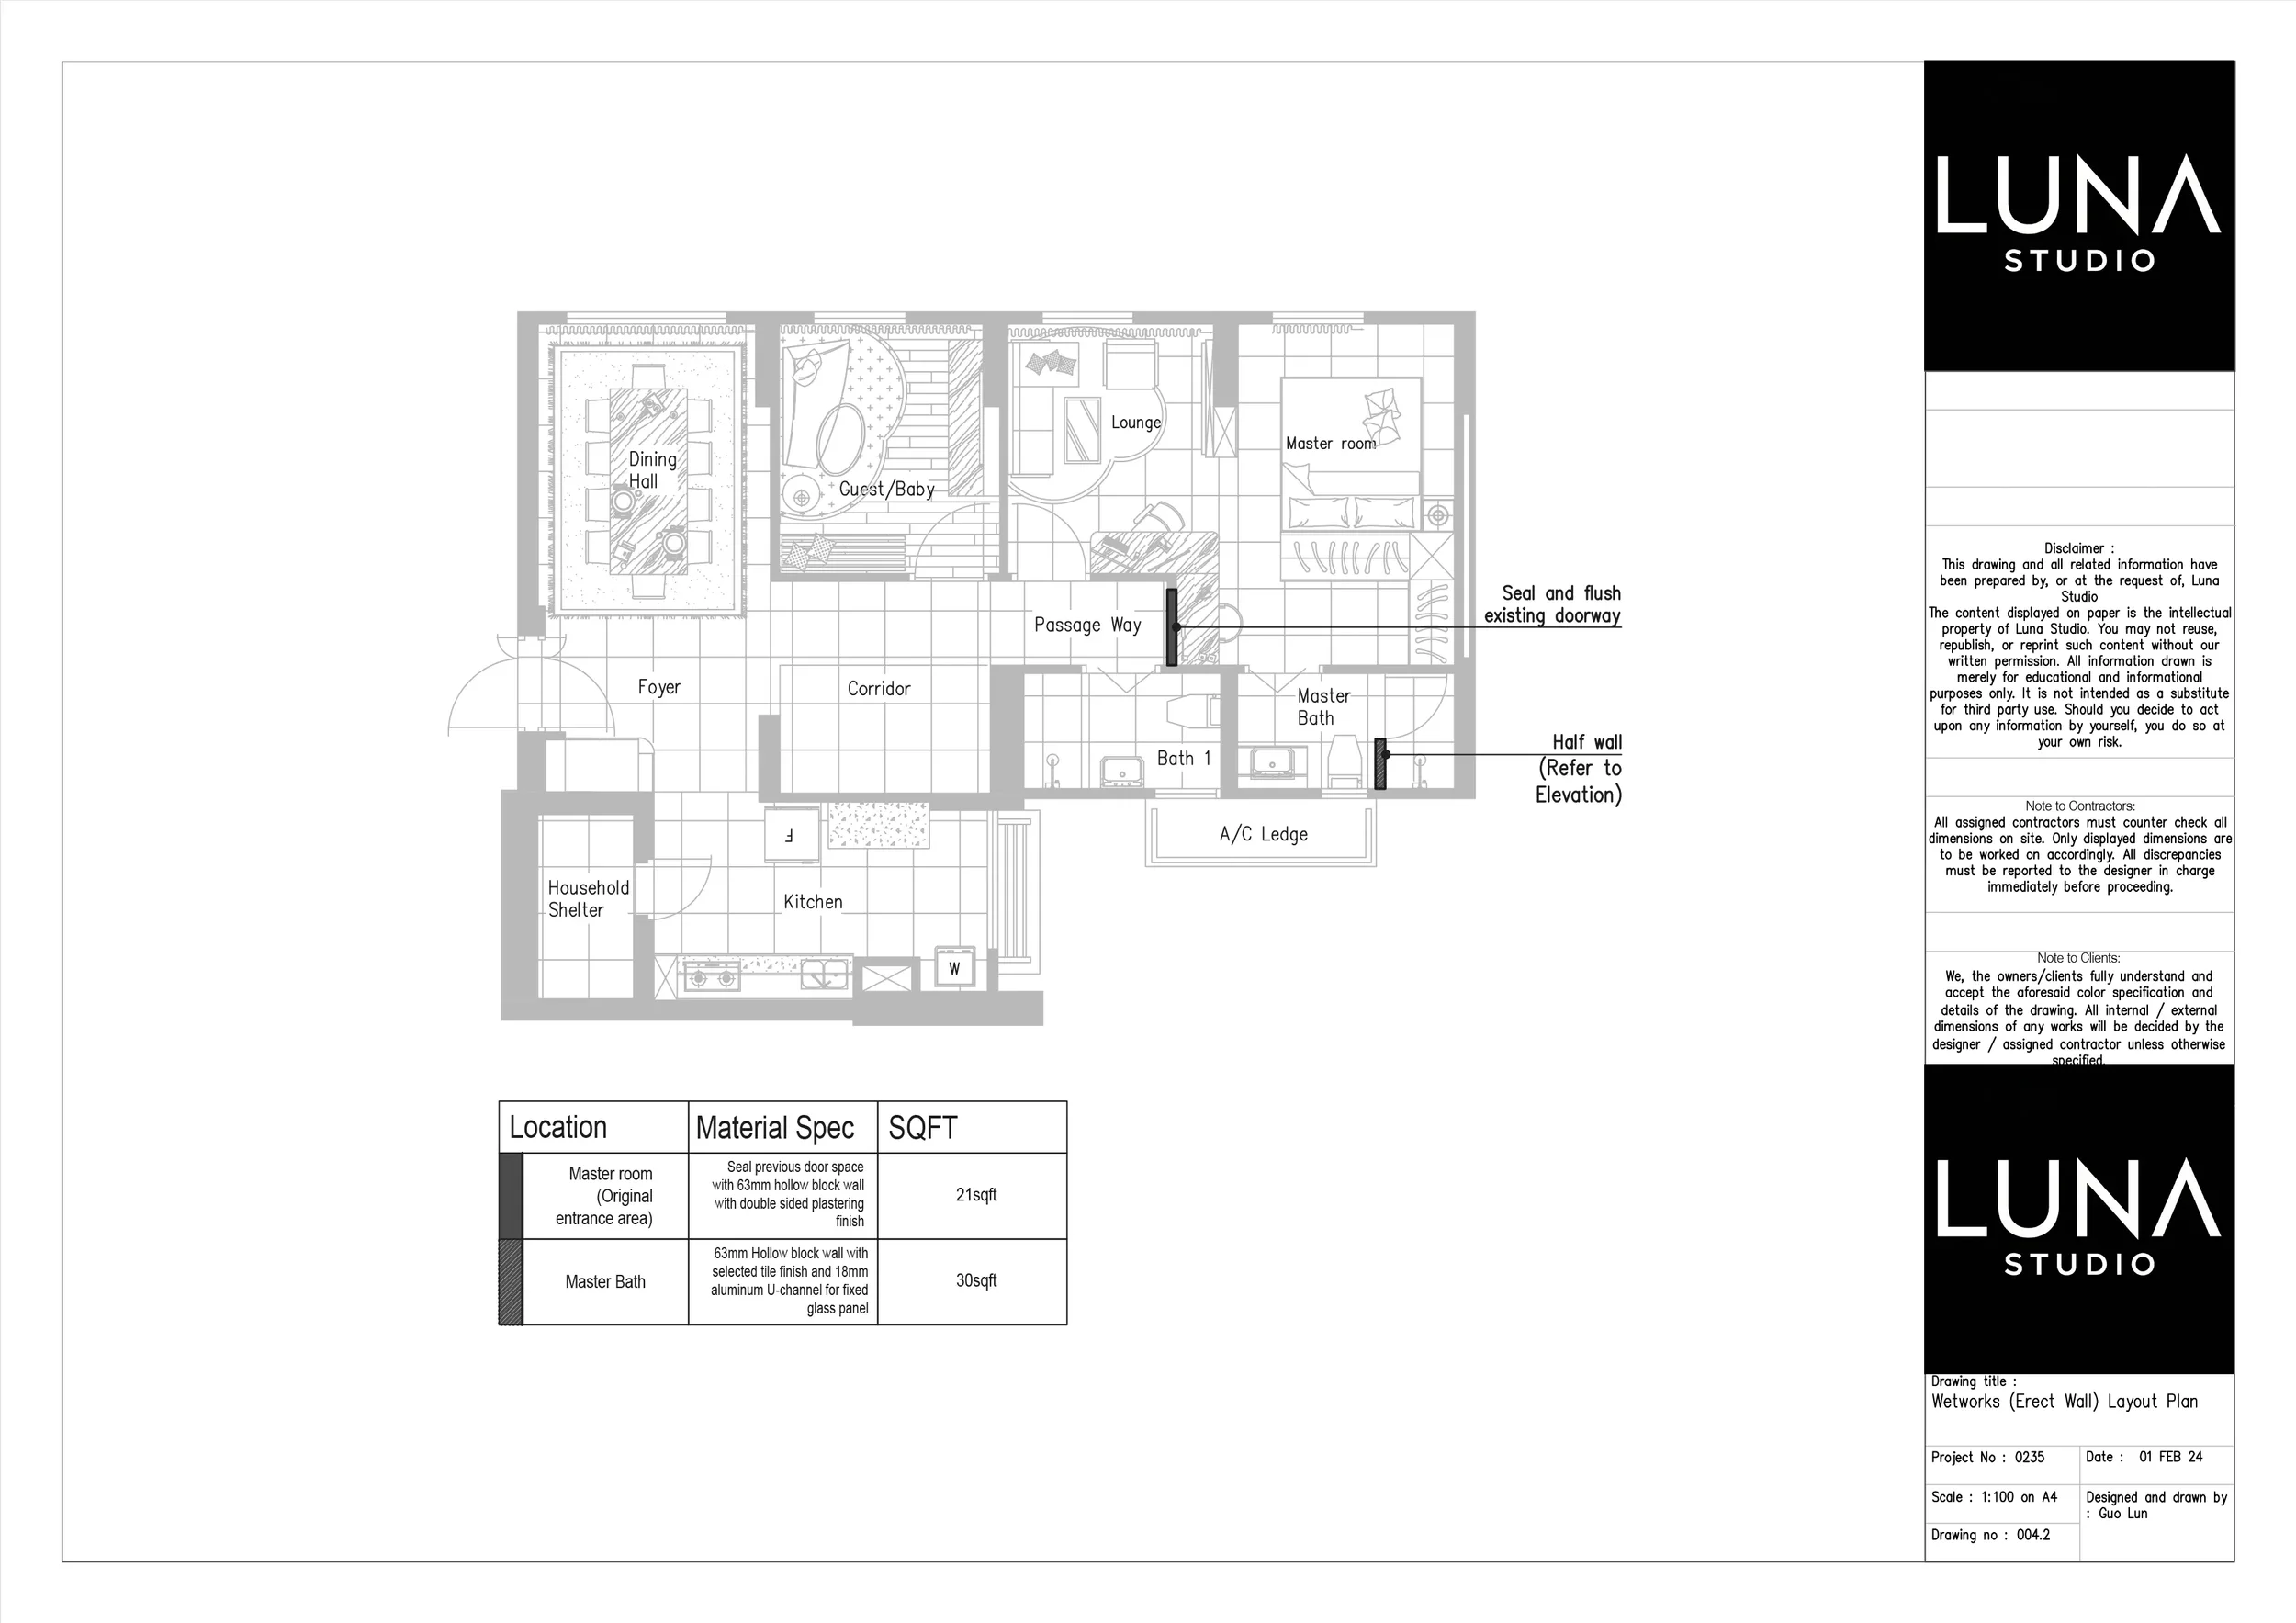
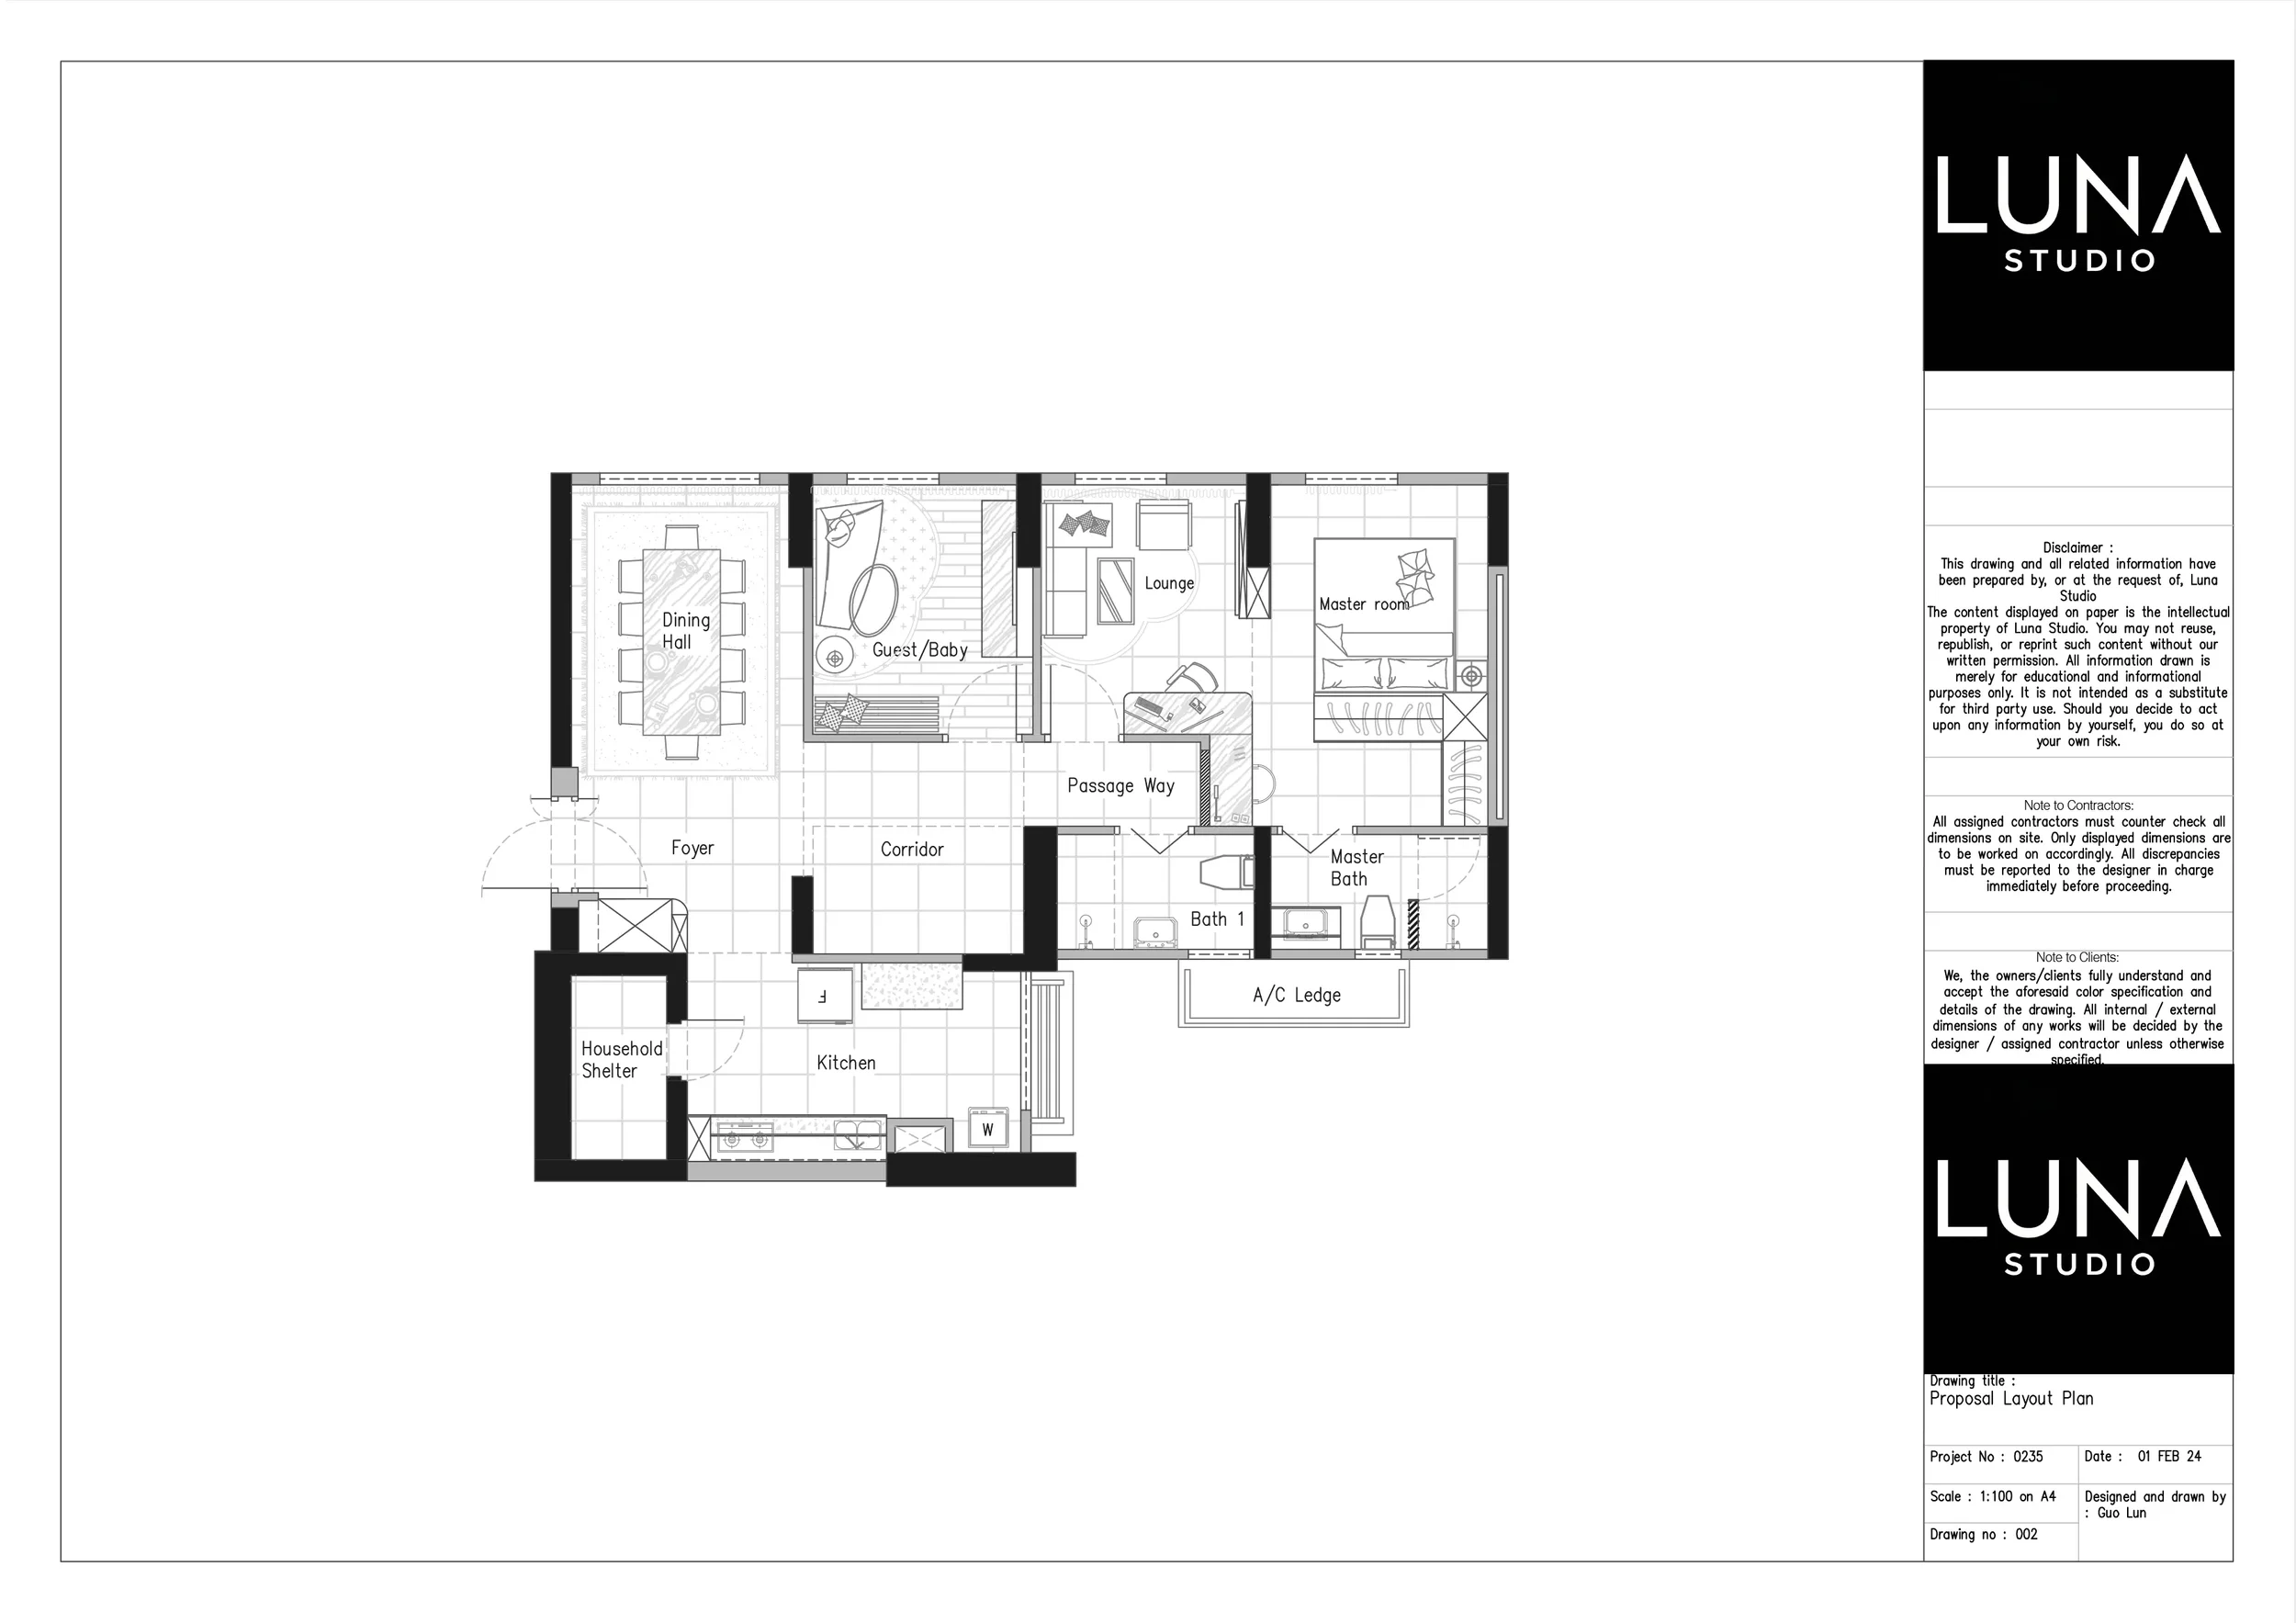
This is where the living room went.
The plan was only half the solution. The combined room had to become a real living environment.
The unusual spatial move becomes visible here, transforming what was once merely sleeping quarters into a dedicated private wing.
One room. Four functions.
Sleep
The original master-bedroom function remains the anchor of the room.
Live
The enlarged footprint creates a genuine private lounge and media zone.
Work
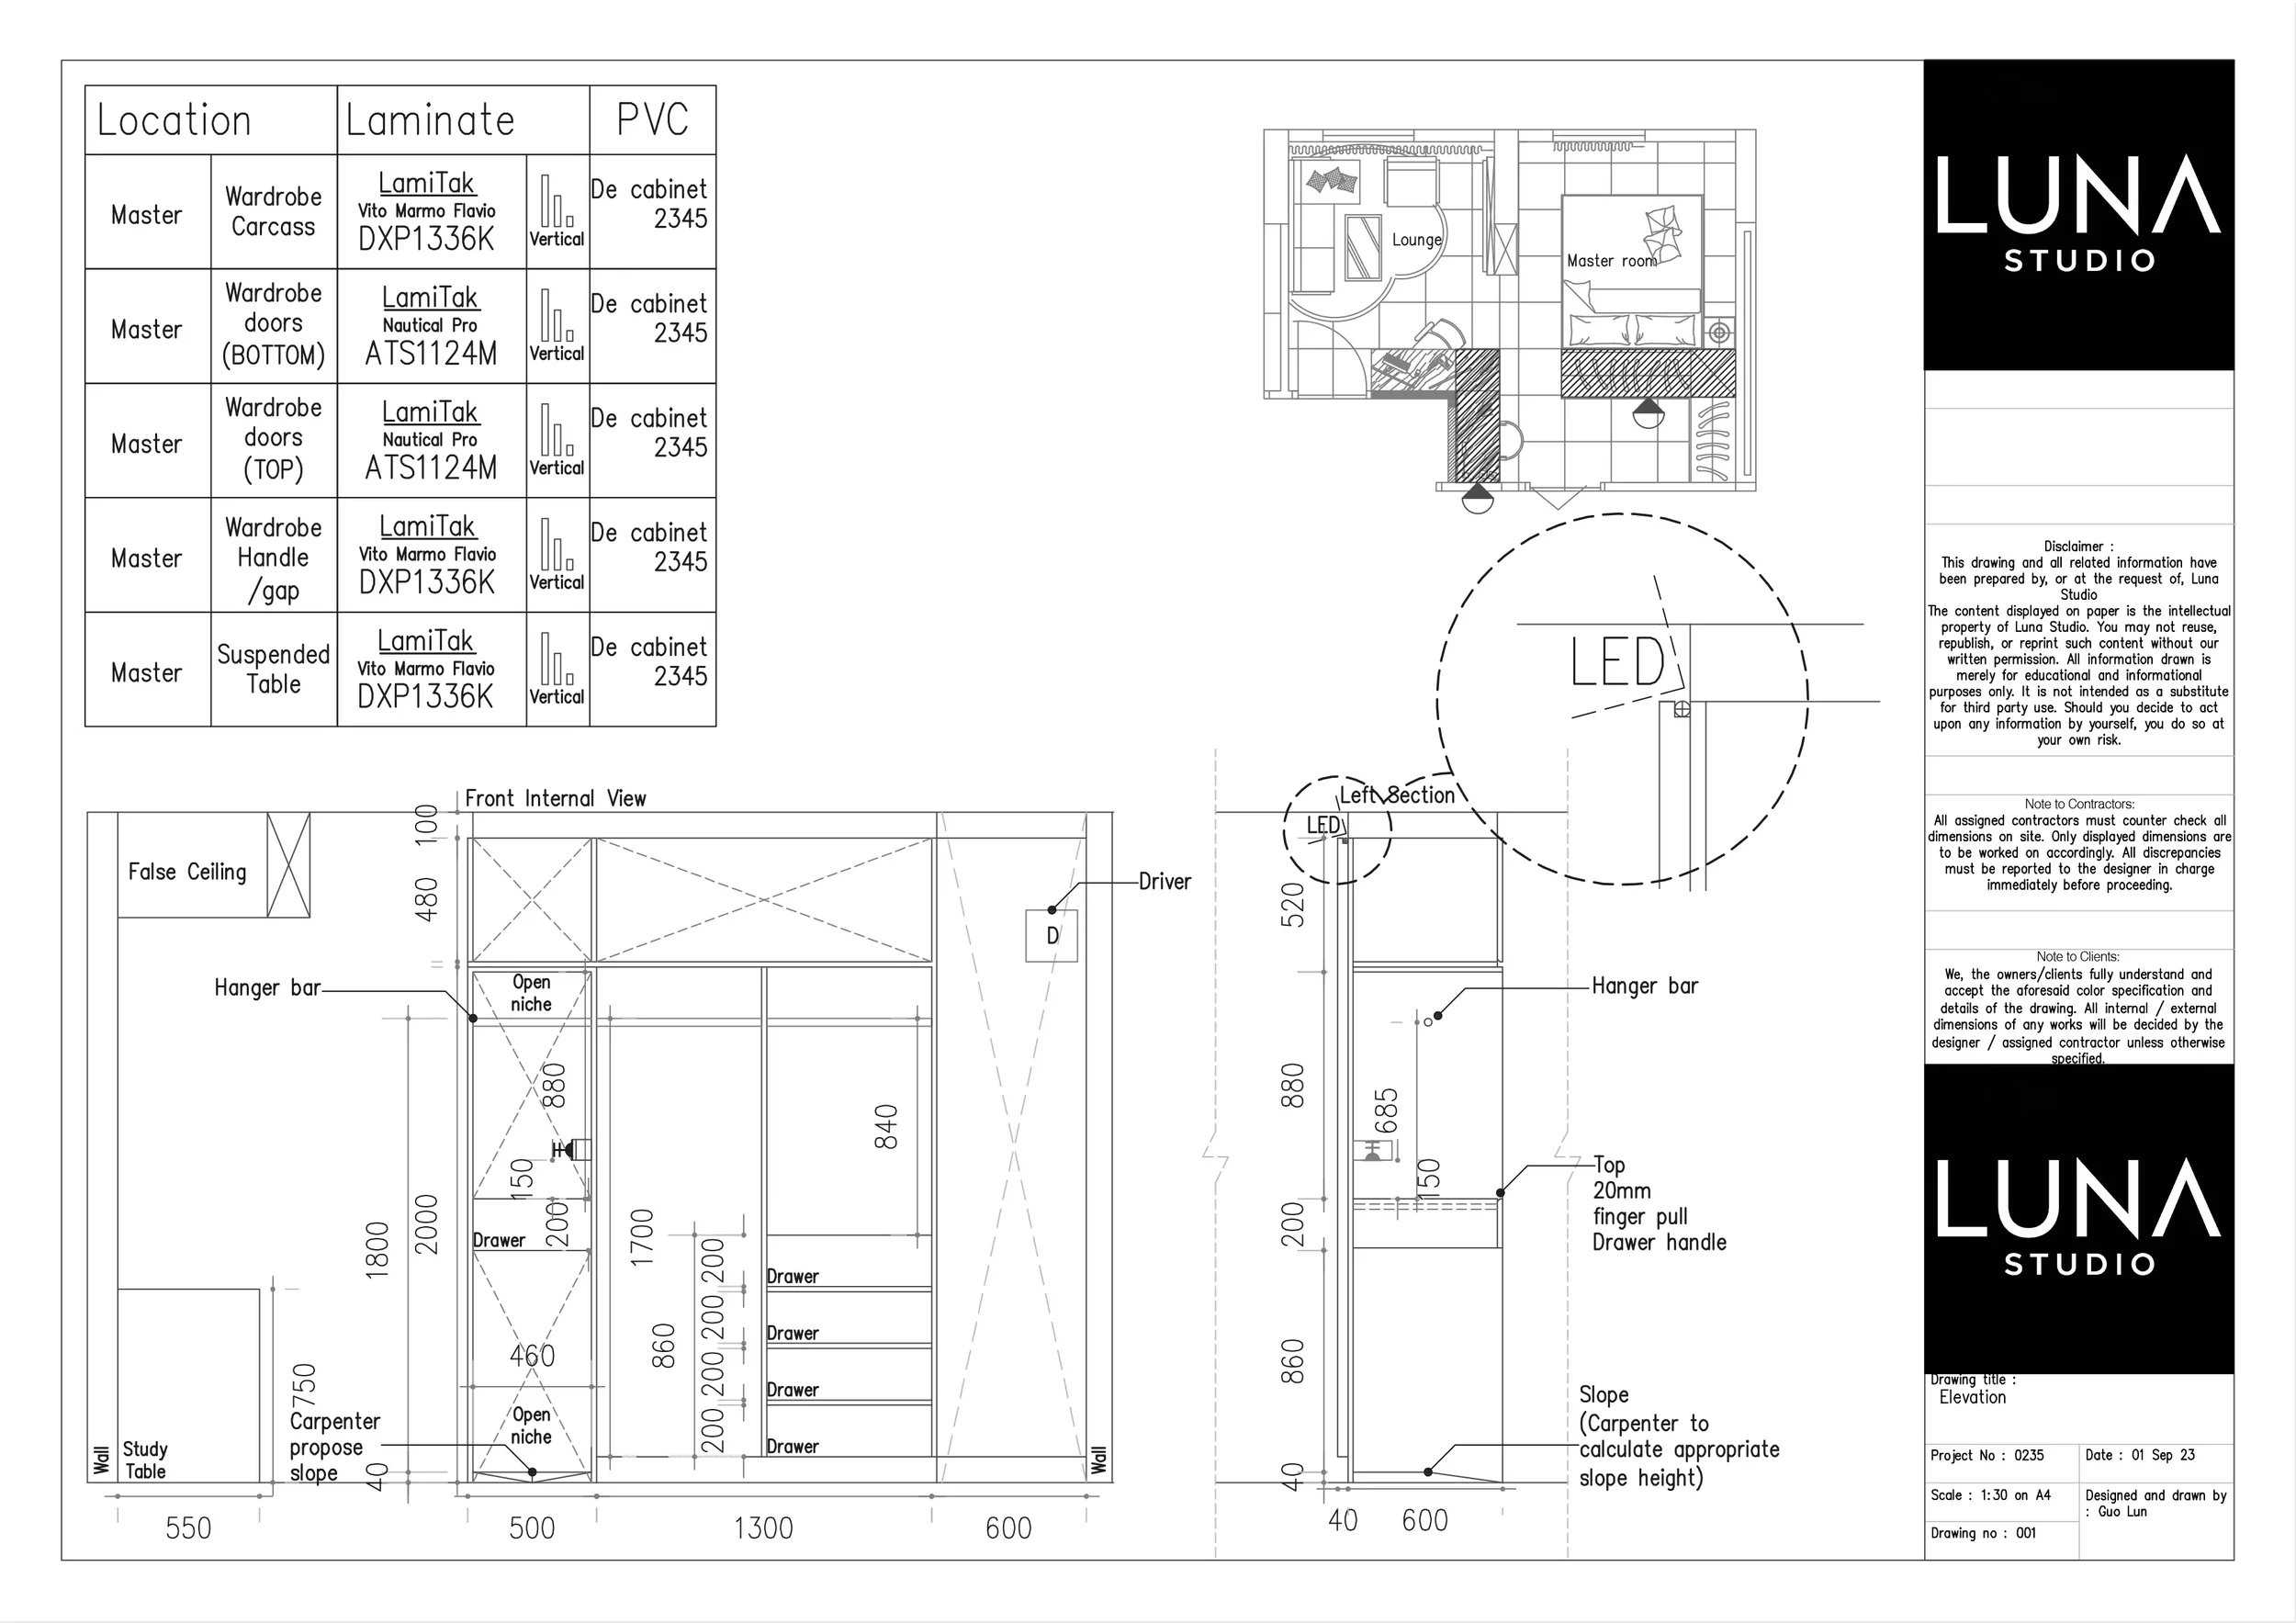
A dedicated 1,700mm study position fits into the suite without requiring another enclosed room.
Dress
A long built-in storage edge absorbs dressing and display into the architecture.
The room was organised by built elements, not more walls.
Once the two bedrooms became one, the additional volume did not need to be divided back into smaller rooms. Built-in elements were used to establish the different functions instead.
The wardrobe forms one architectural edge. The study extends from it. The media wall anchors the lounge. Together, they define the room without fragmenting it.
The challenge was not fitting four functions into one room. It was allowing four functions to coexist without making one room feel like four rooms.
3,900mm of the room becomes storage.
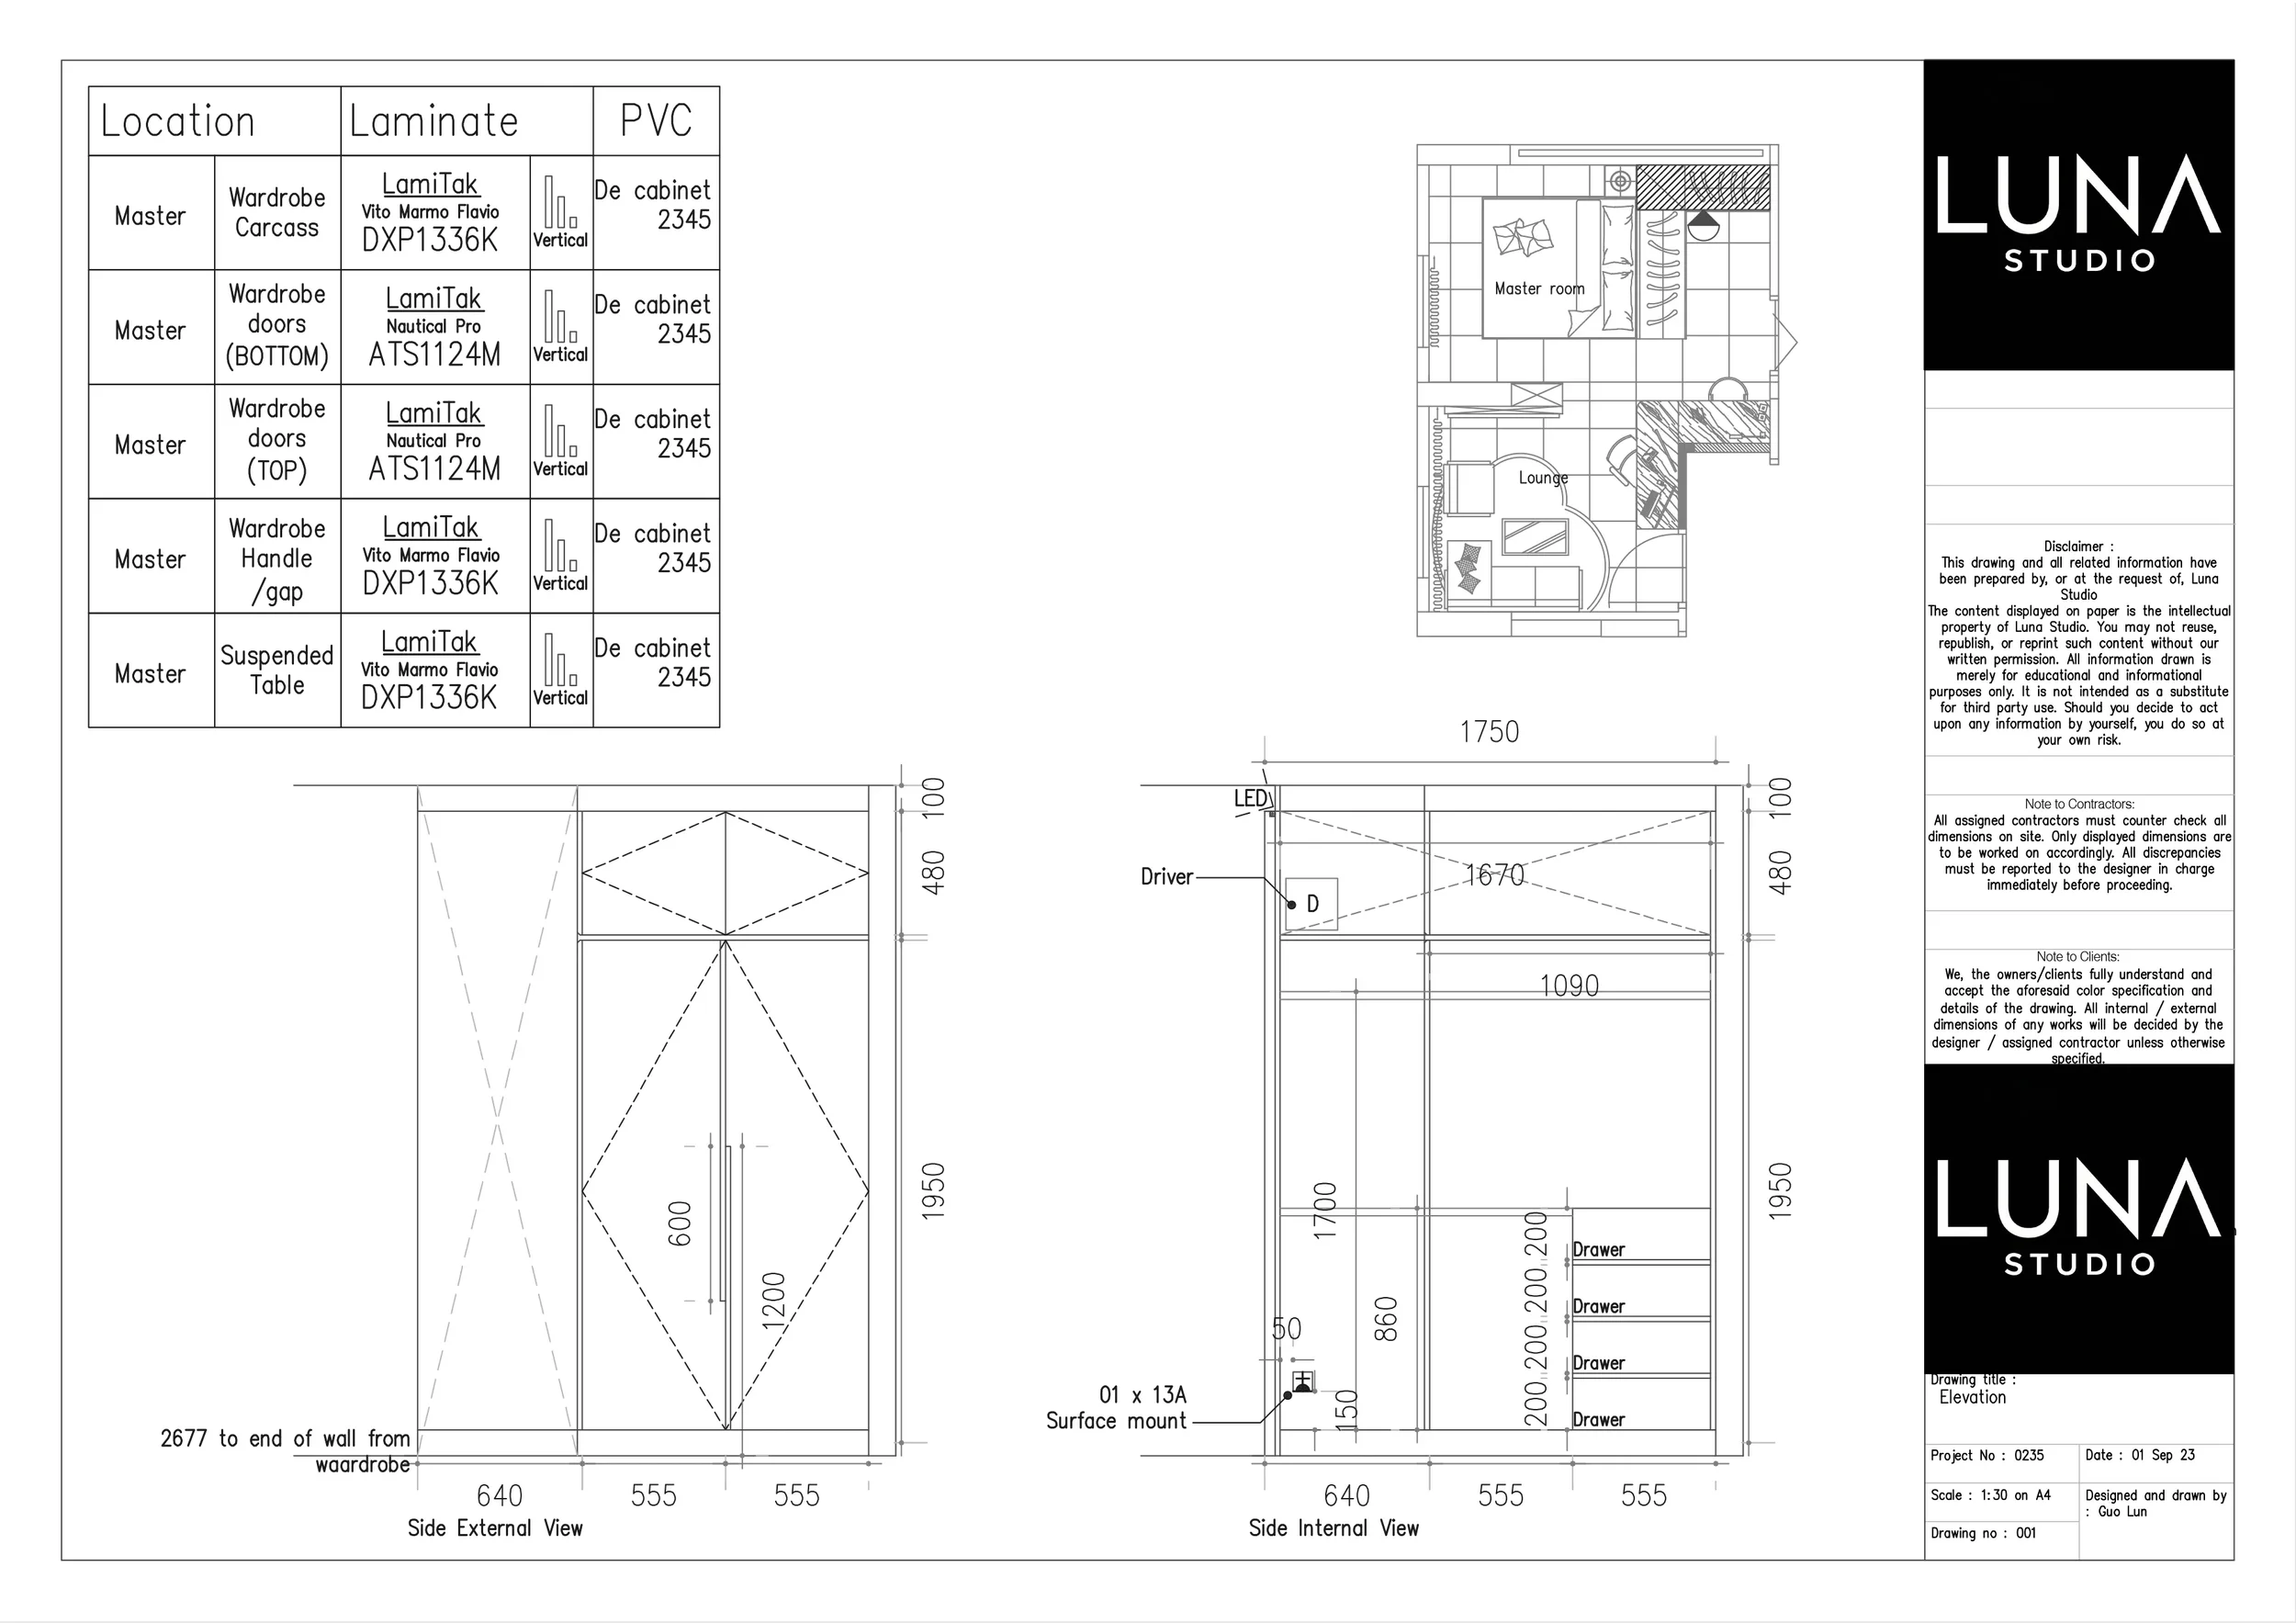
The enlarged suite created enough linear wall length for a 3,900mm wardrobe system, allowing storage to occupy the perimeter rather than consuming the centre of the room.
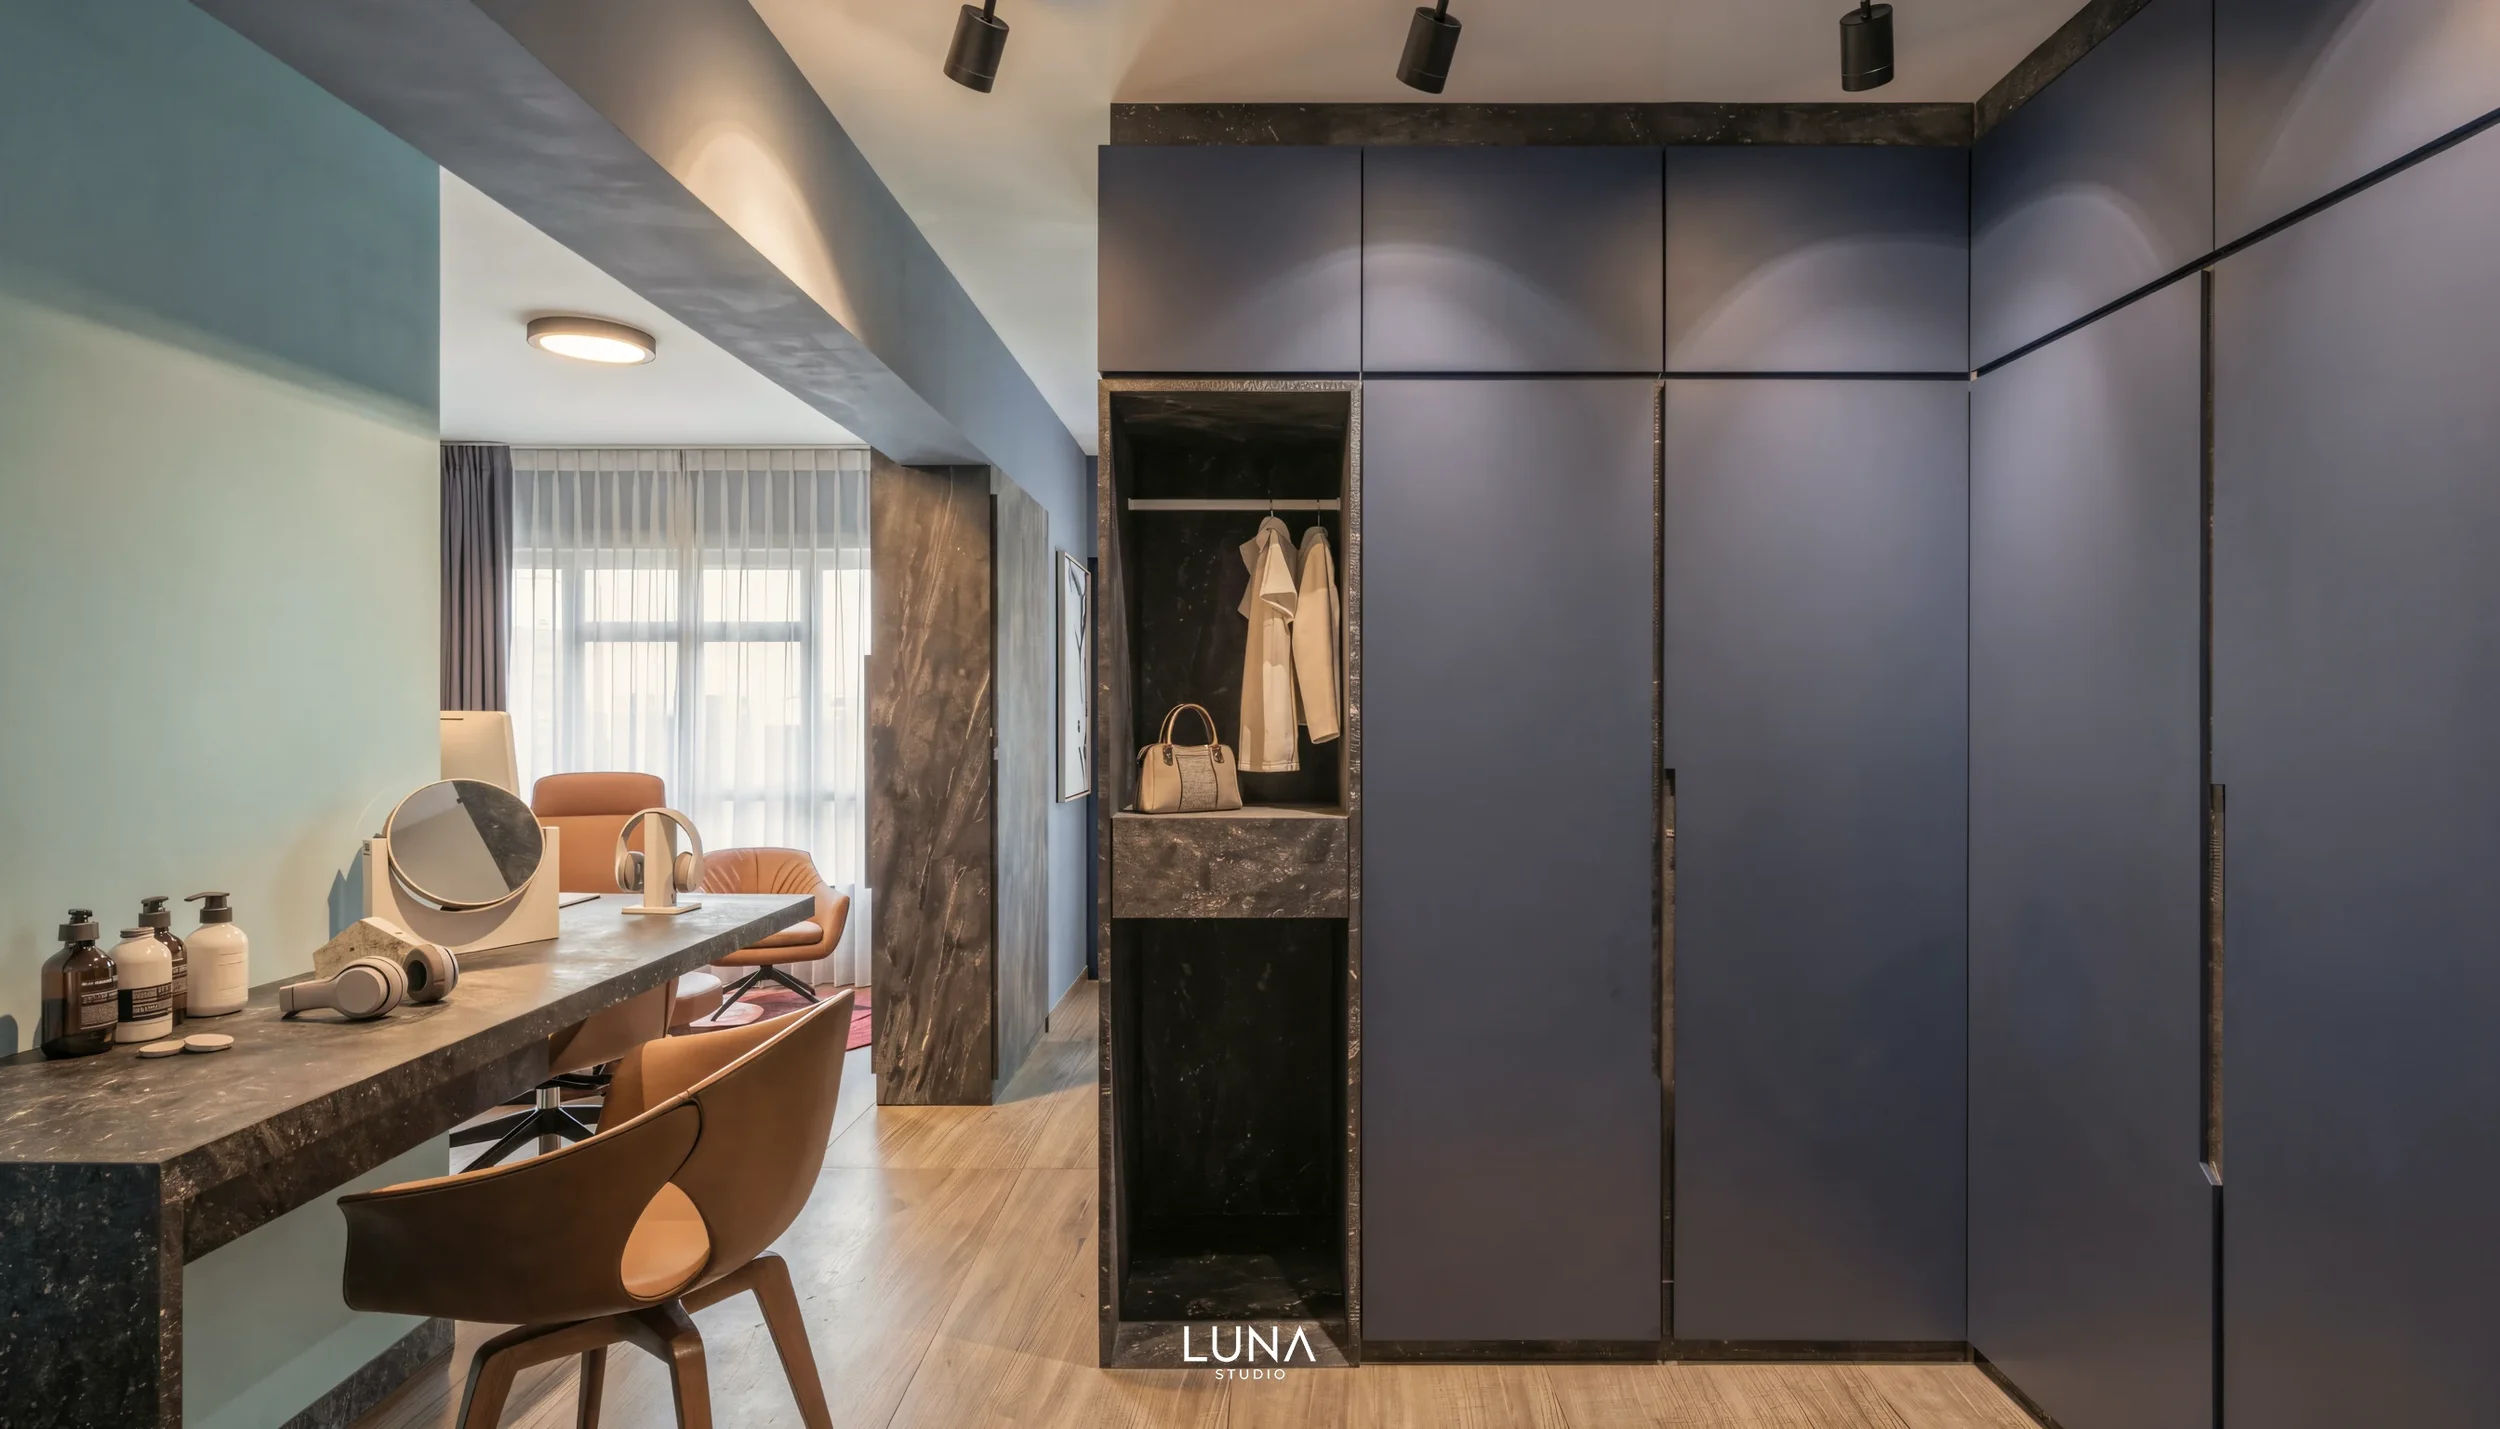
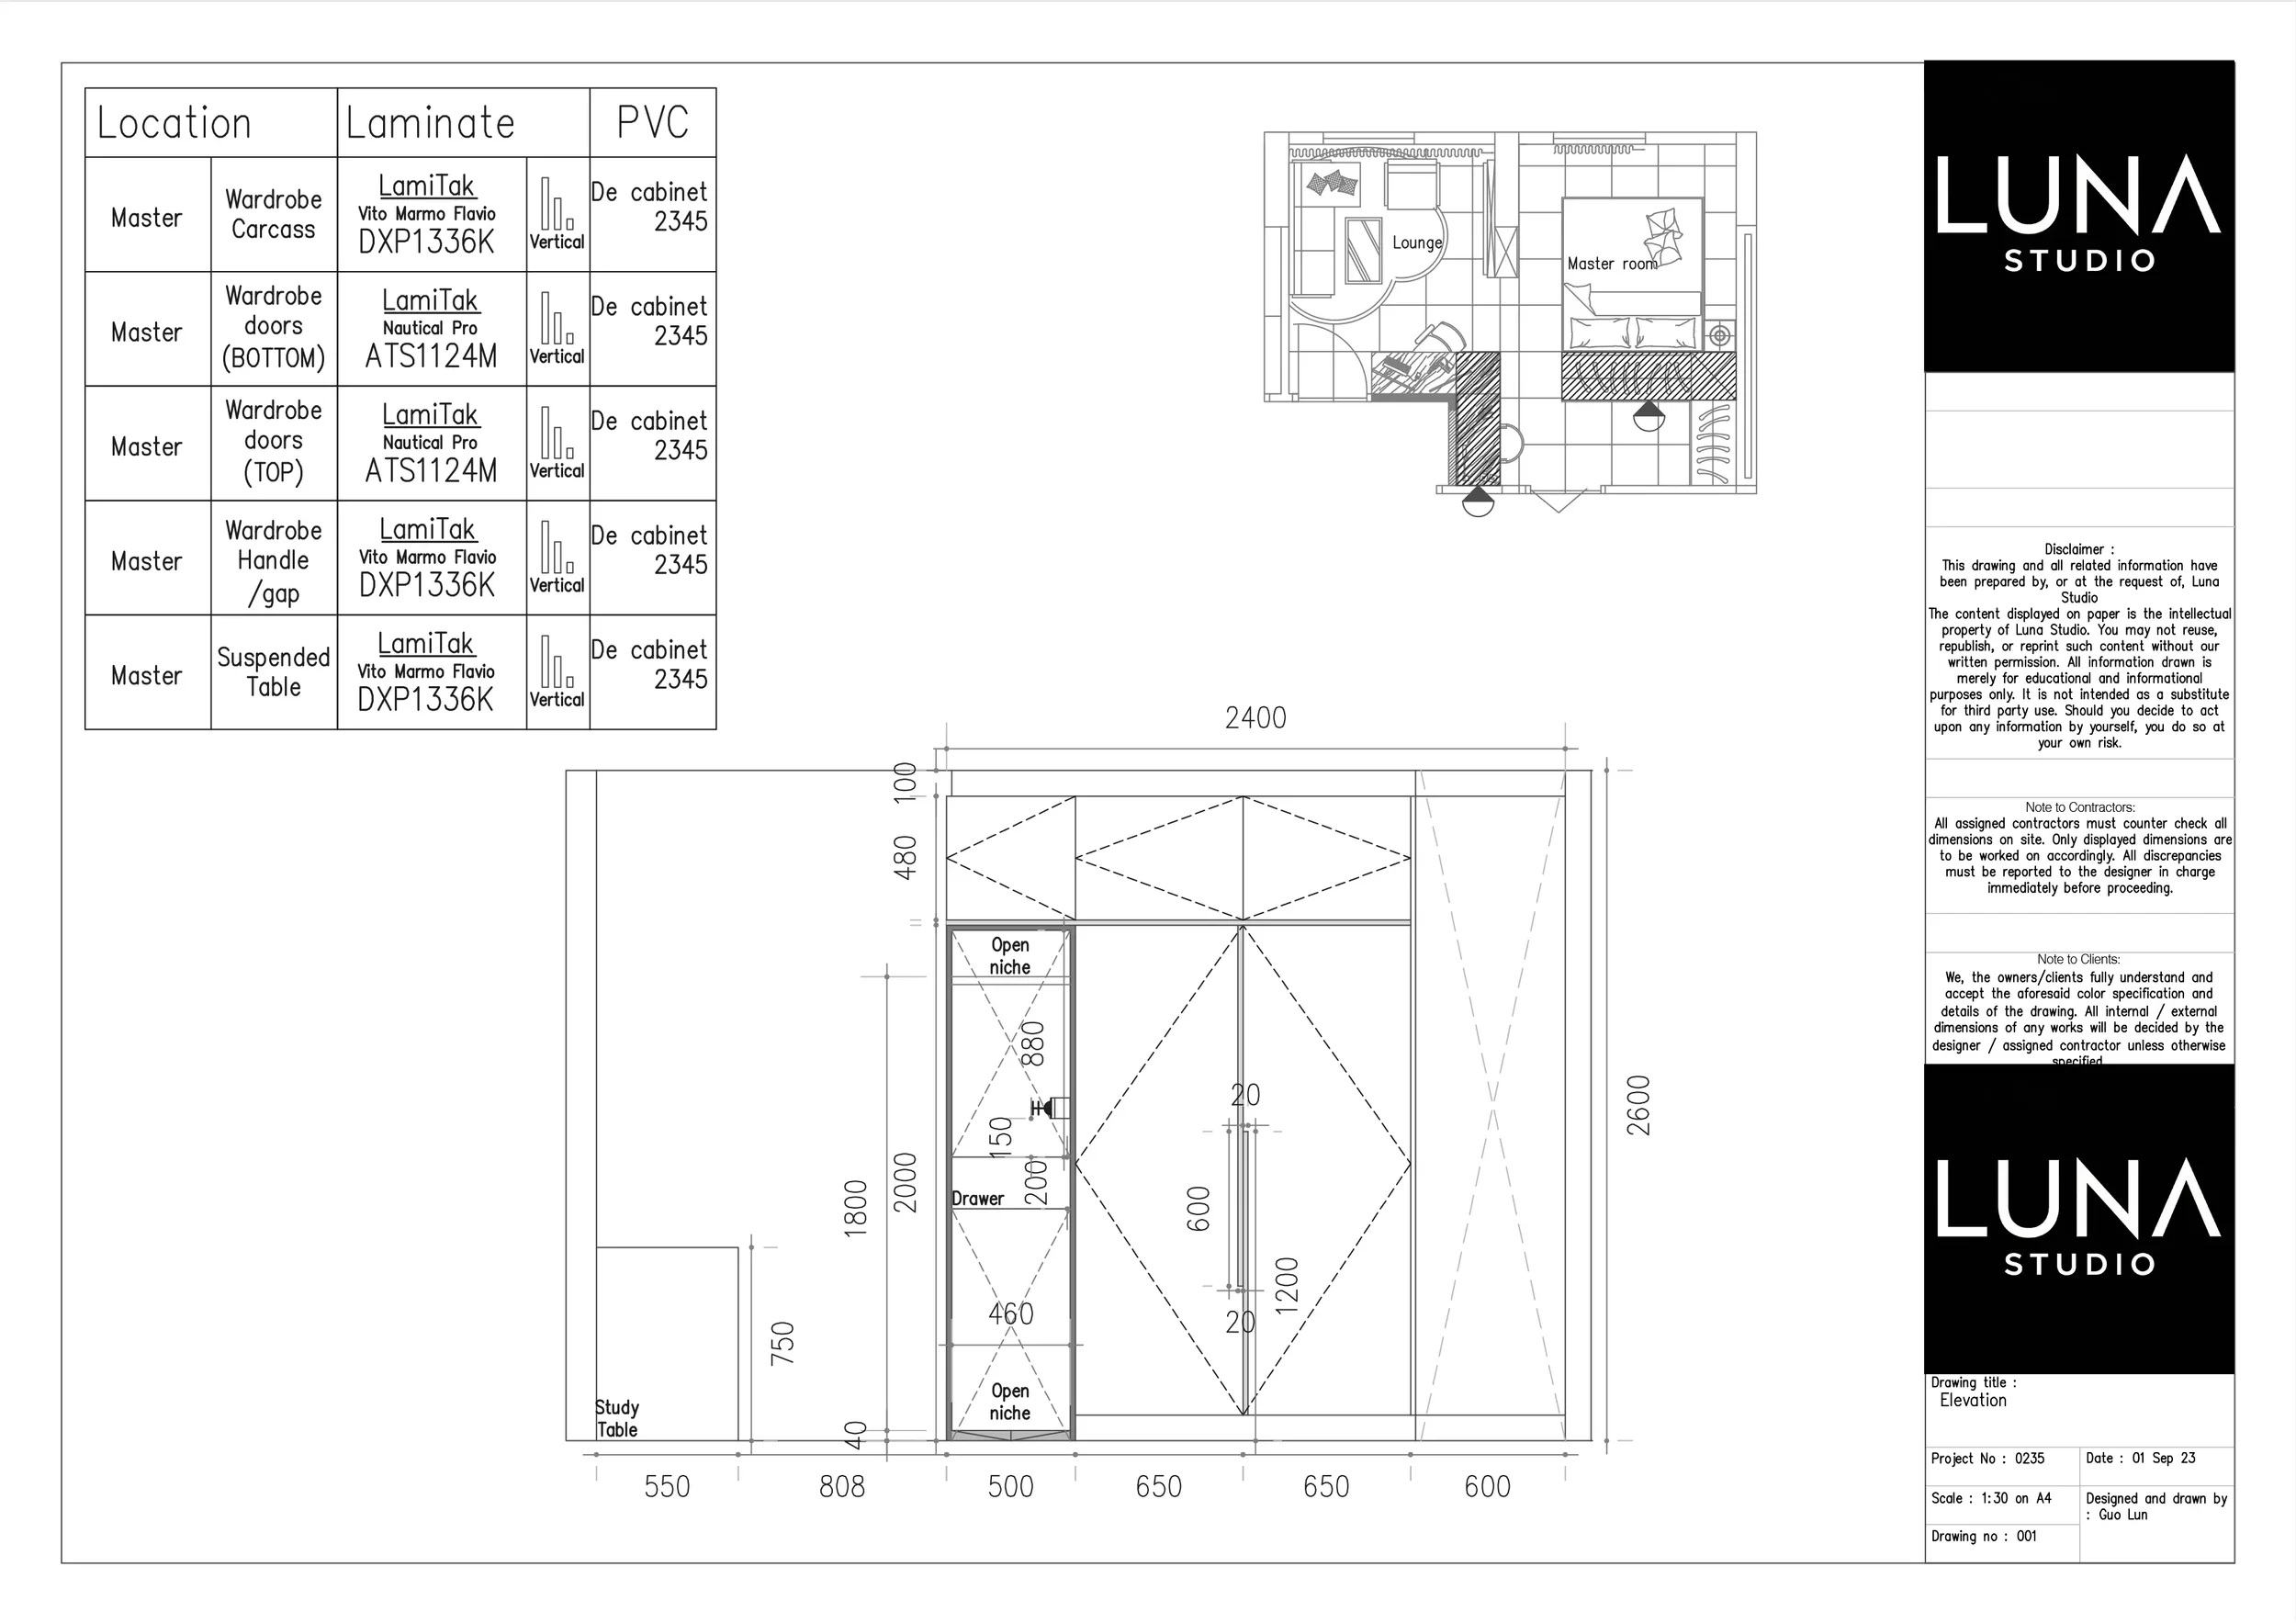
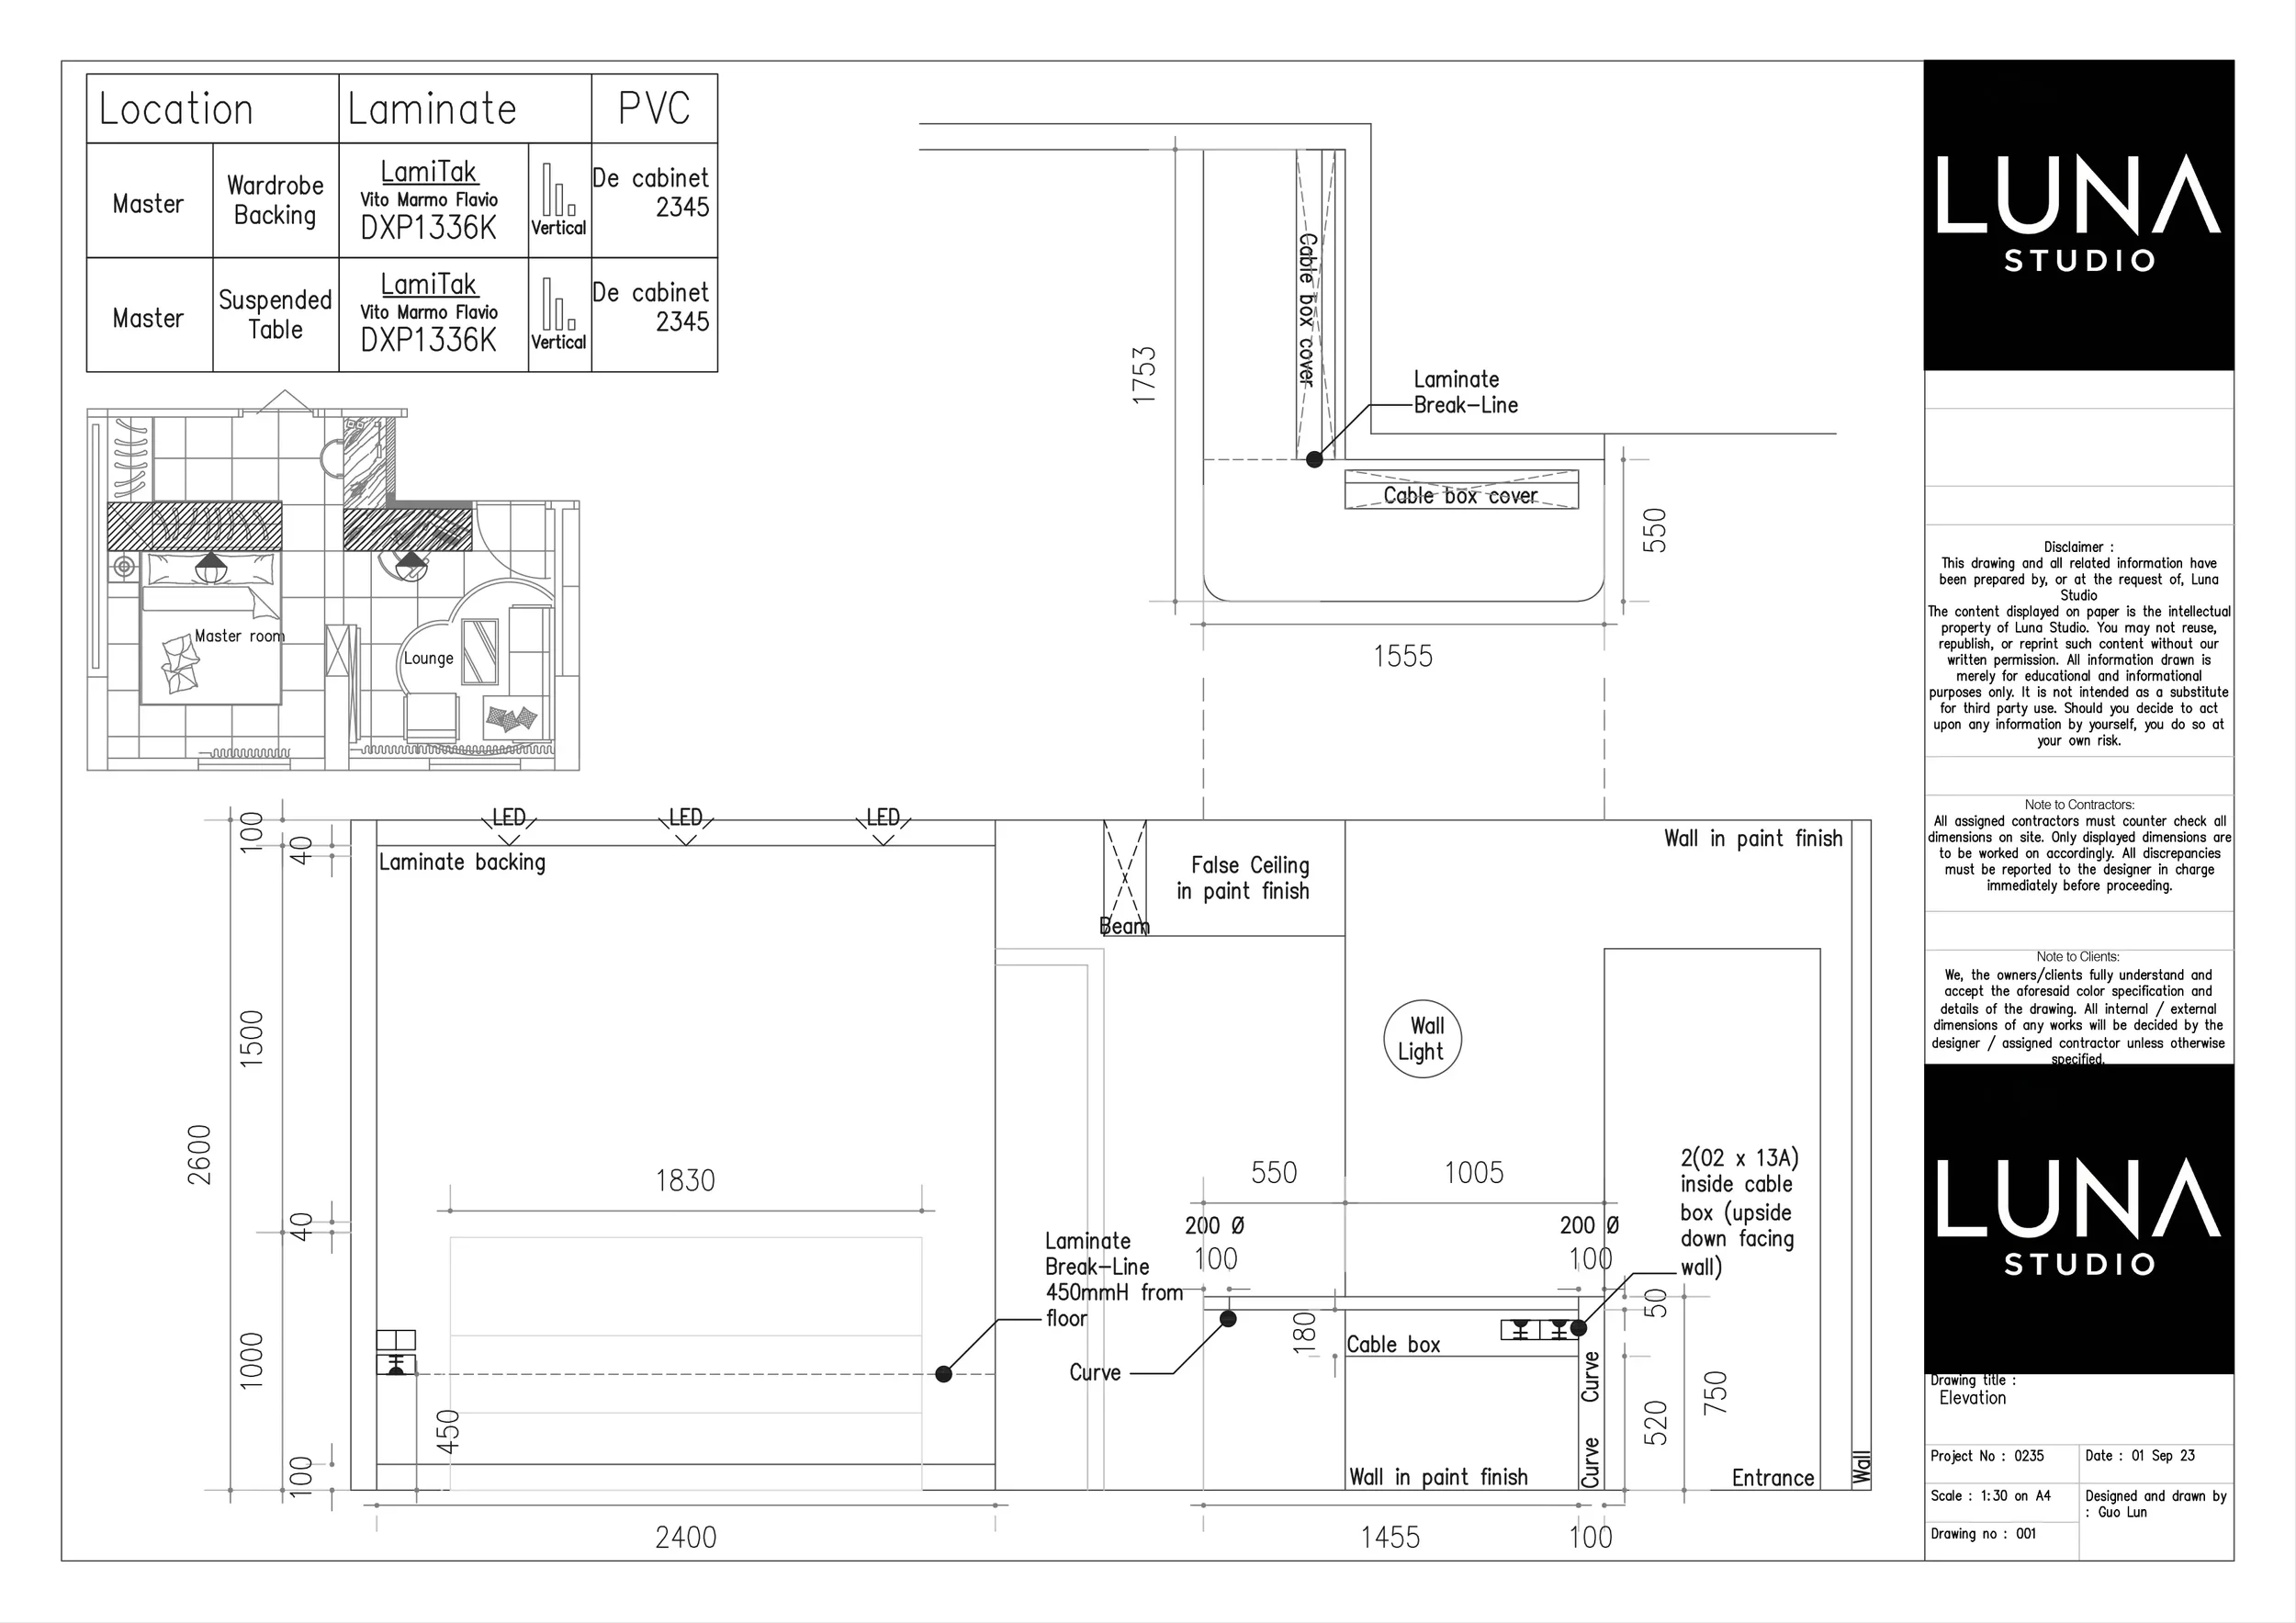
Work was carved into the same room.
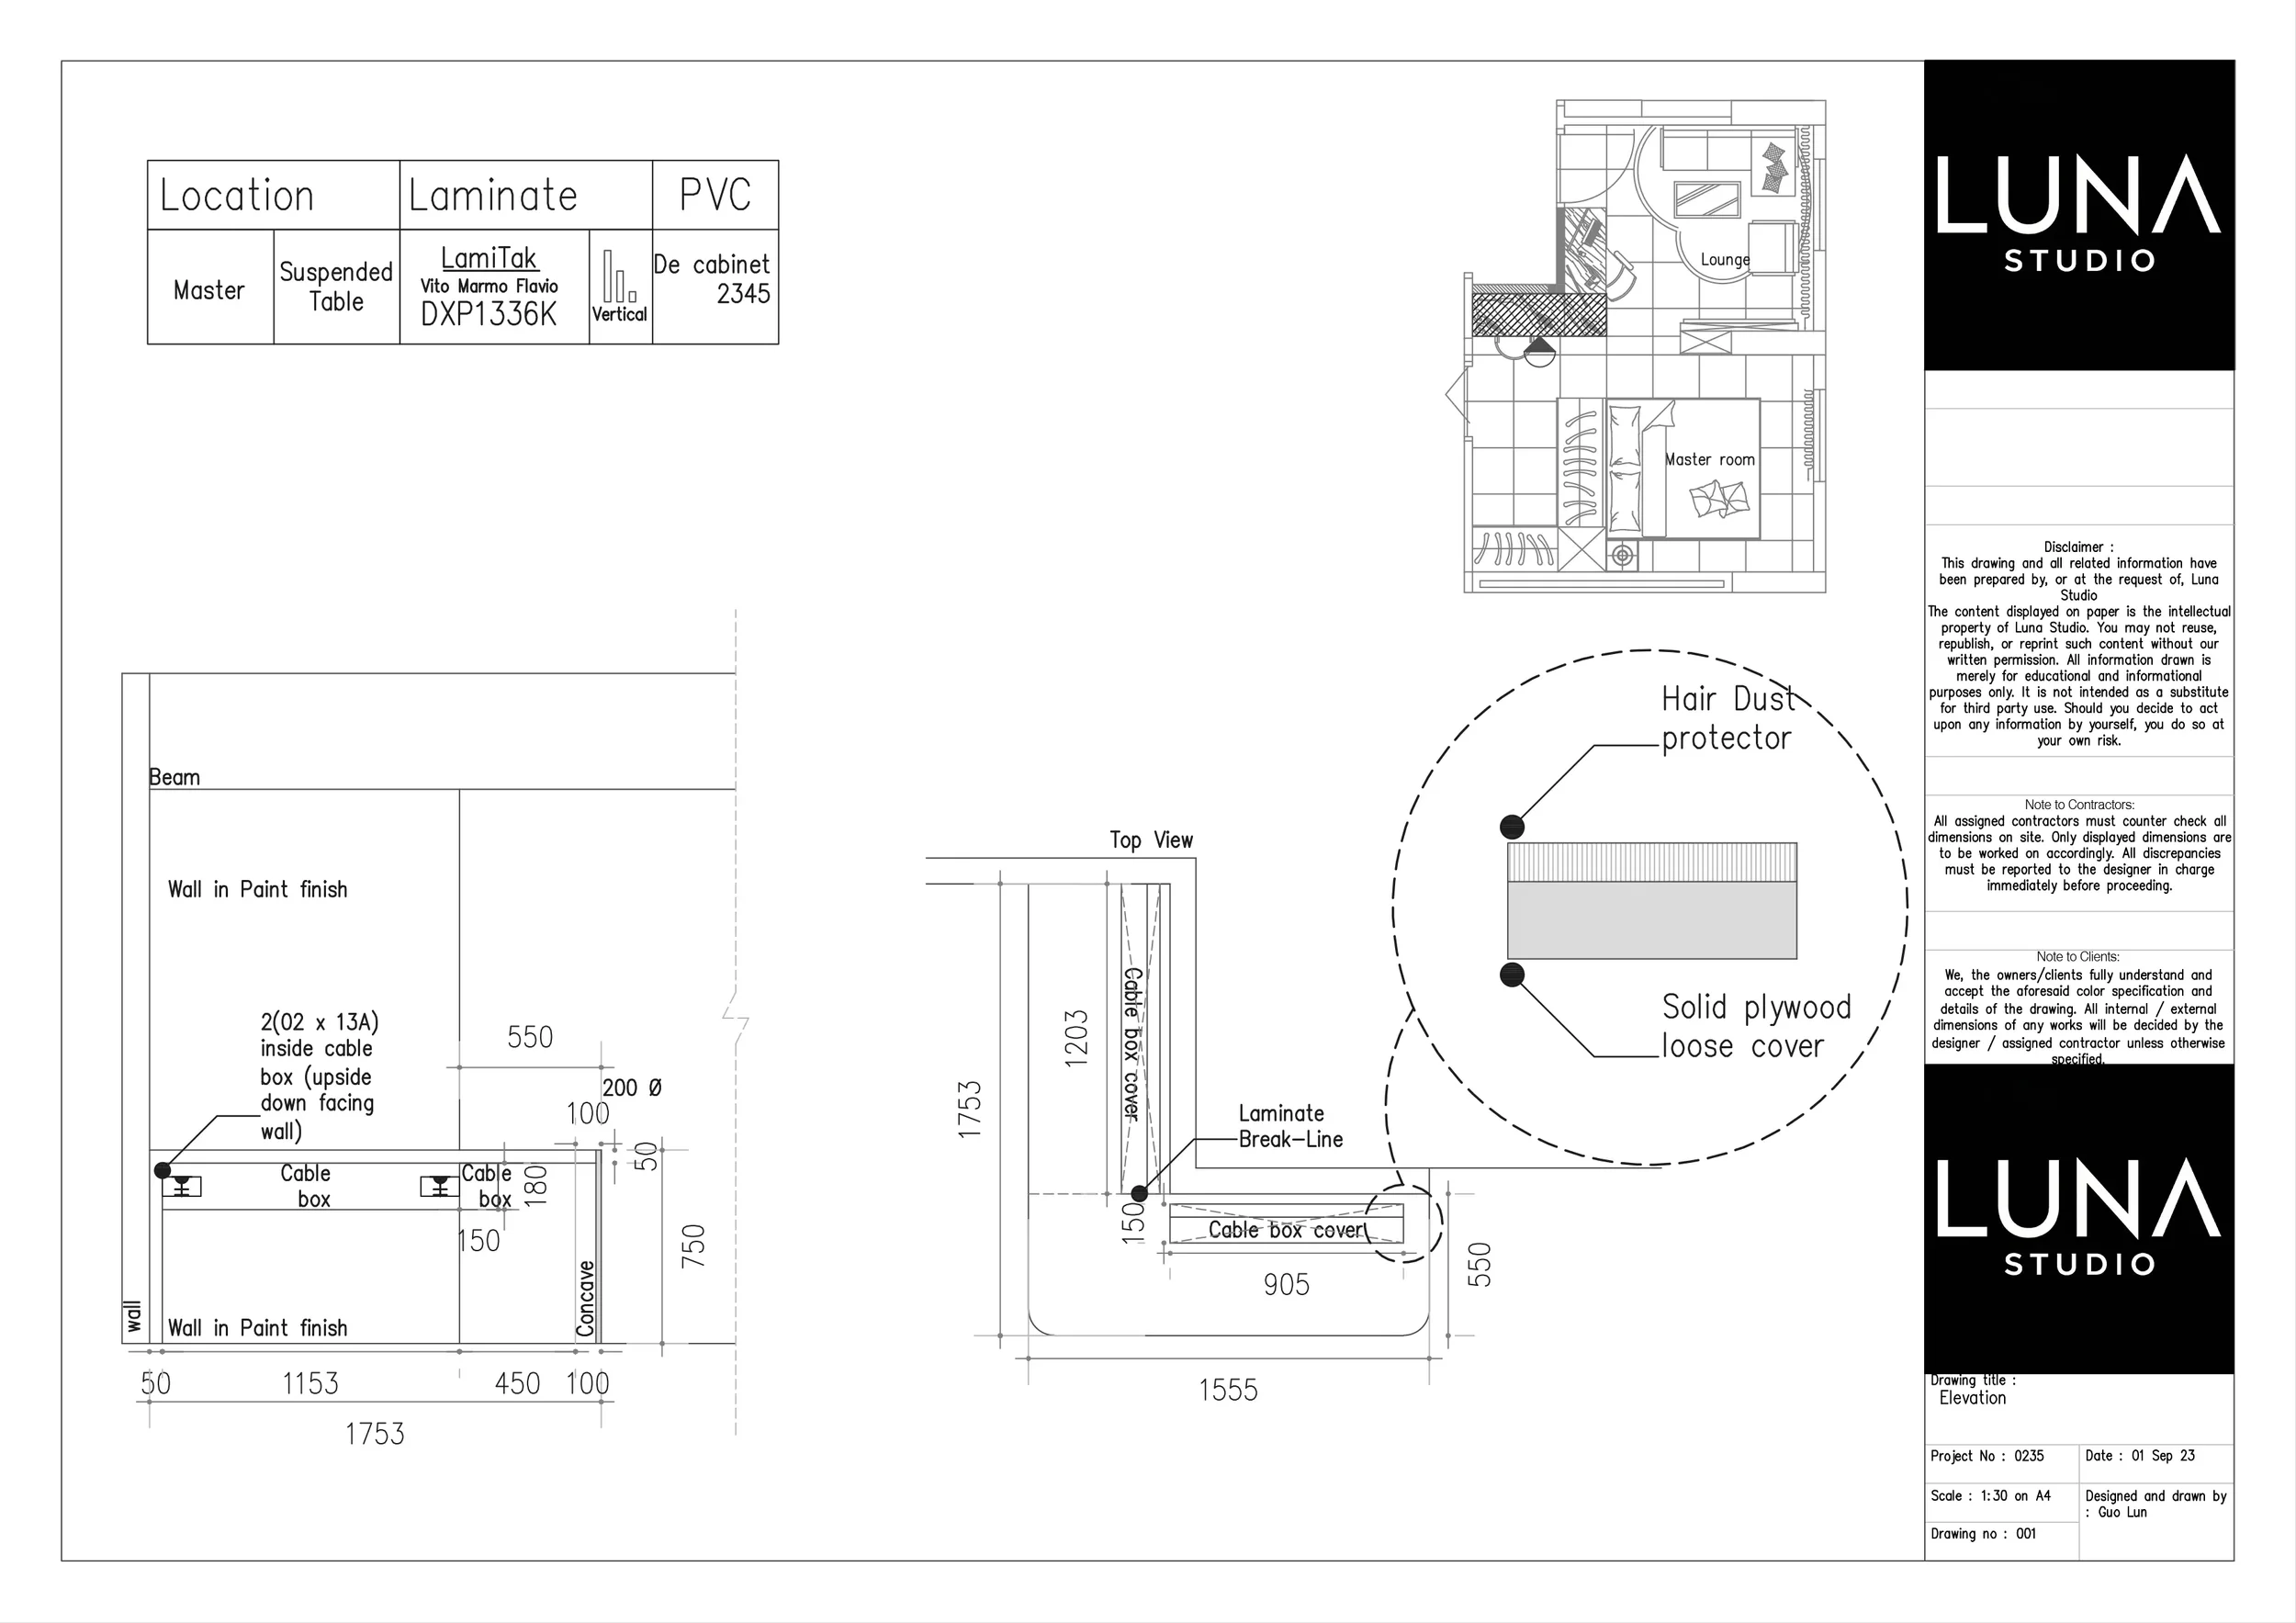
The study did not require another room. A 1,700mm suspended desk was integrated into the joinery line, giving the enlarged suite a dedicated working position while preserving the openness of the main space.
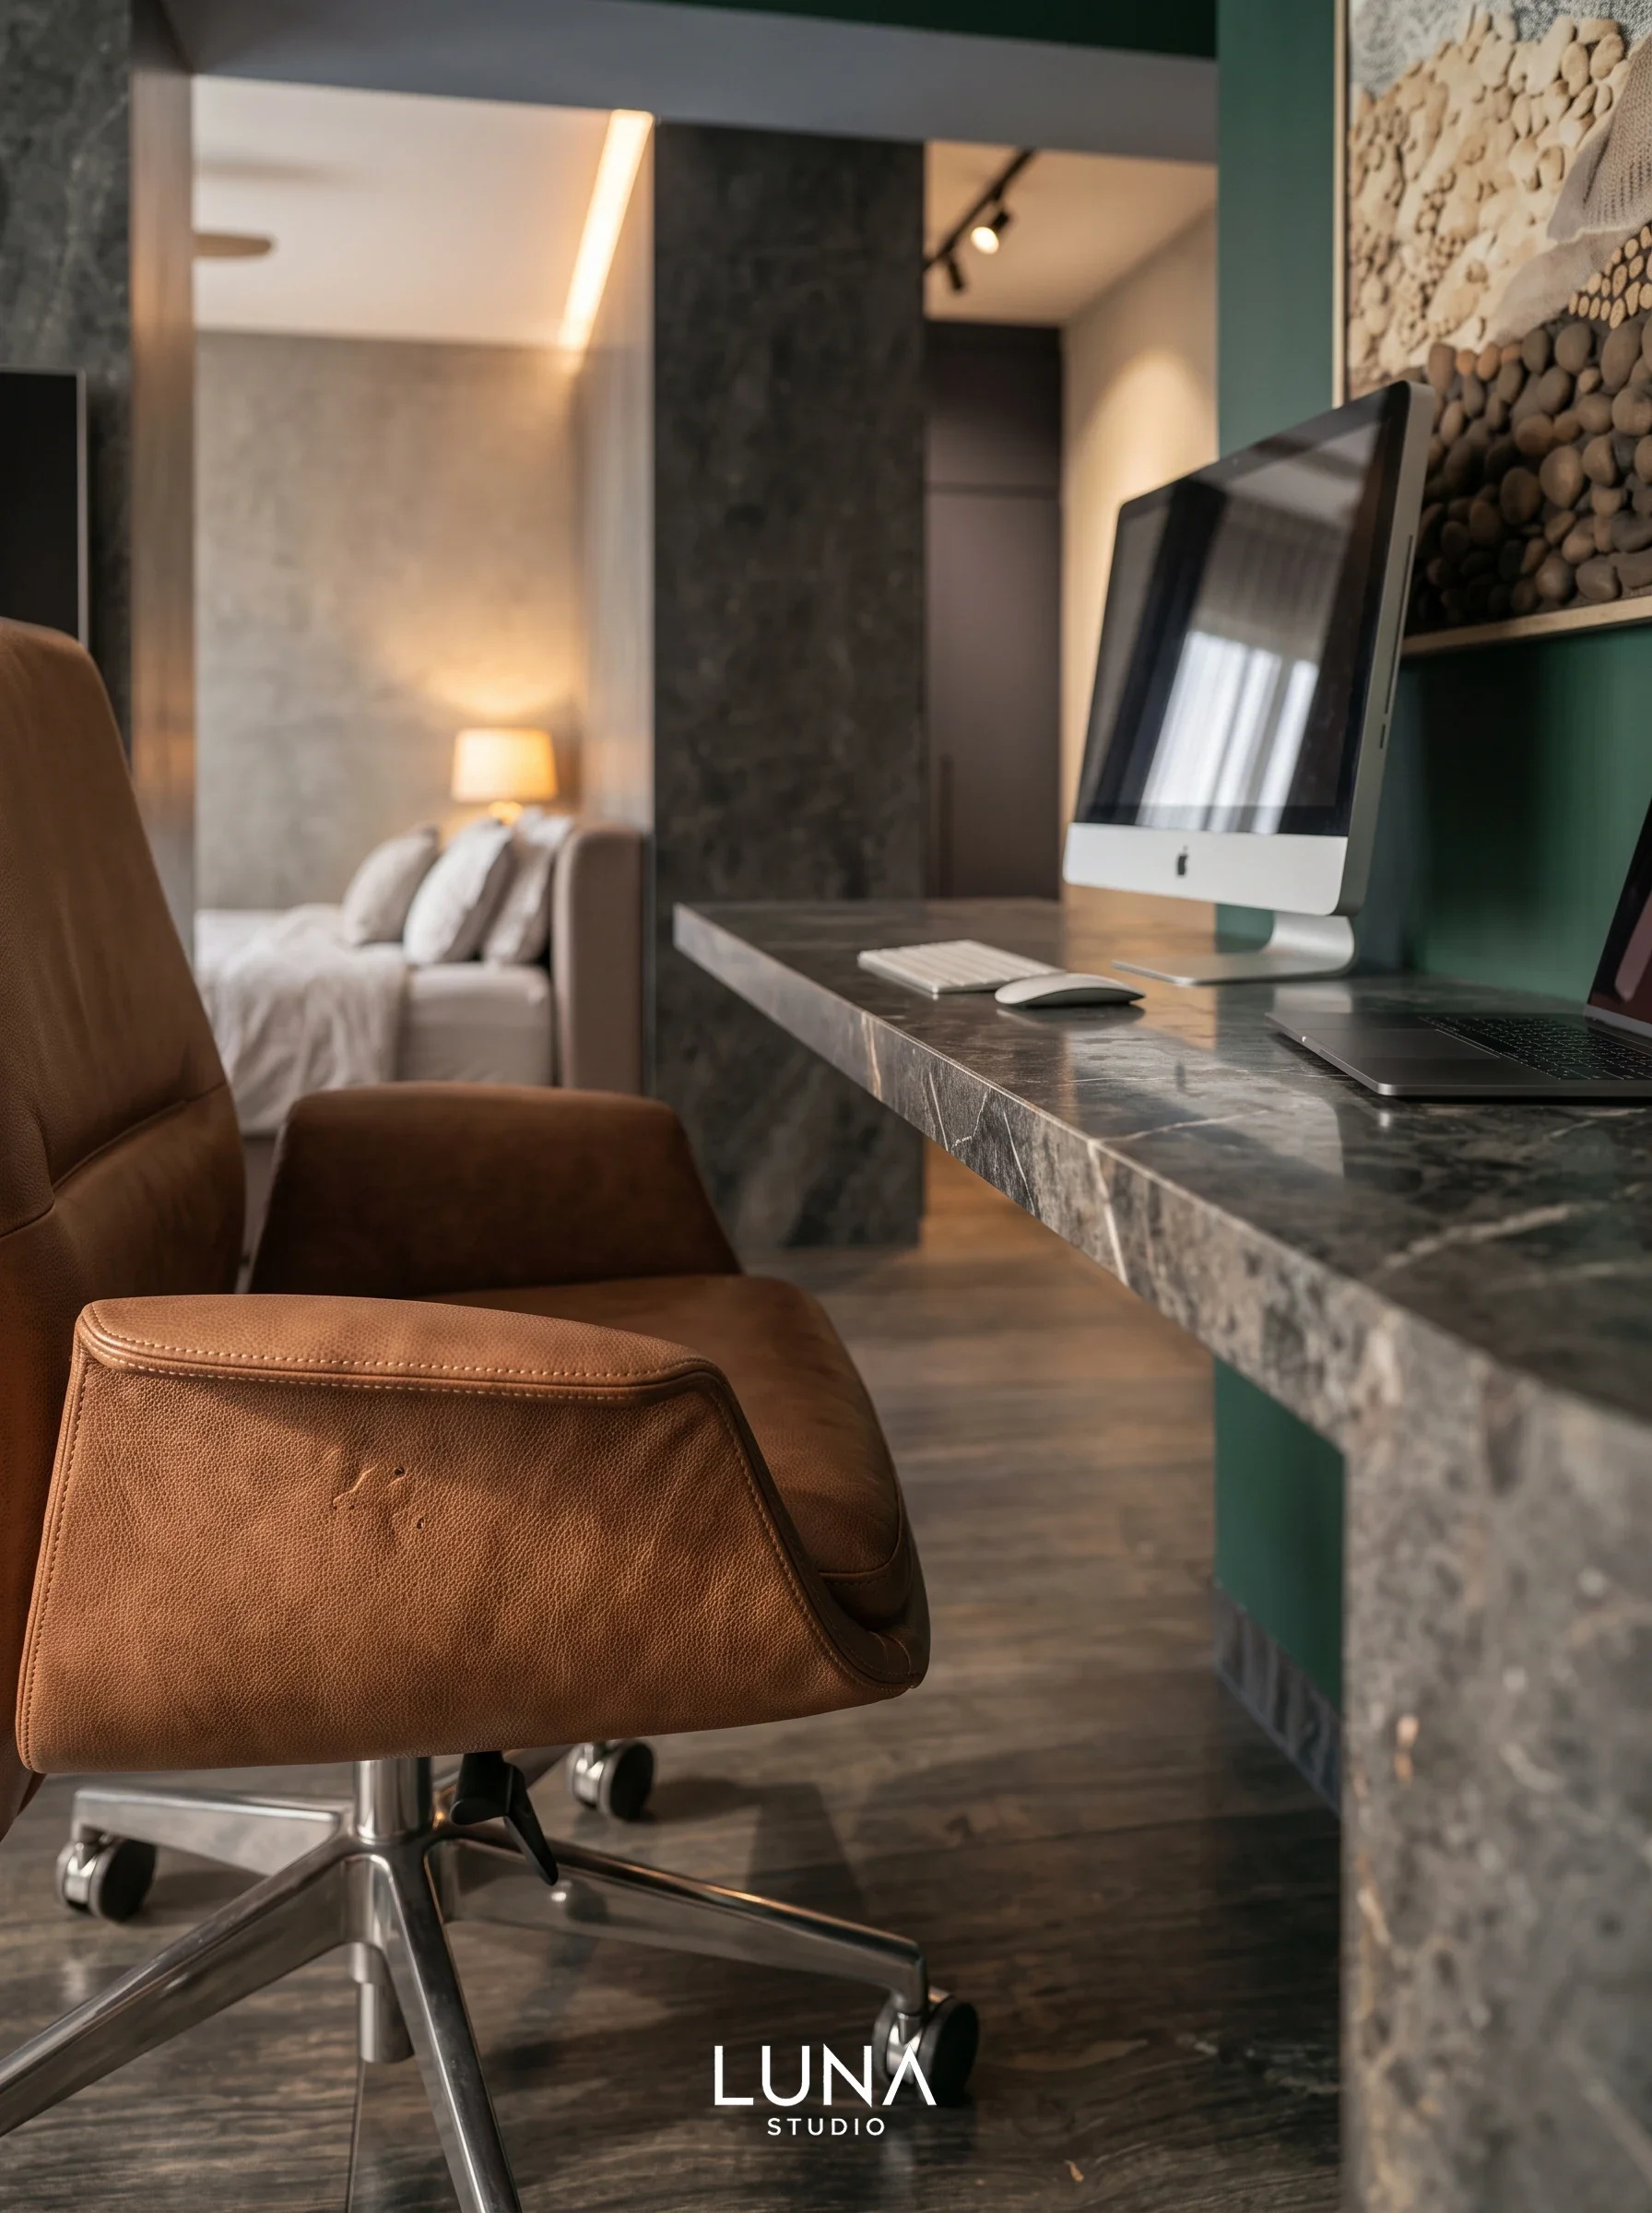
A living room still needs an anchor.
Once living was moved into the private wing, the enlarged room still needed to read as a place for living rather than simply an oversized bedroom.
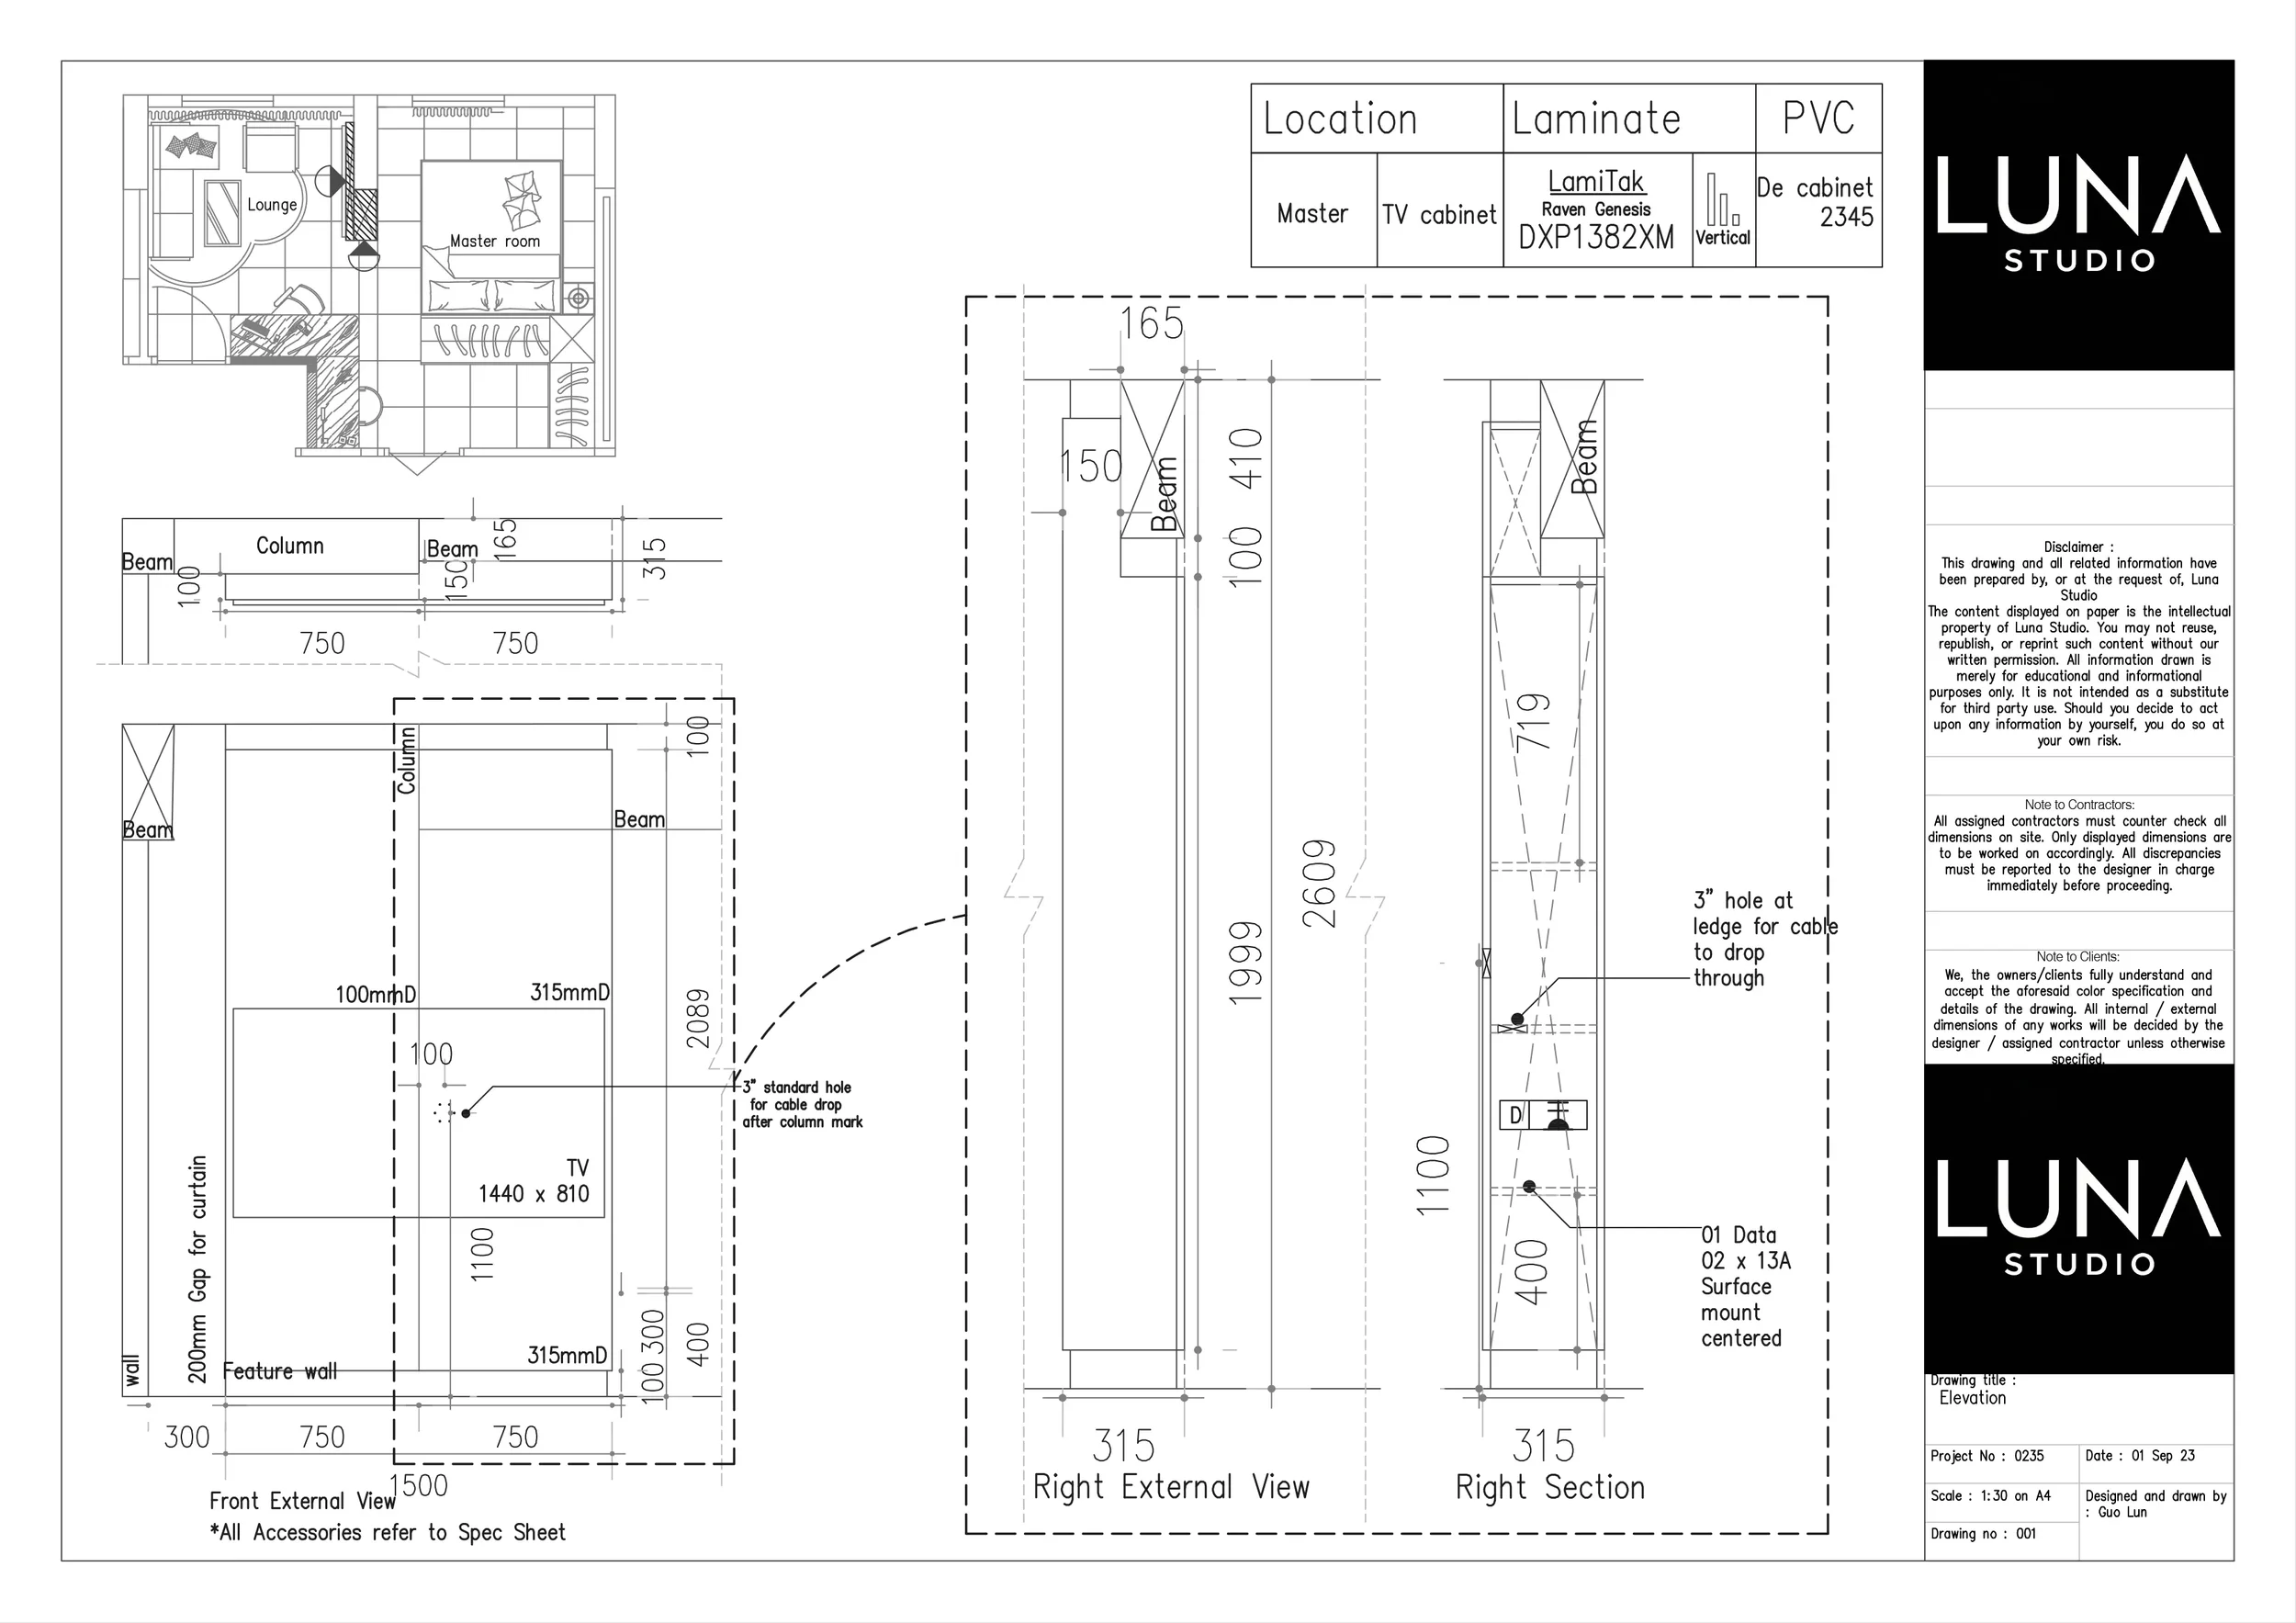
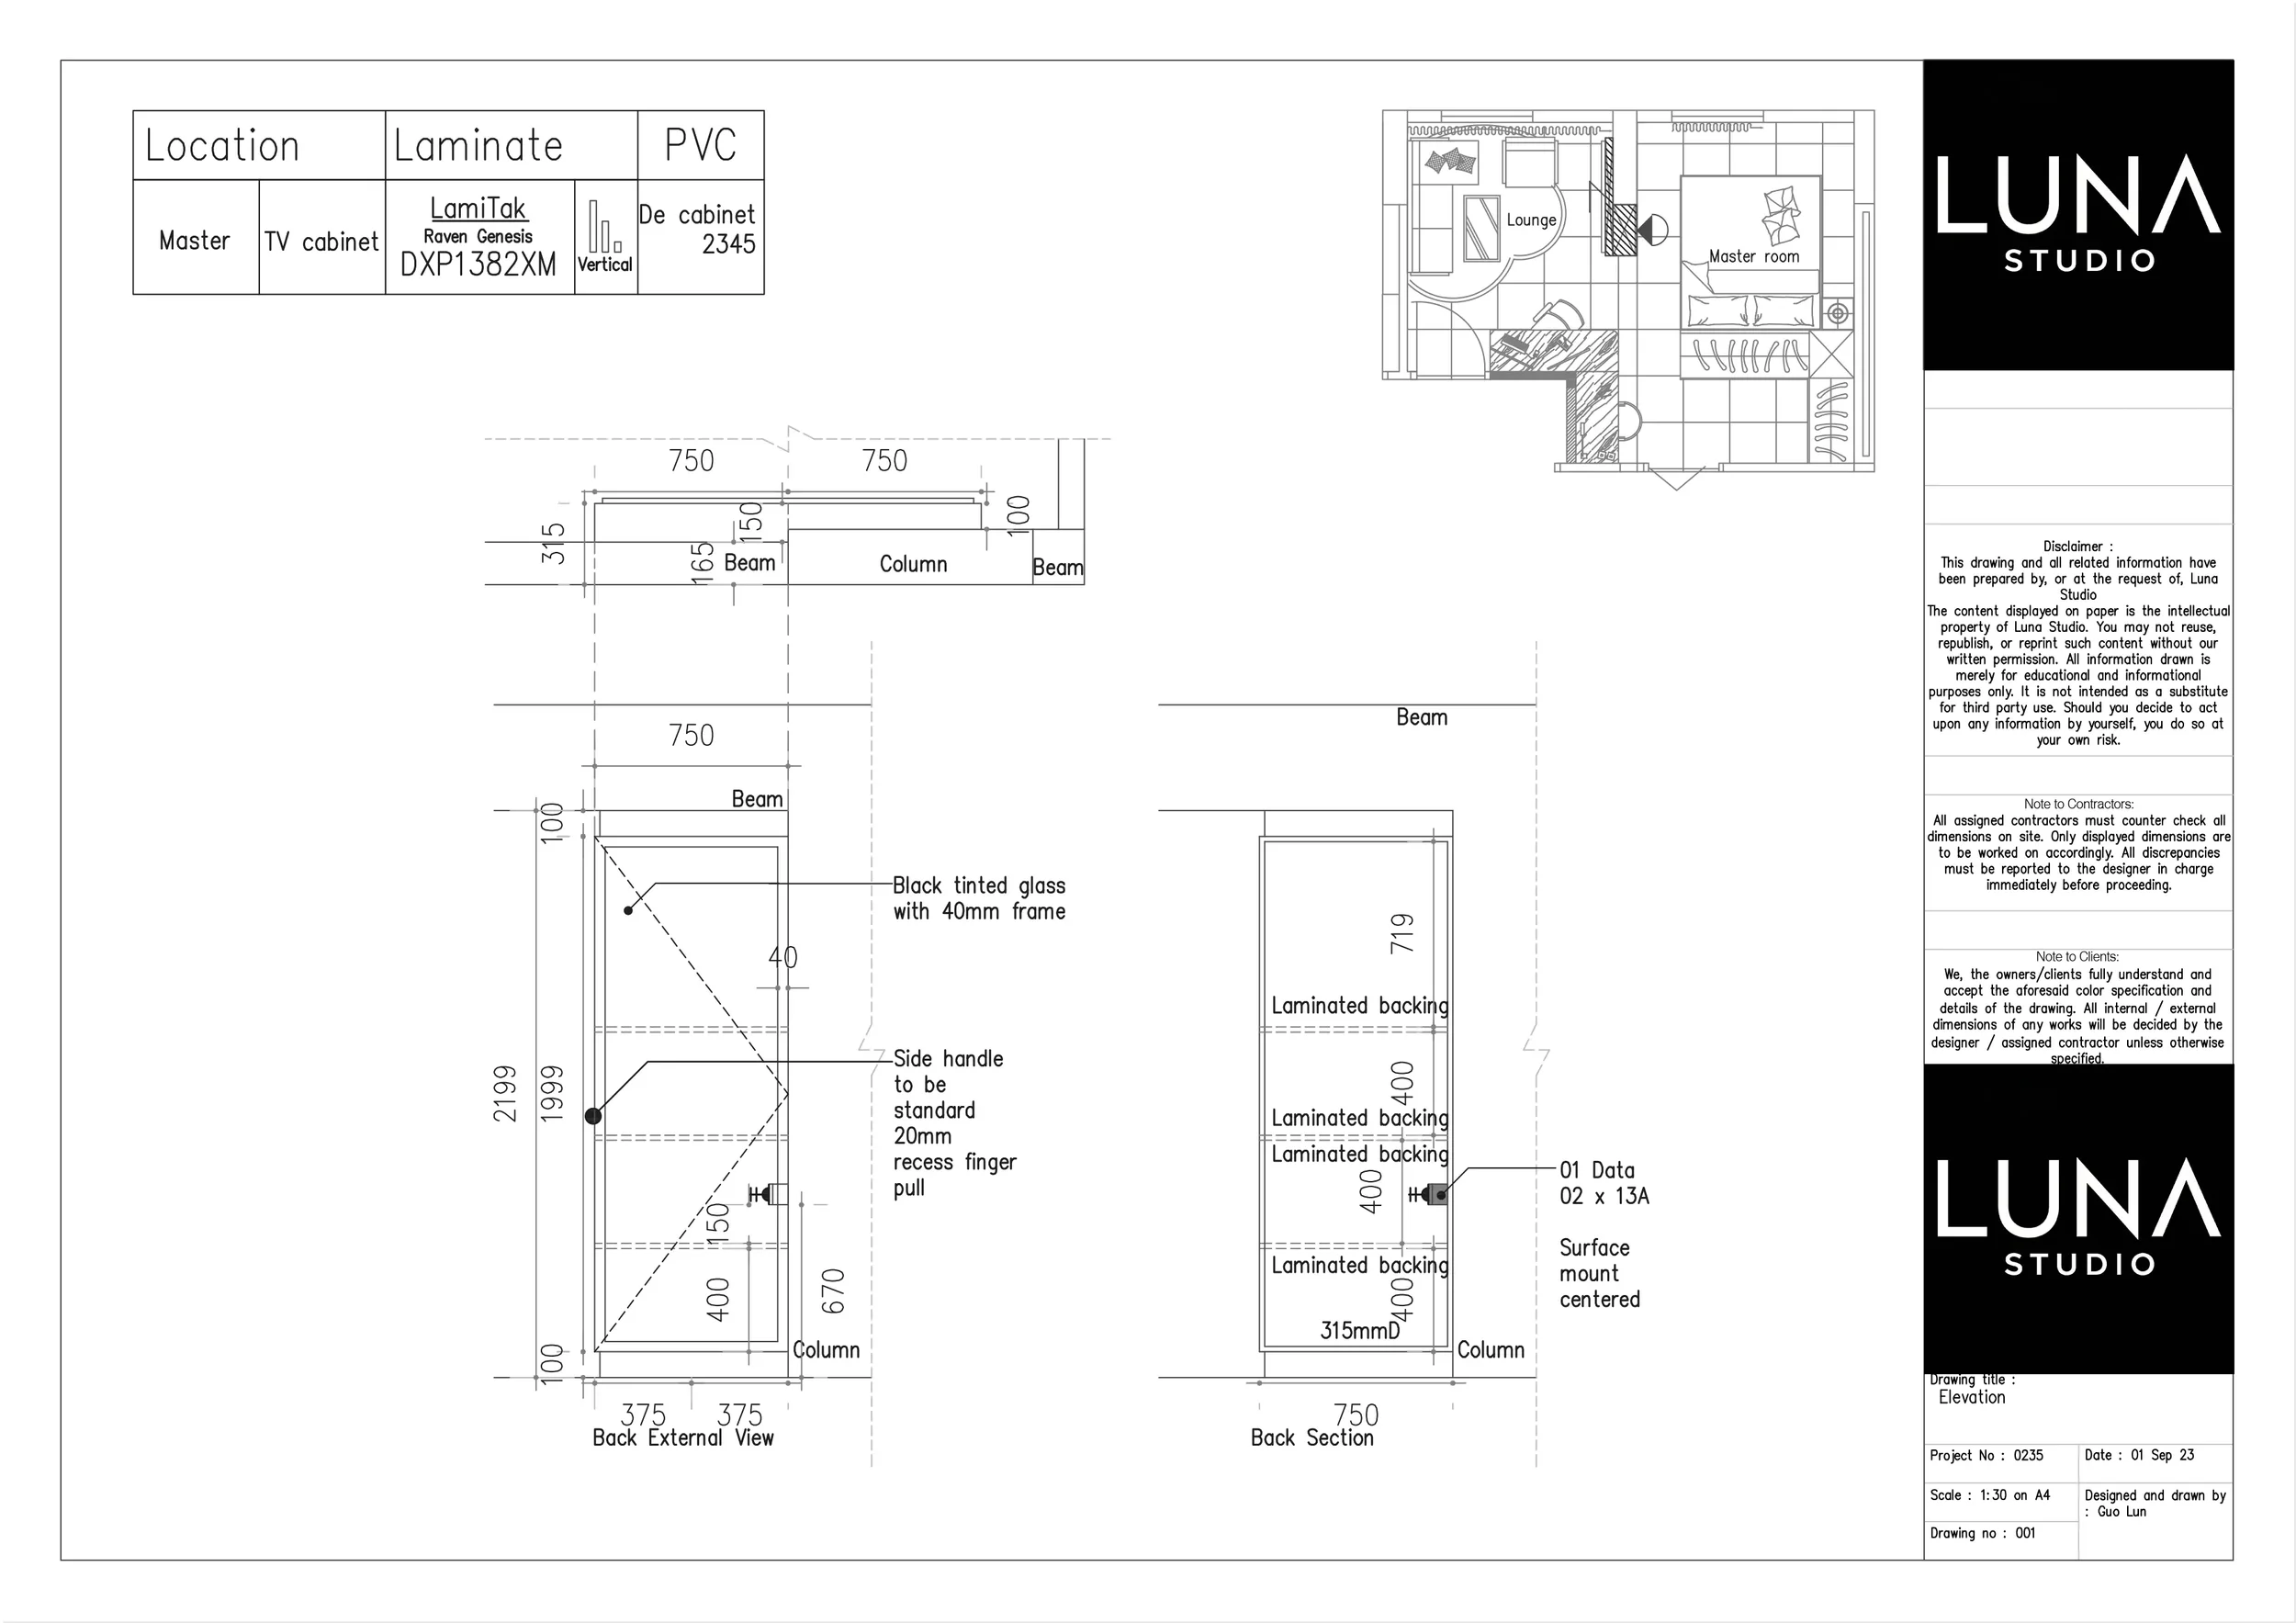
The TV wall establishes the lounge as a distinct zone without enclosing it.
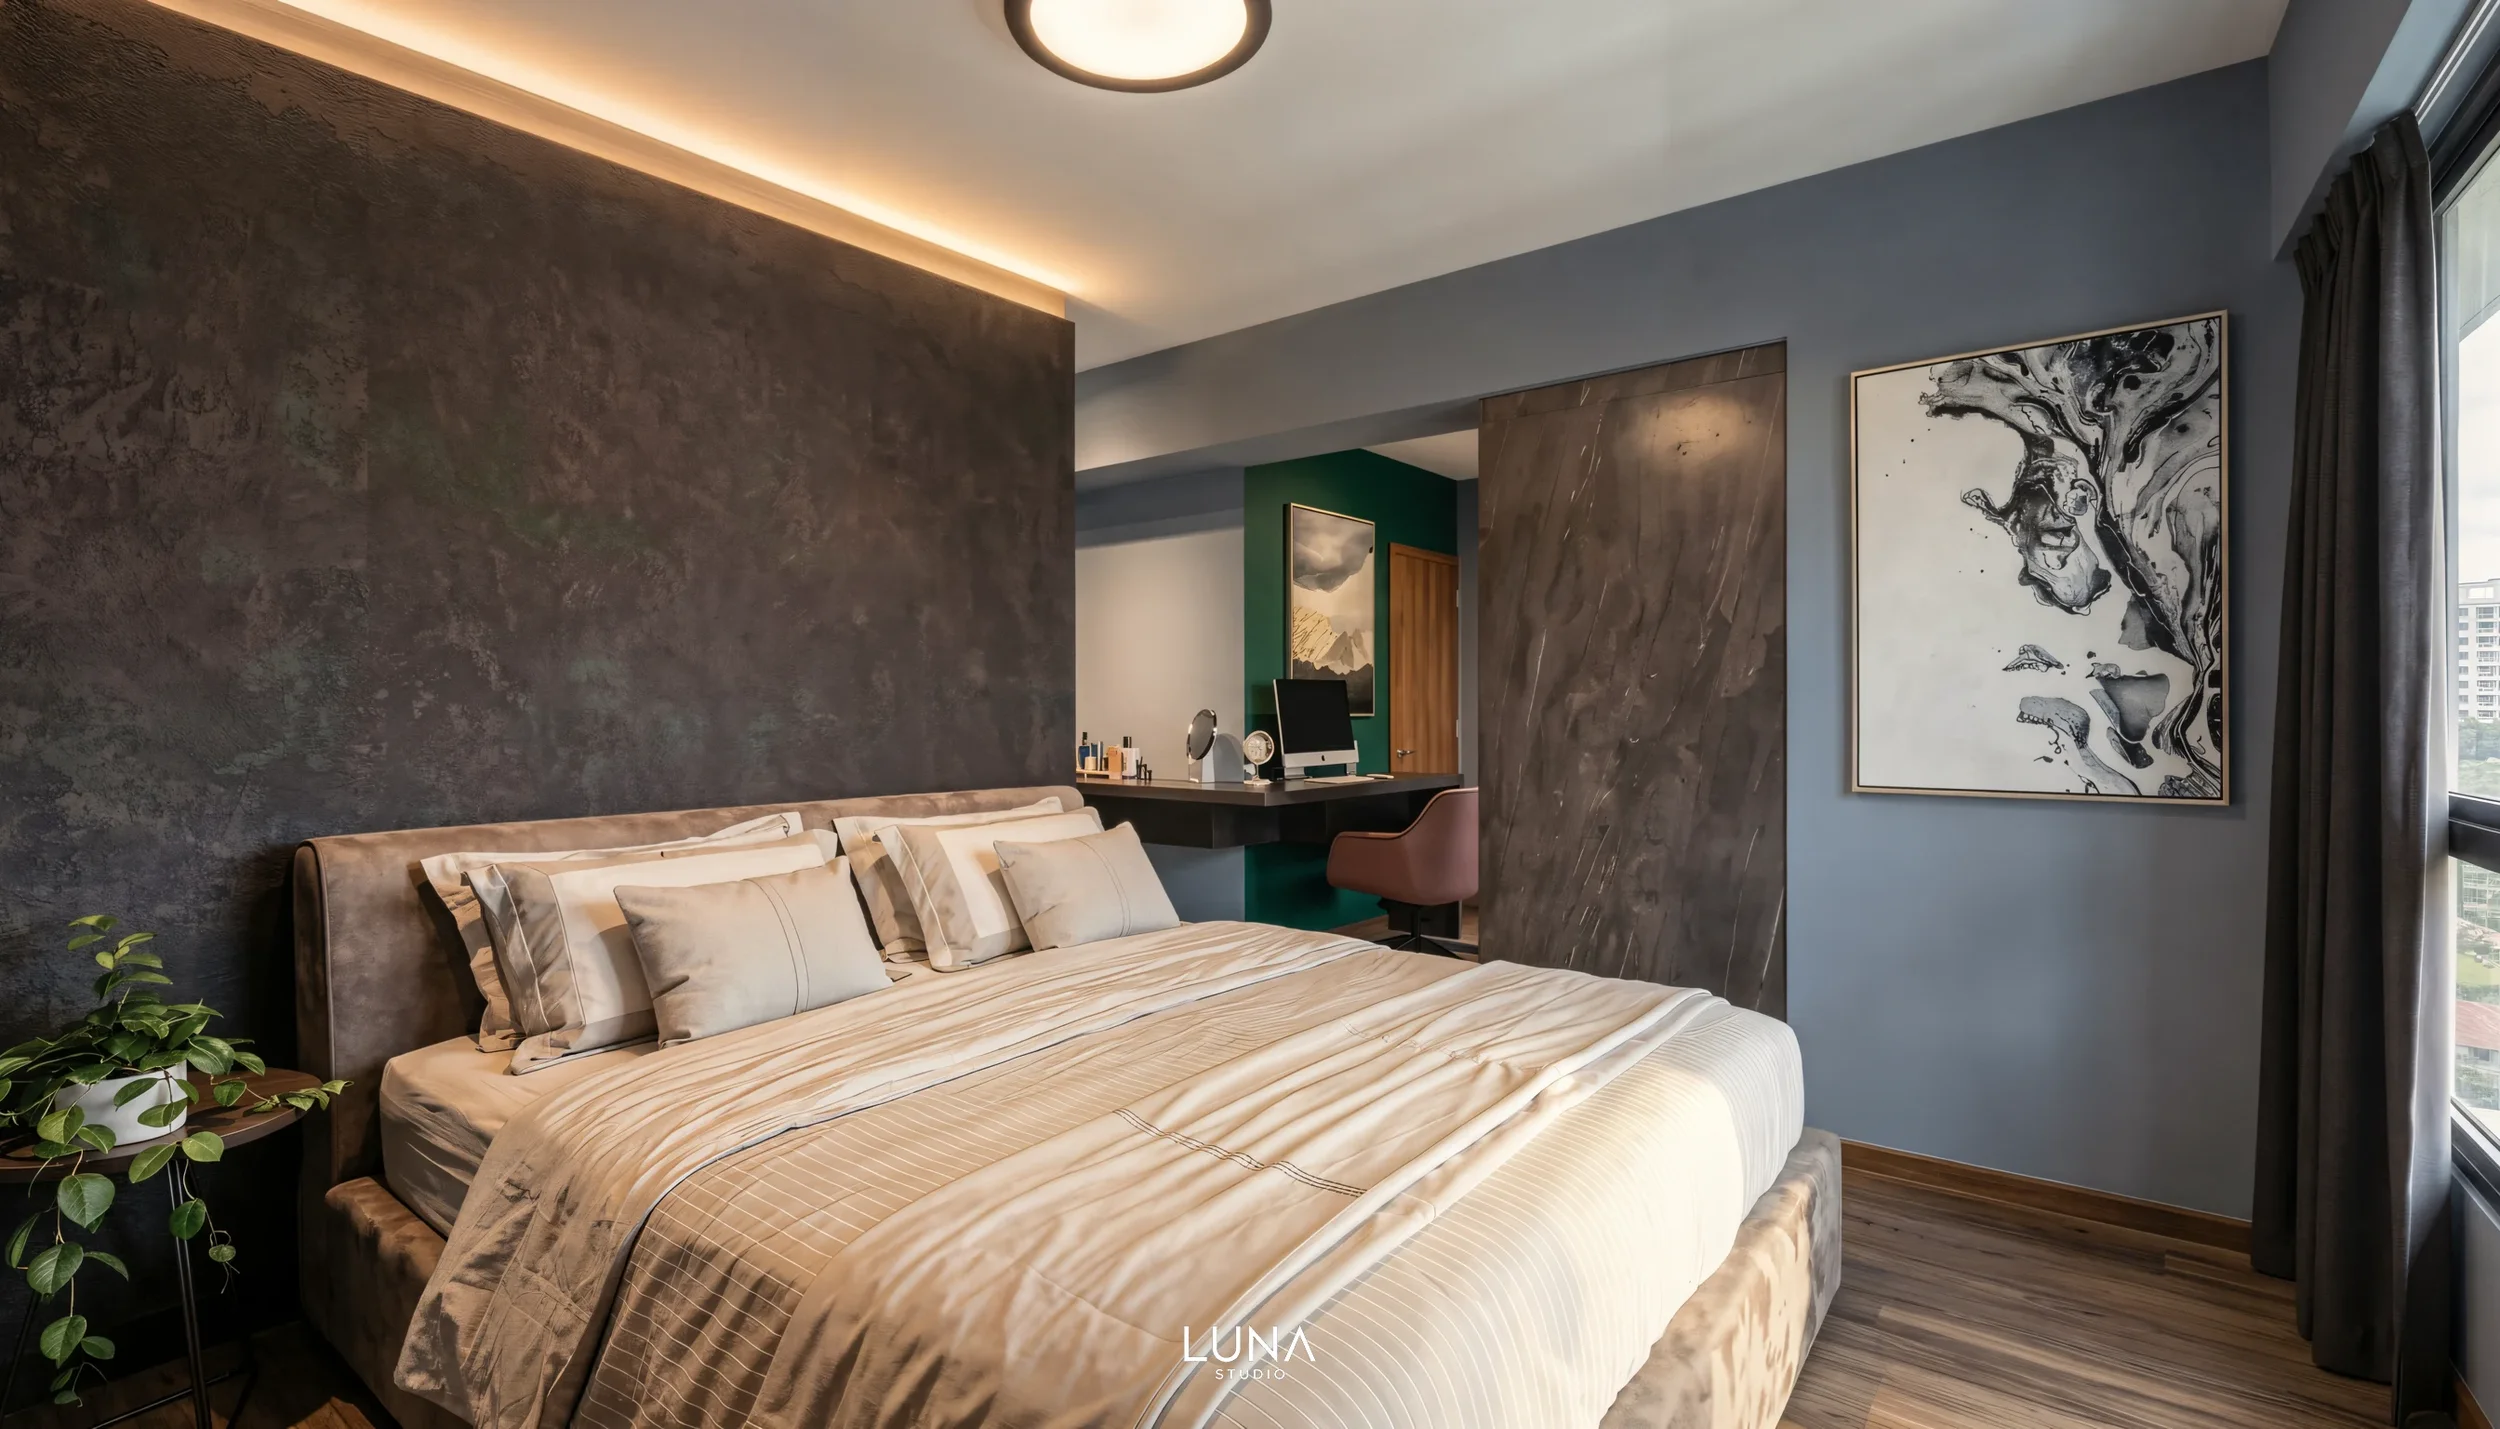
One room, one material language.
The enlarged suite had to feel like one room despite carrying several functions. Continuous joinery, darker surfaces and repeated material tones keep the lounge, study, dressing and sleeping areas connected rather than visually separating them into four rooms.
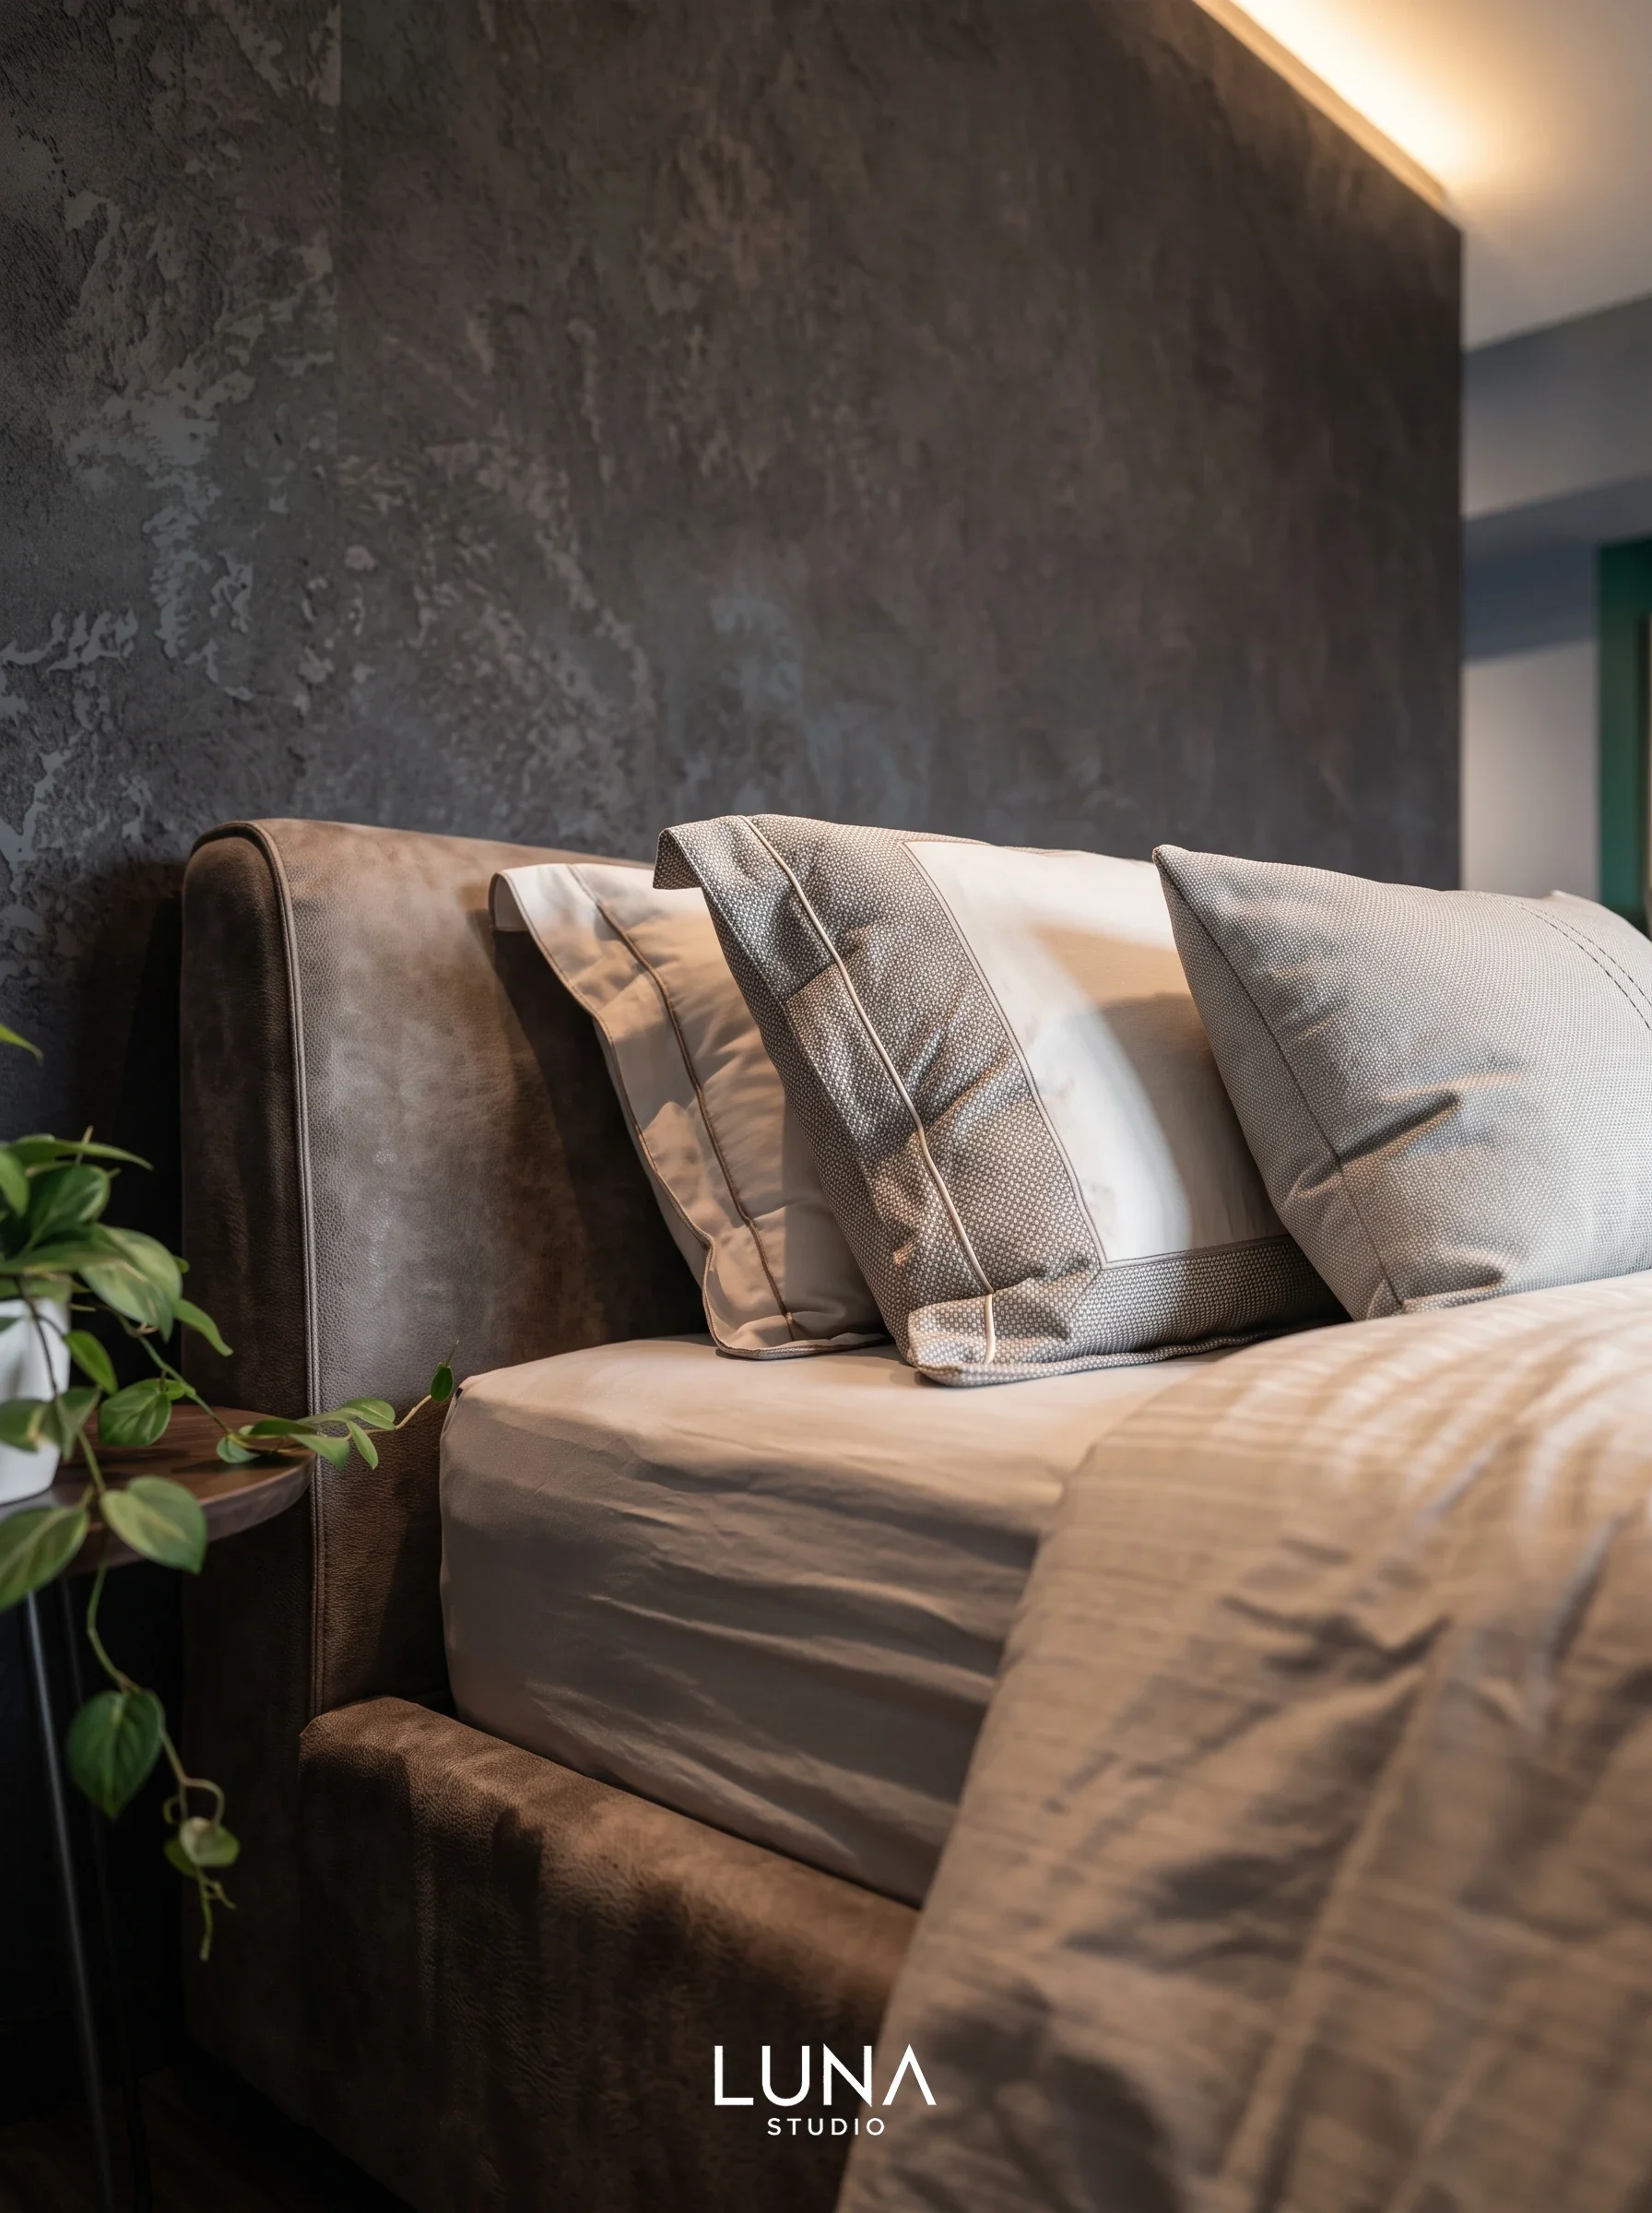
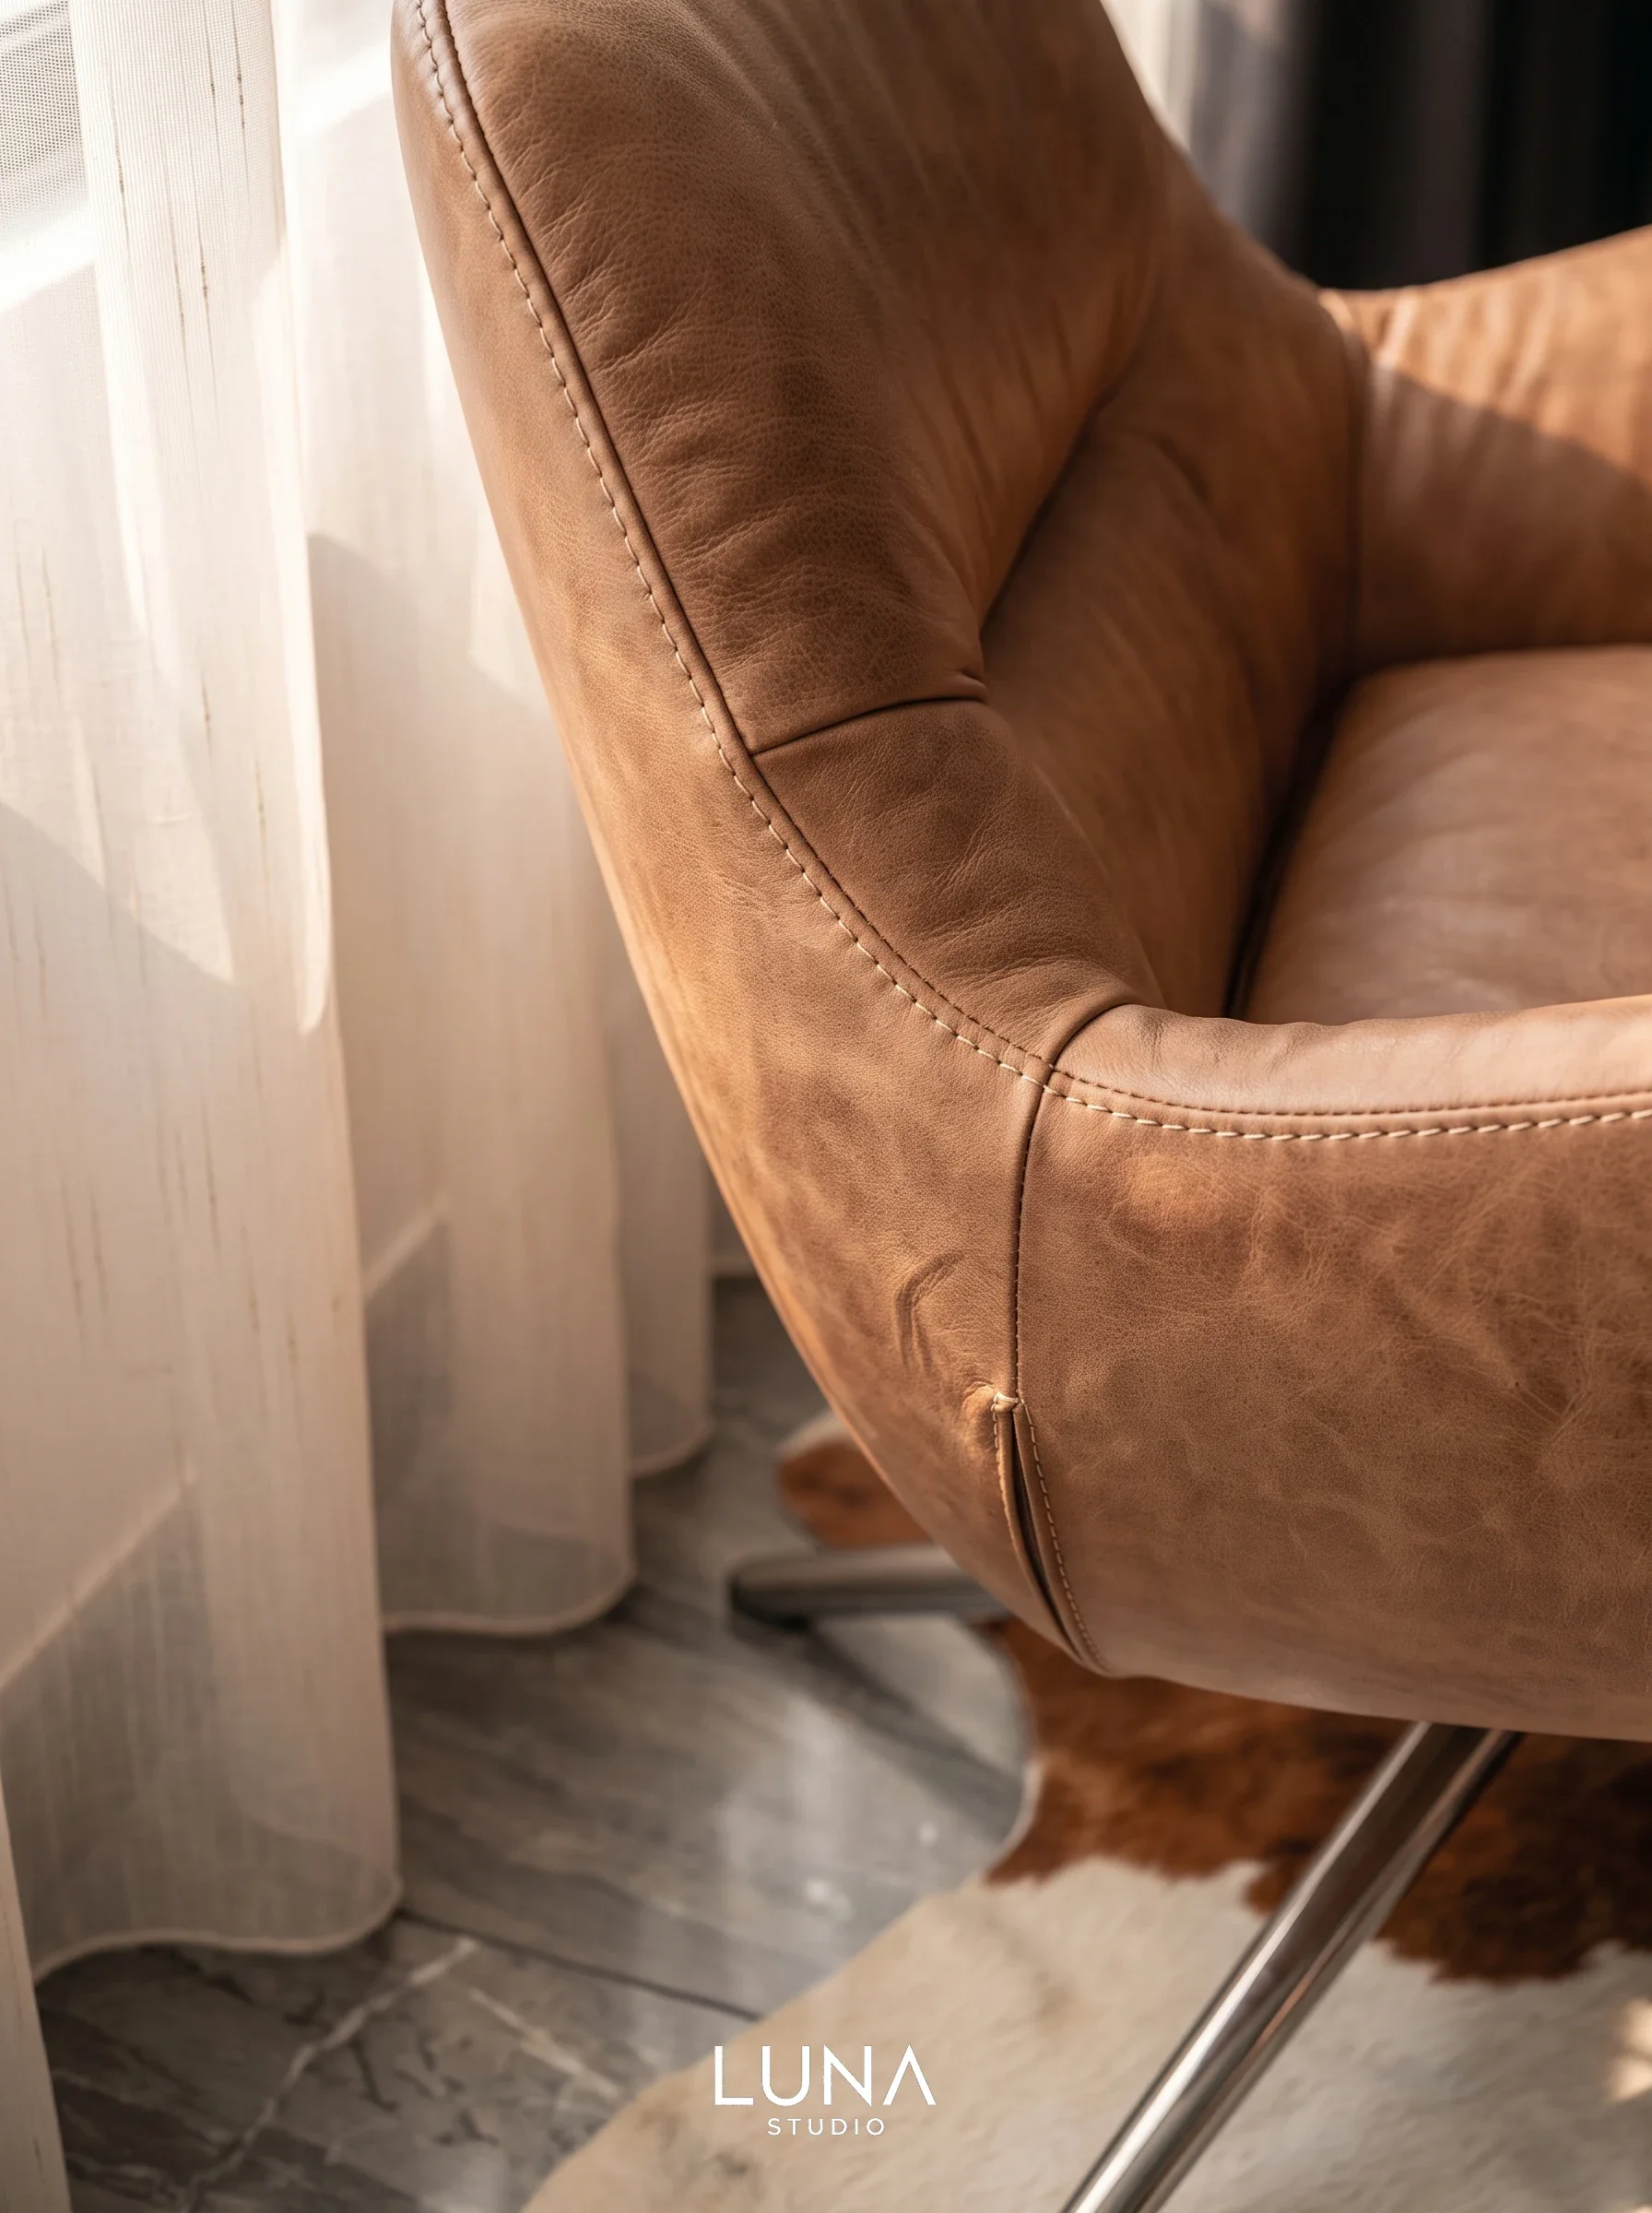
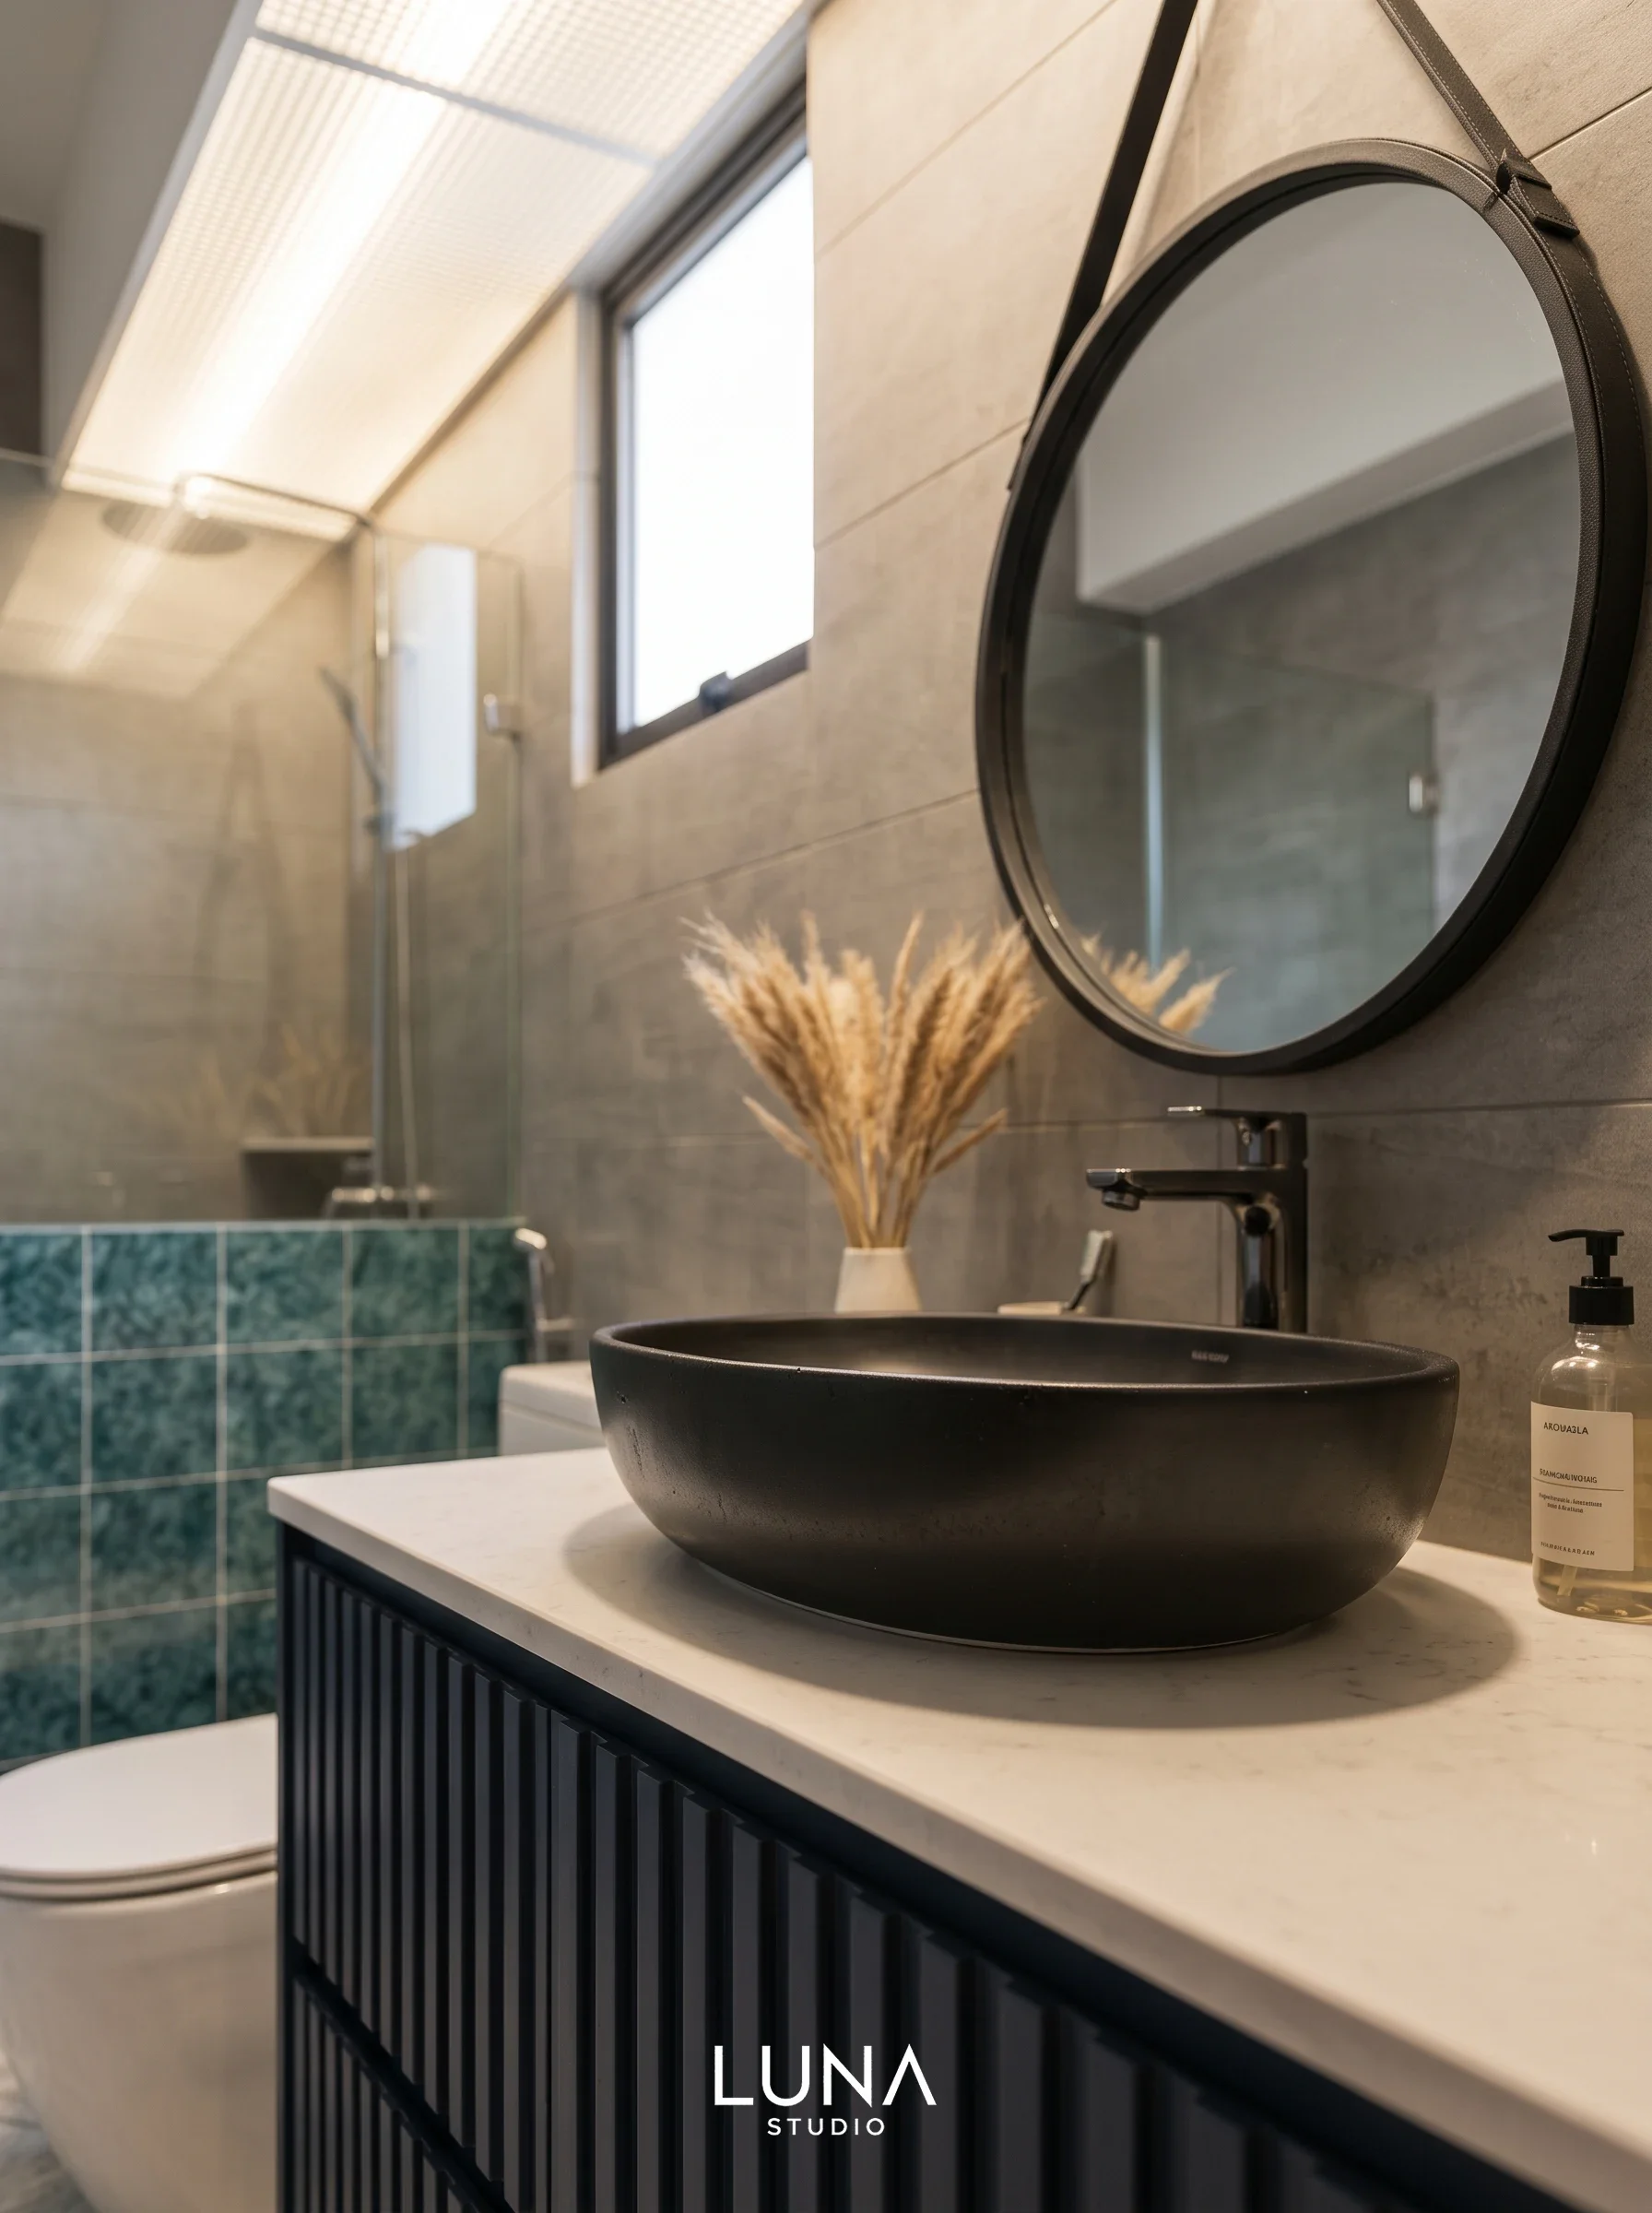
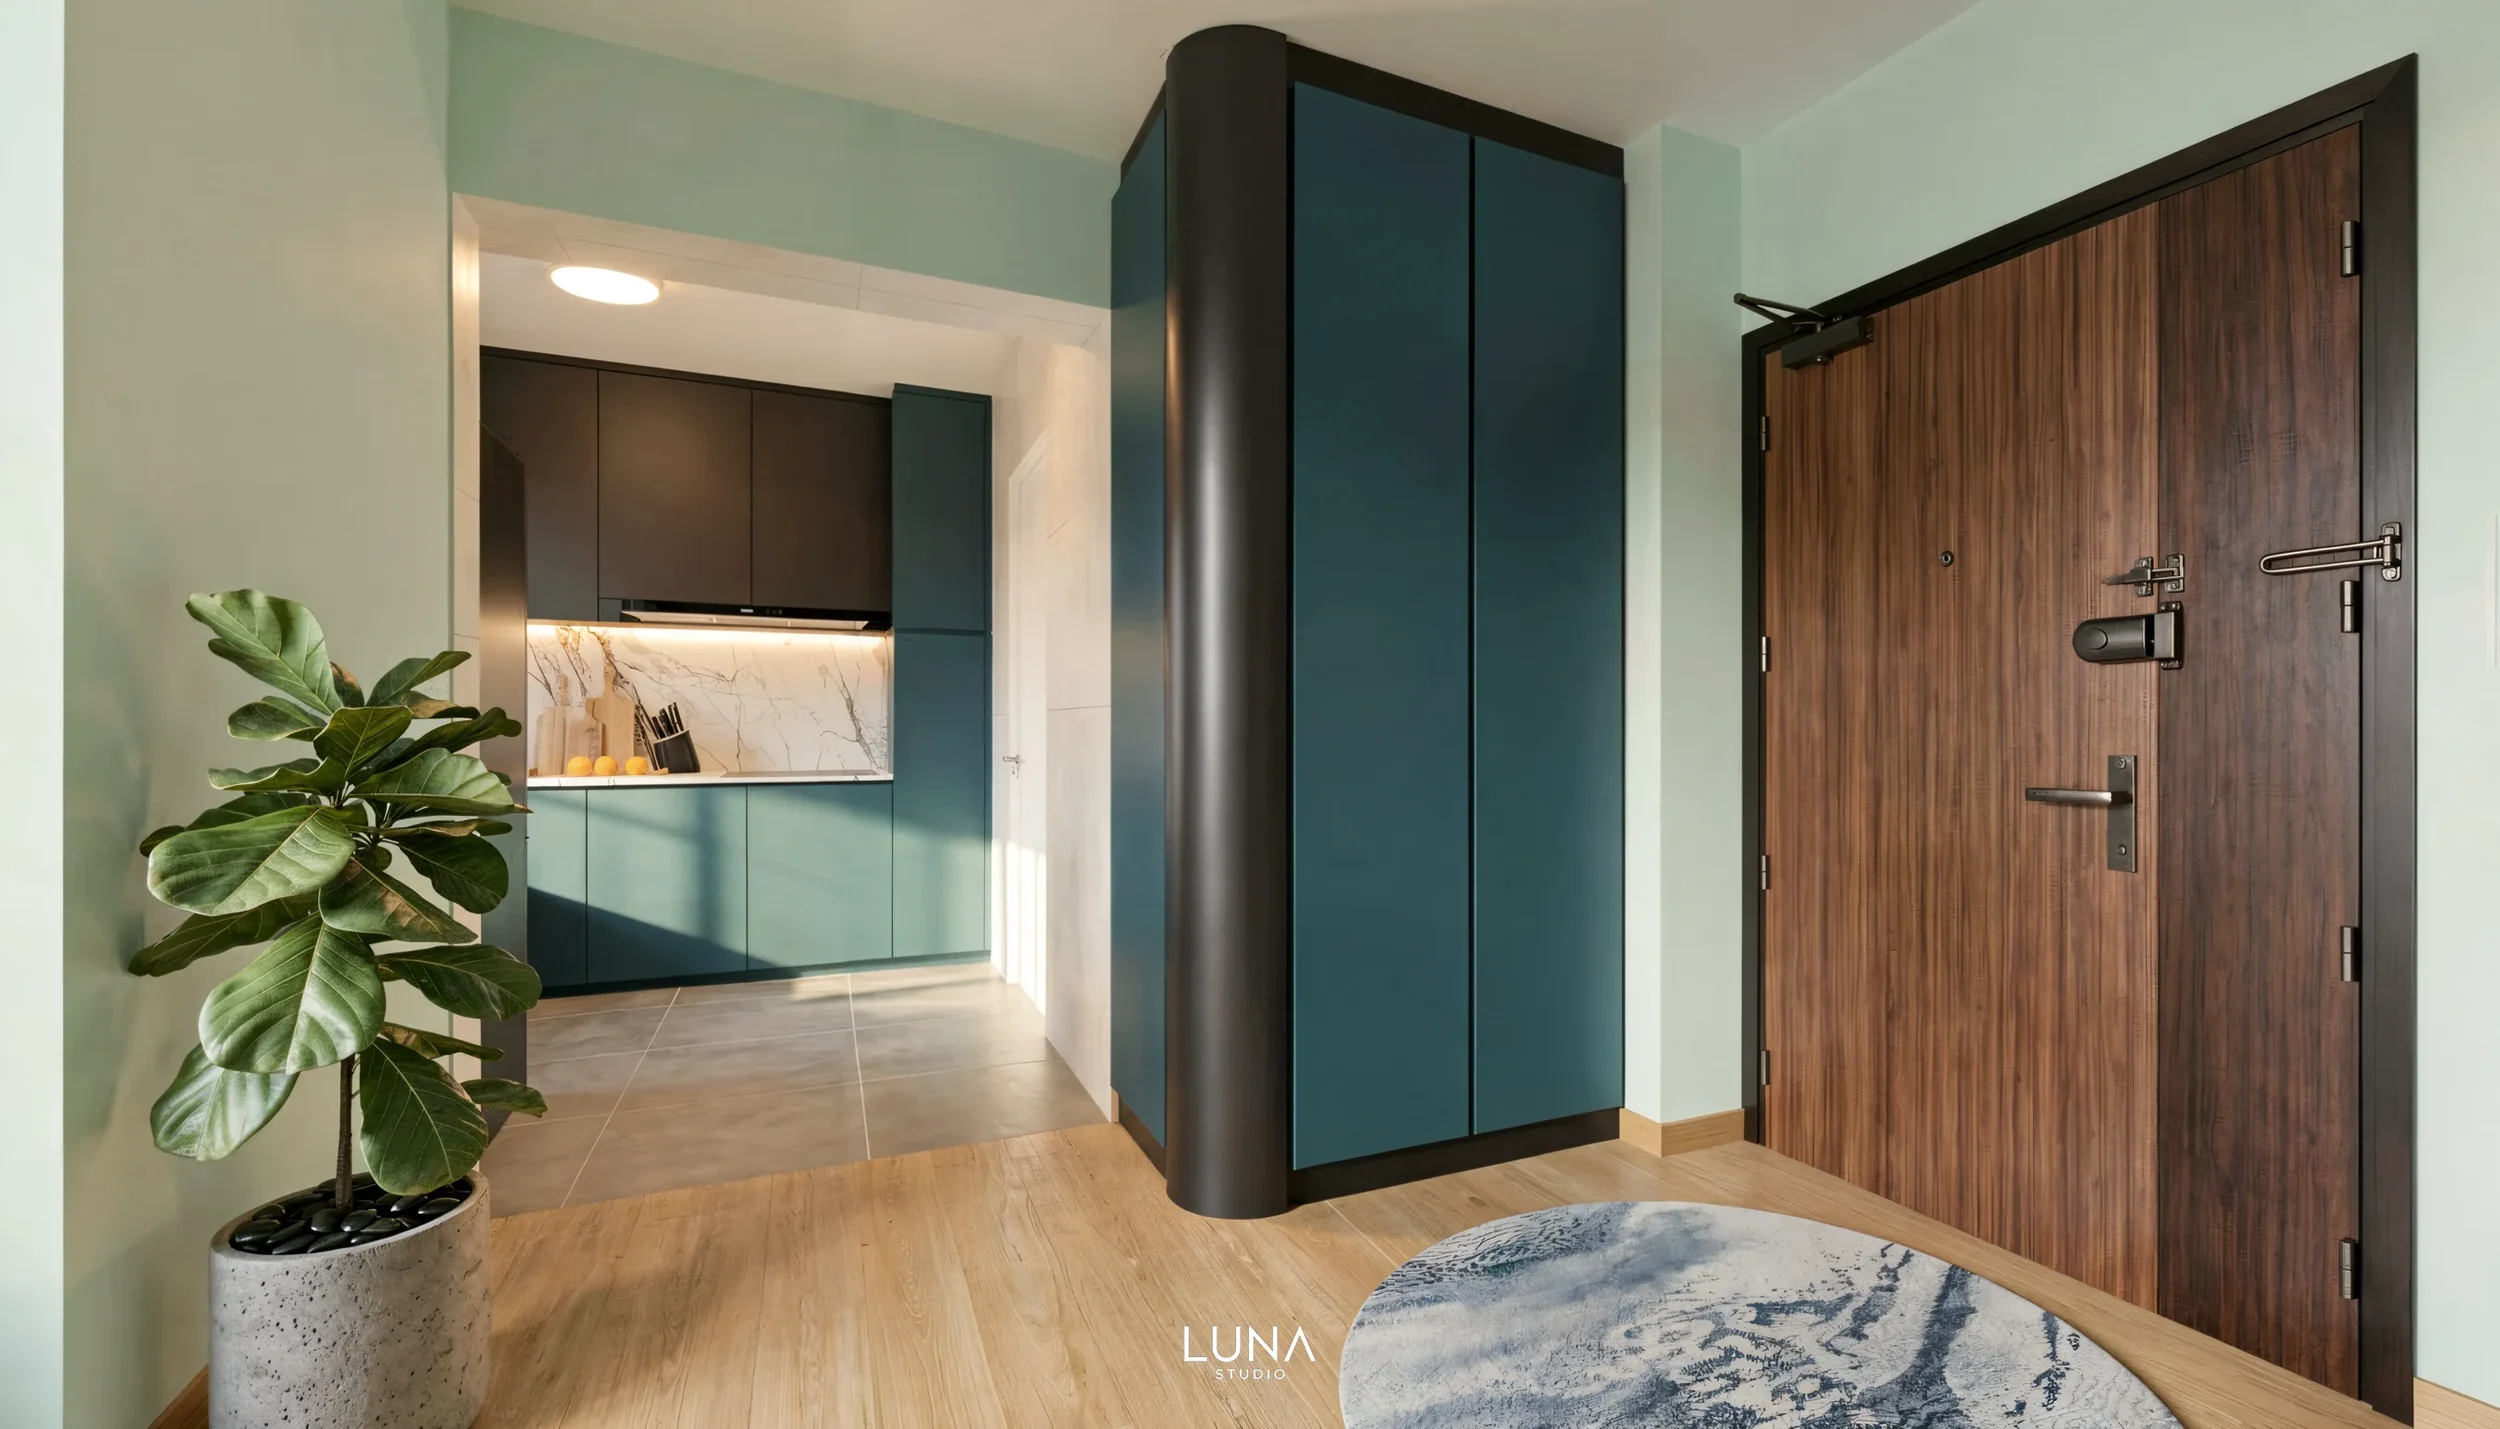
The space we gave back.
The space was not lost. It changed function.
Releasing the original living-room footprint allowed the dining table to occupy the front of the home properly, creating a clearer social zone for hosting. The private lounge could therefore move deeper into the home without competing with the dining function.
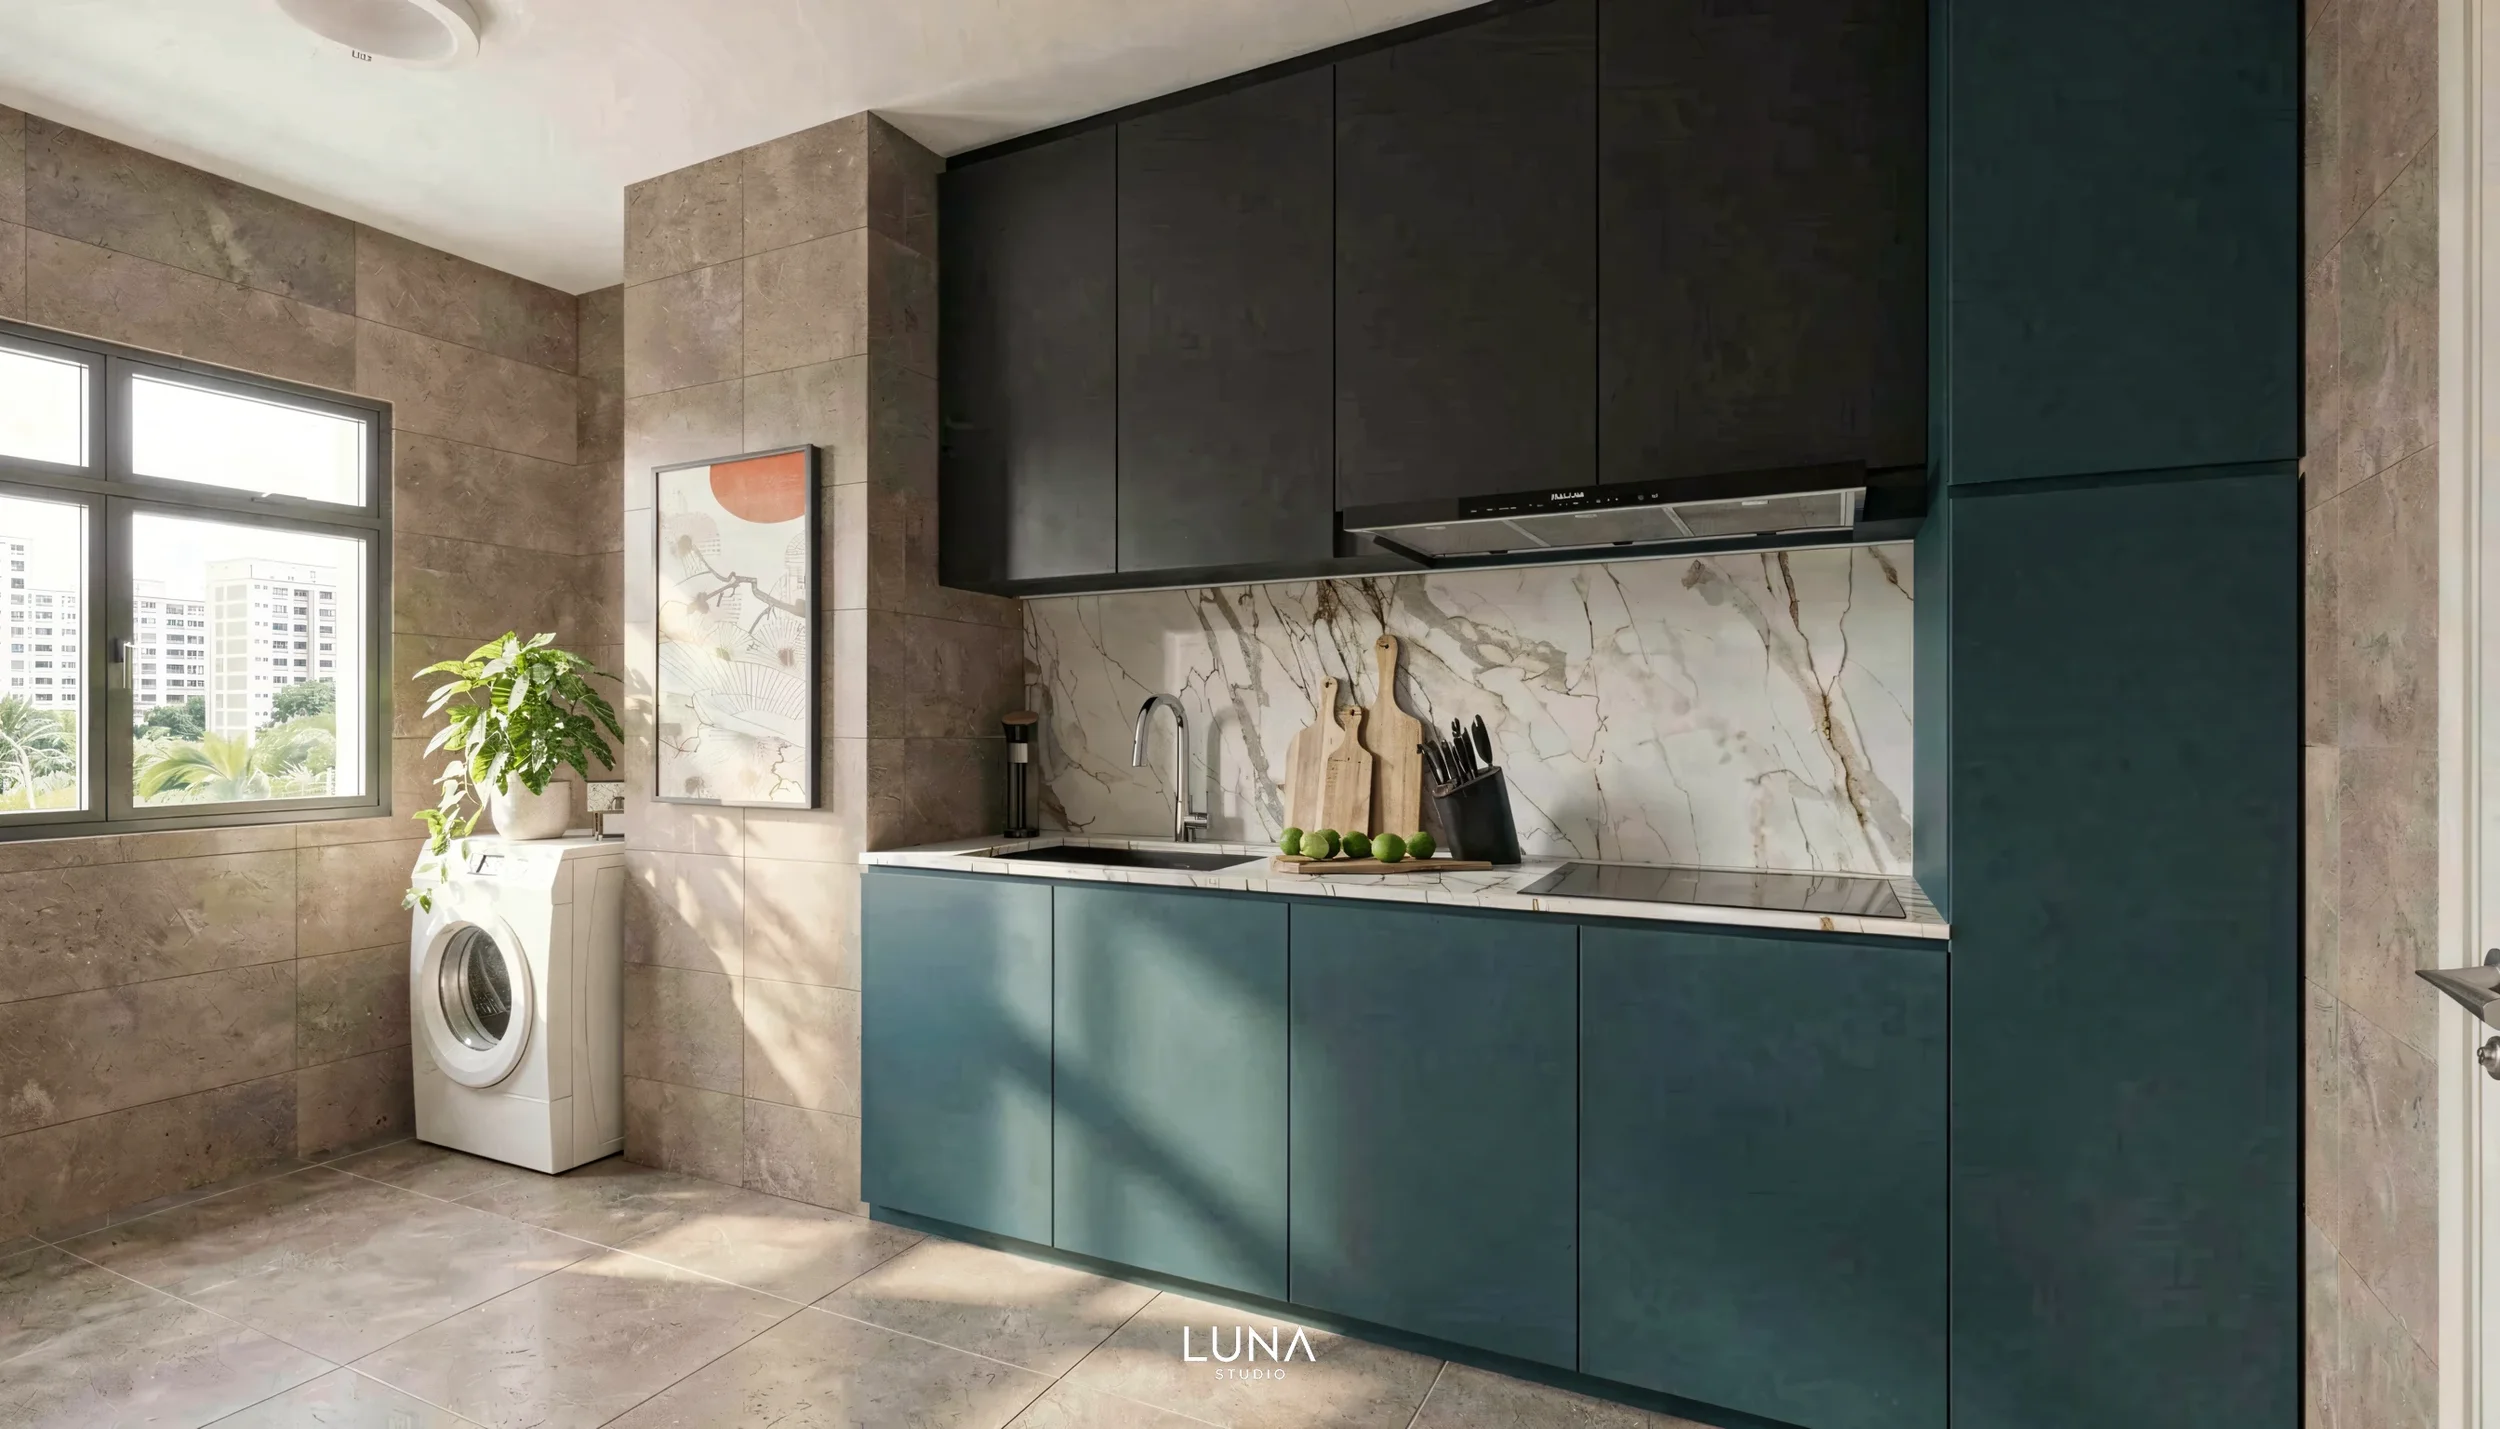
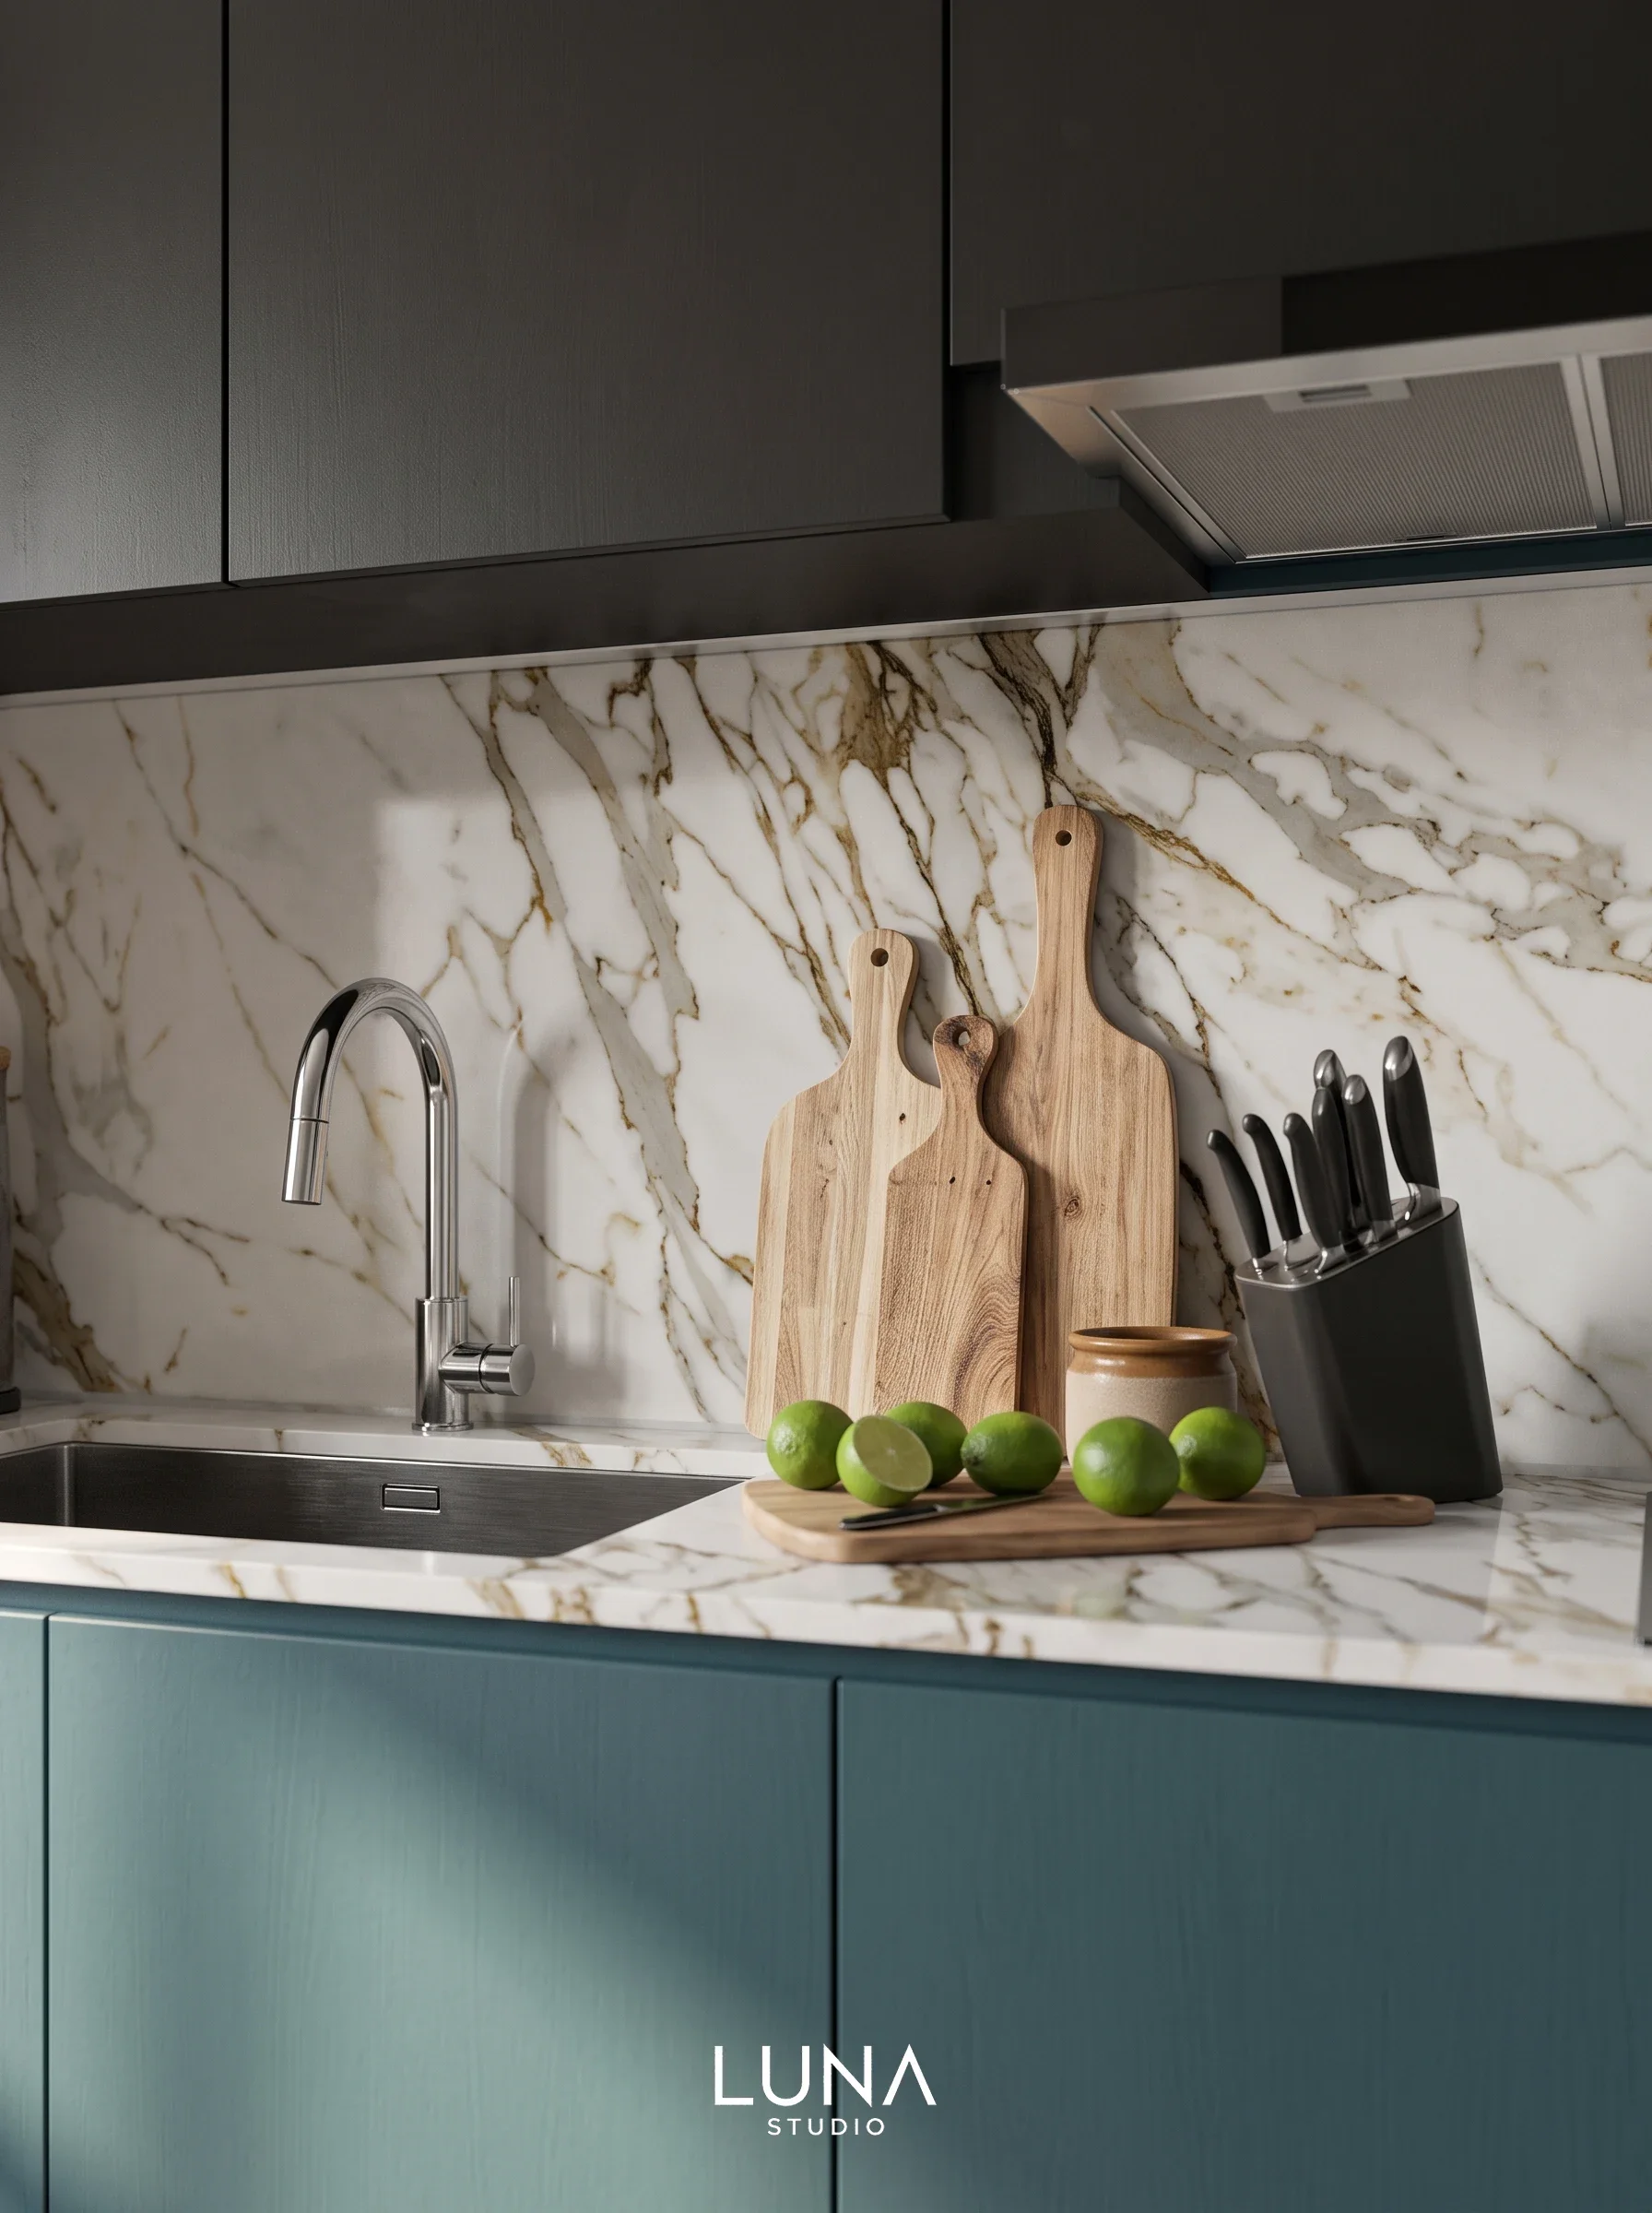
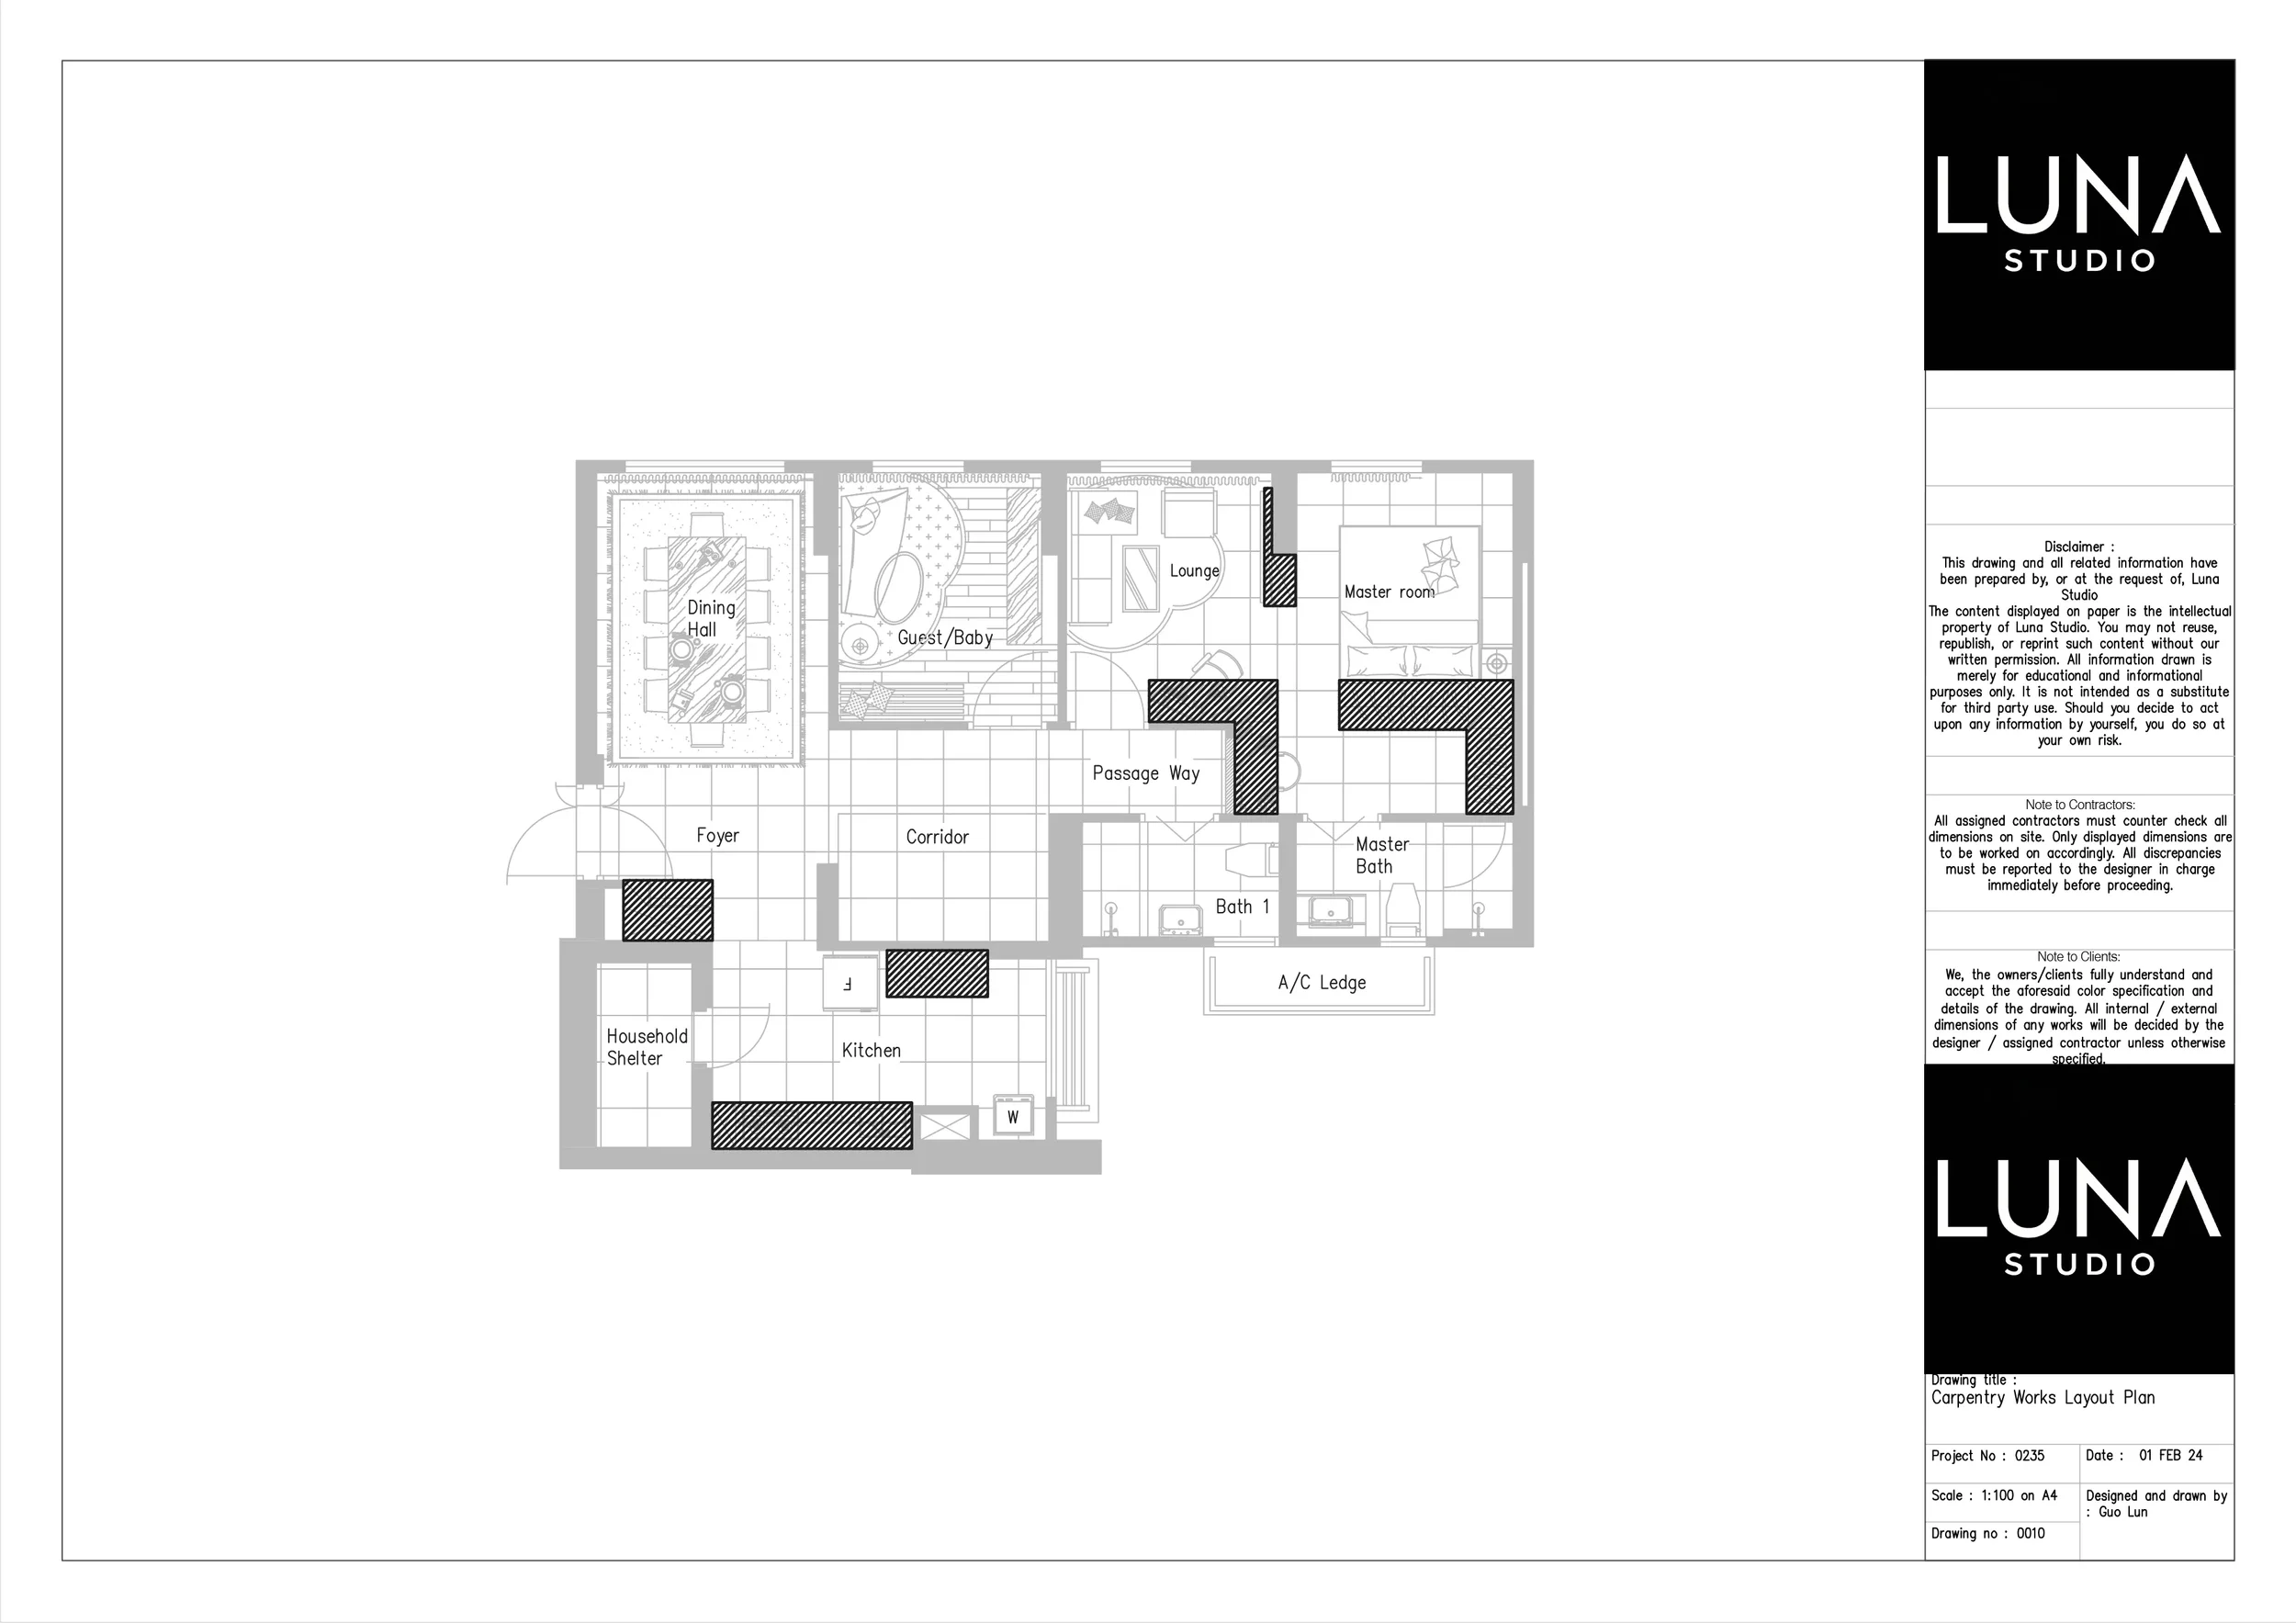
The plan created the room.
The drawings made it buildable.
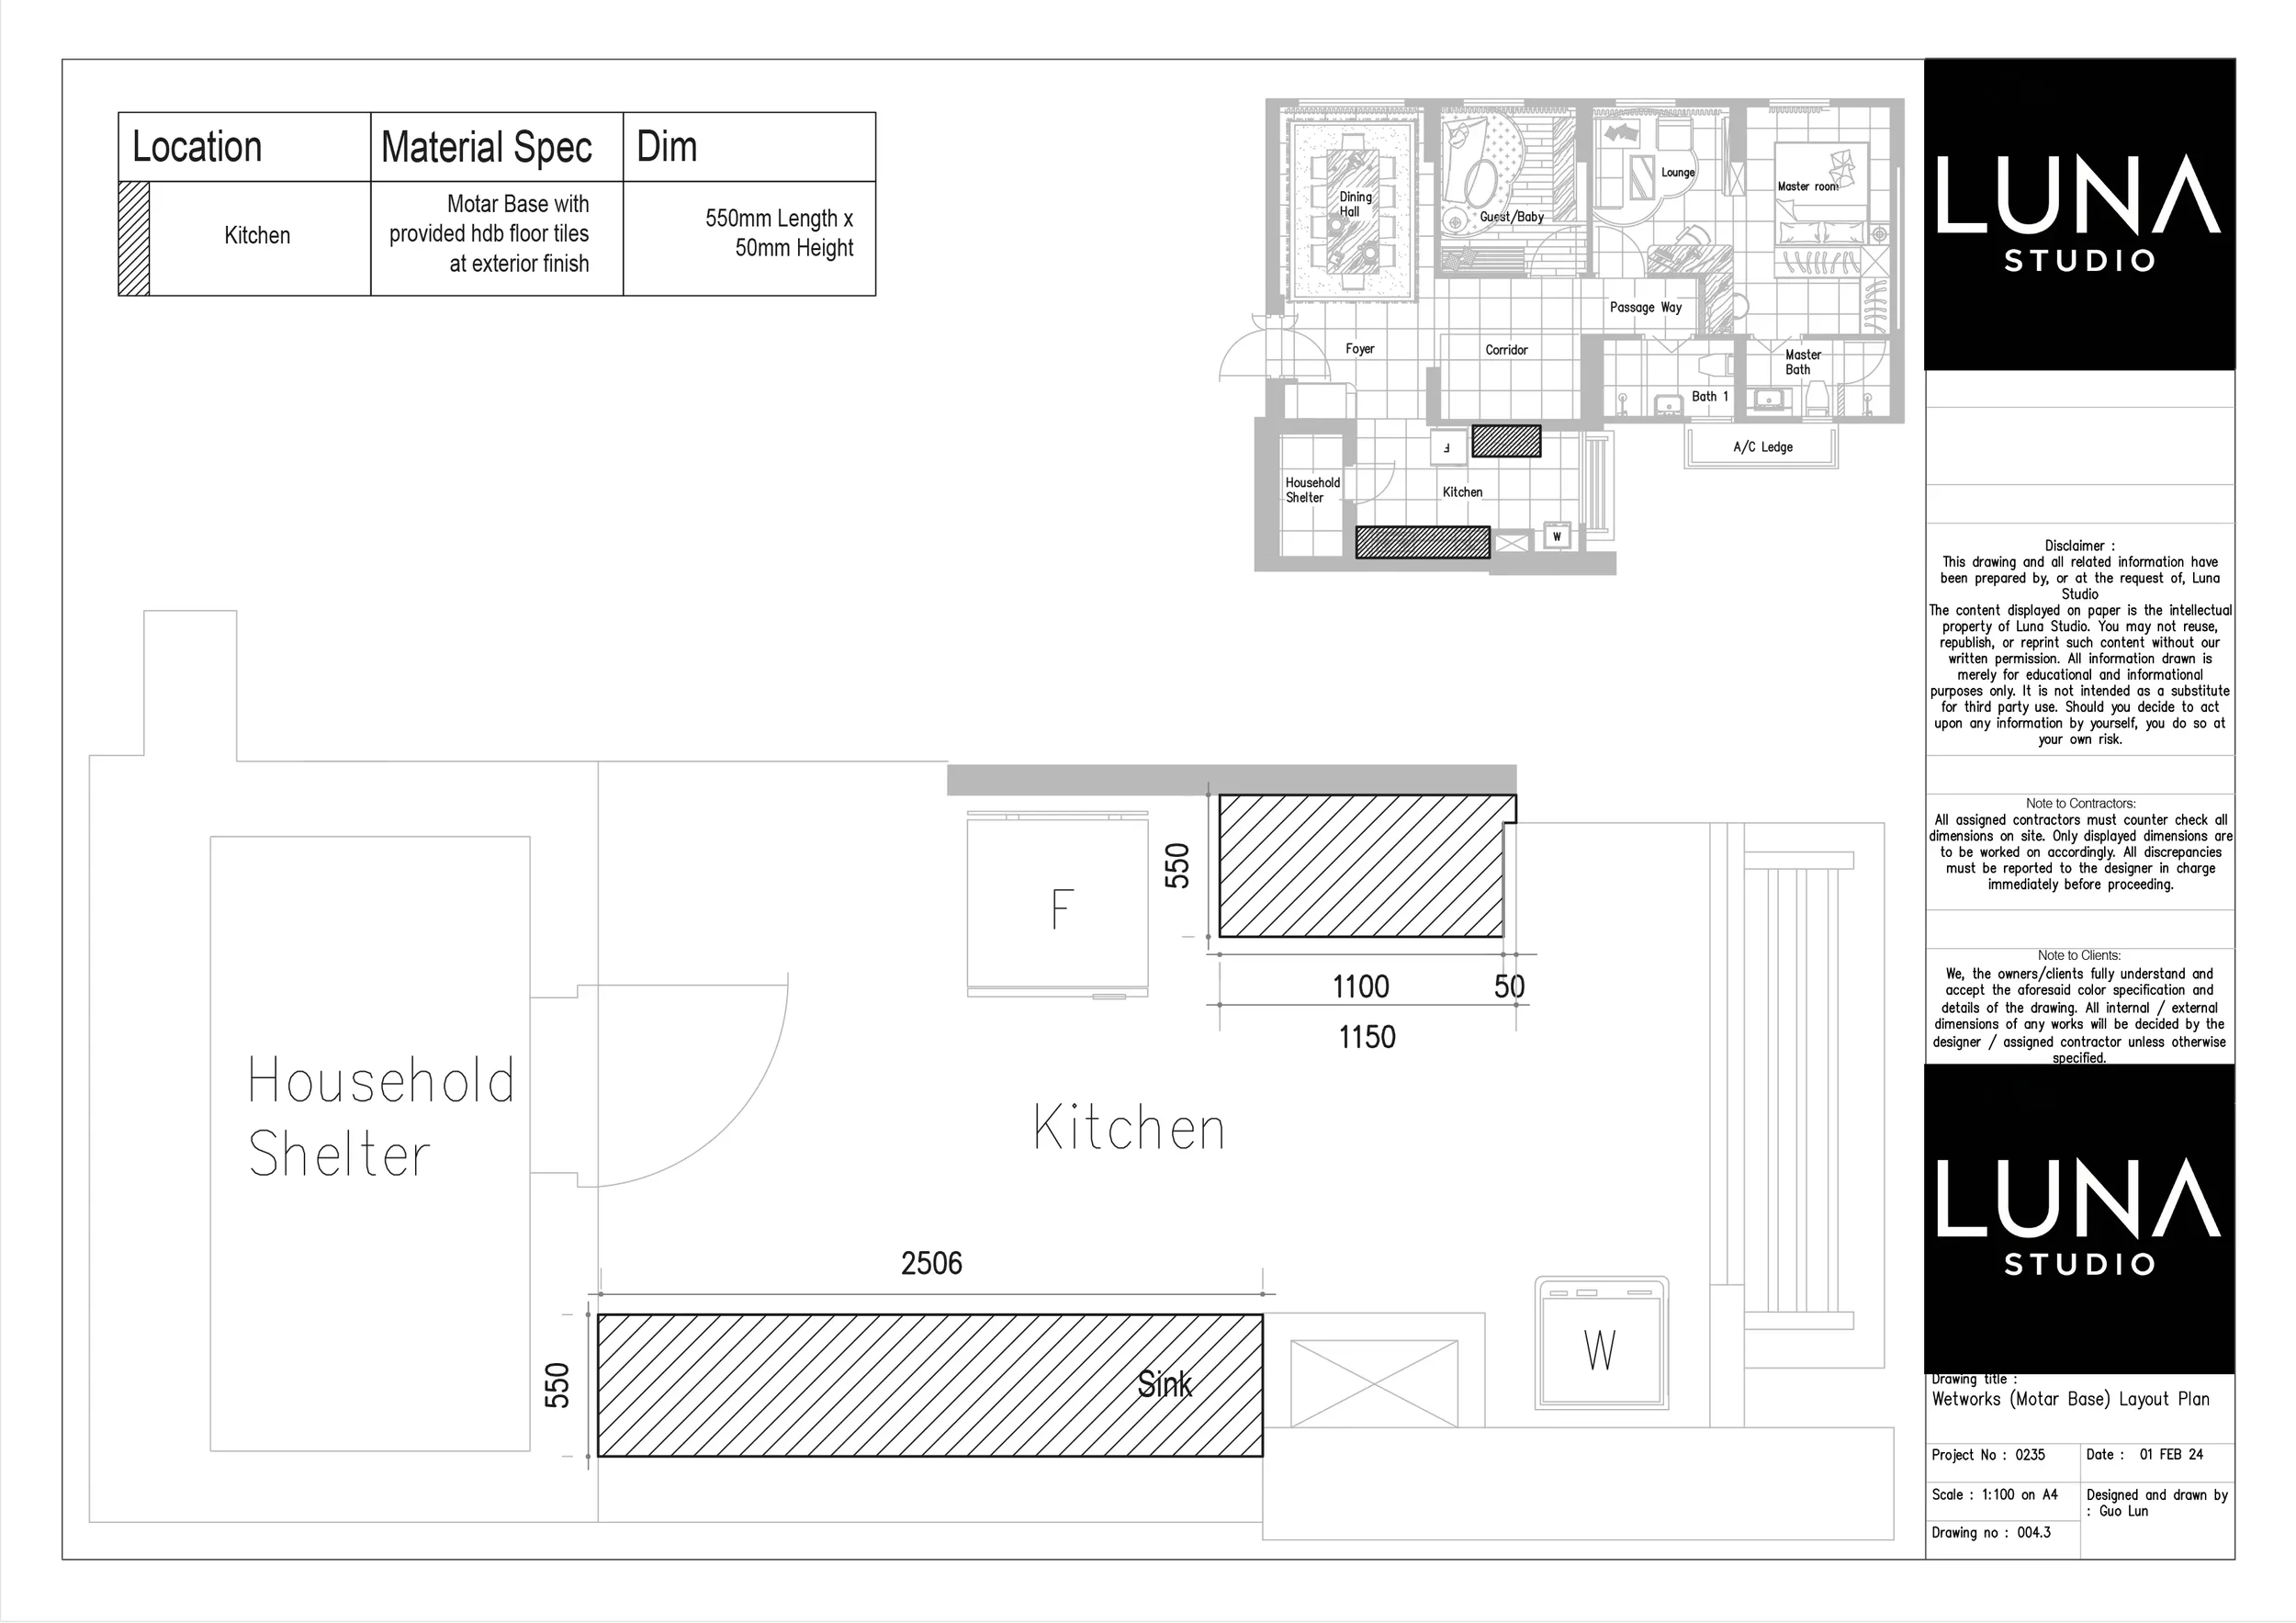
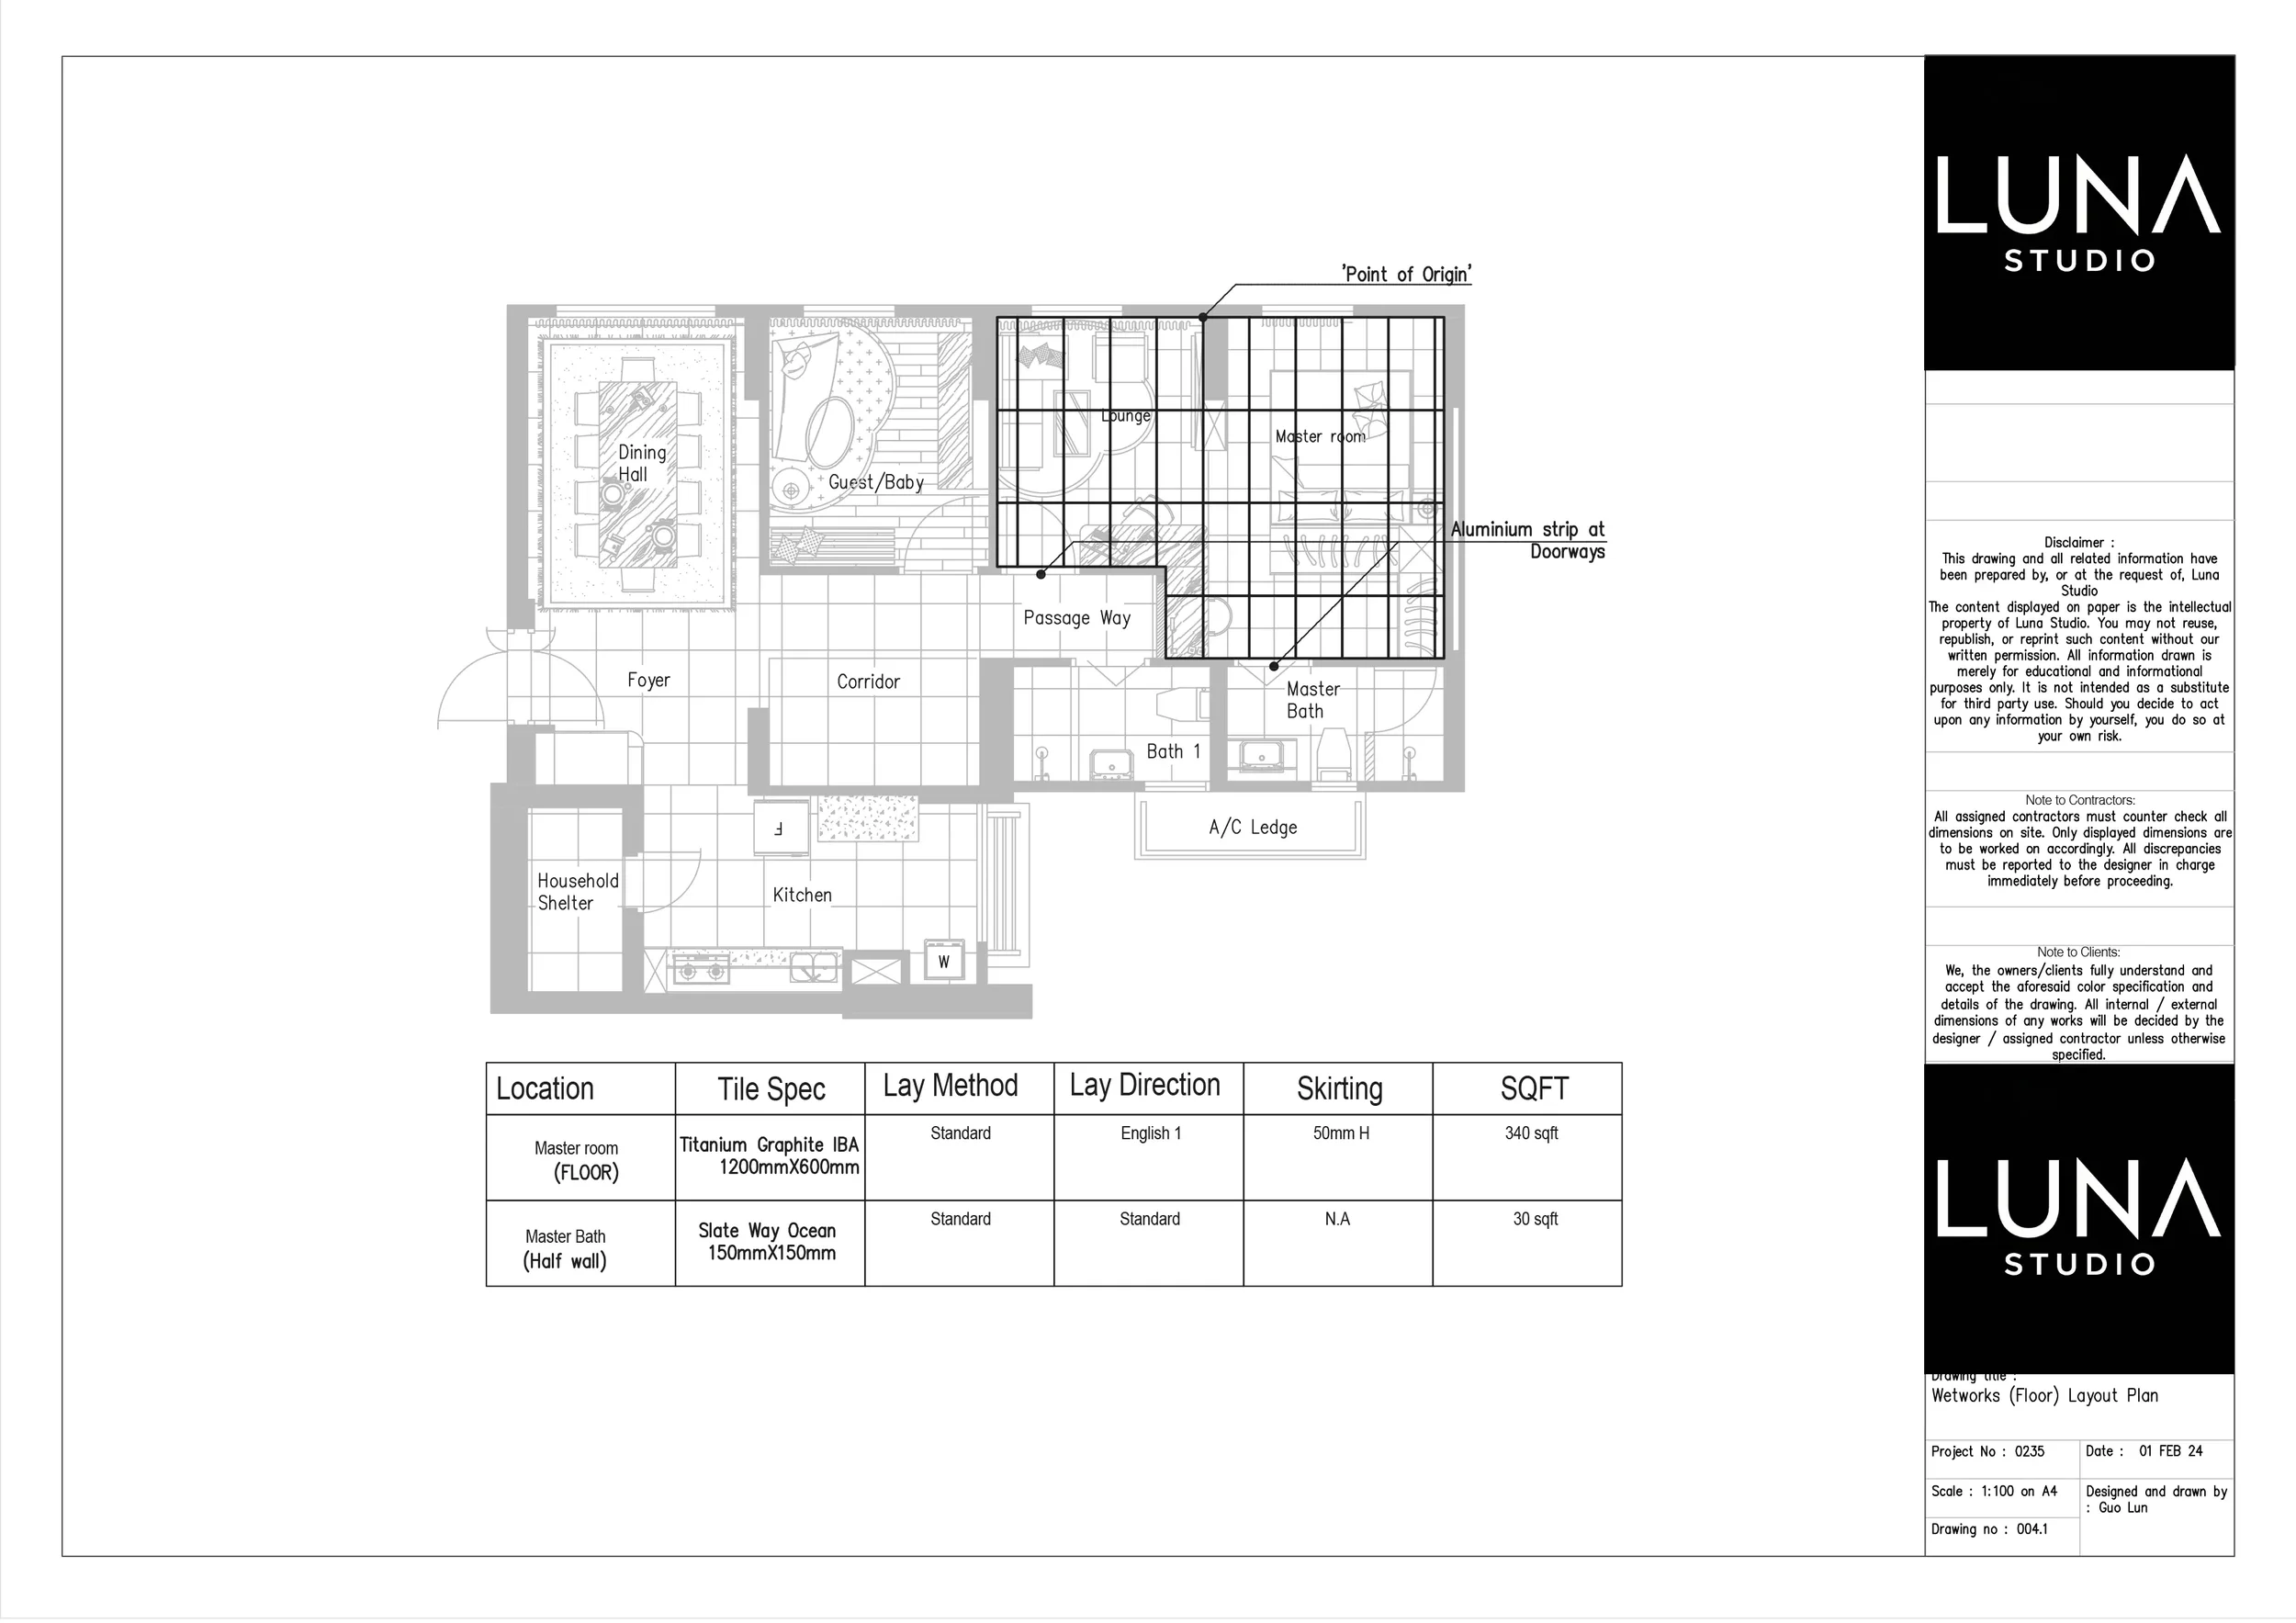
A change this unusual has to exist at more than floor-plan level. The new wardrobe, study, TV wall, services and built elements were translated into detailed drawings so the design could be measured, fabricated and installed.
Spatial Reconfiguration
Existing and proposed plans were developed around a revised functional programme.
Construction Documentation
The reconfigured plan was translated into demolition, masonry, joinery and service information.
Joinery Development
The wardrobe, study and TV wall were detailed as architectural elements rather than generic furniture.
Project Coordination
The design was carried into the construction programme, installation sequence and project documentation by Luna Studio.
View the complete technical drawing set
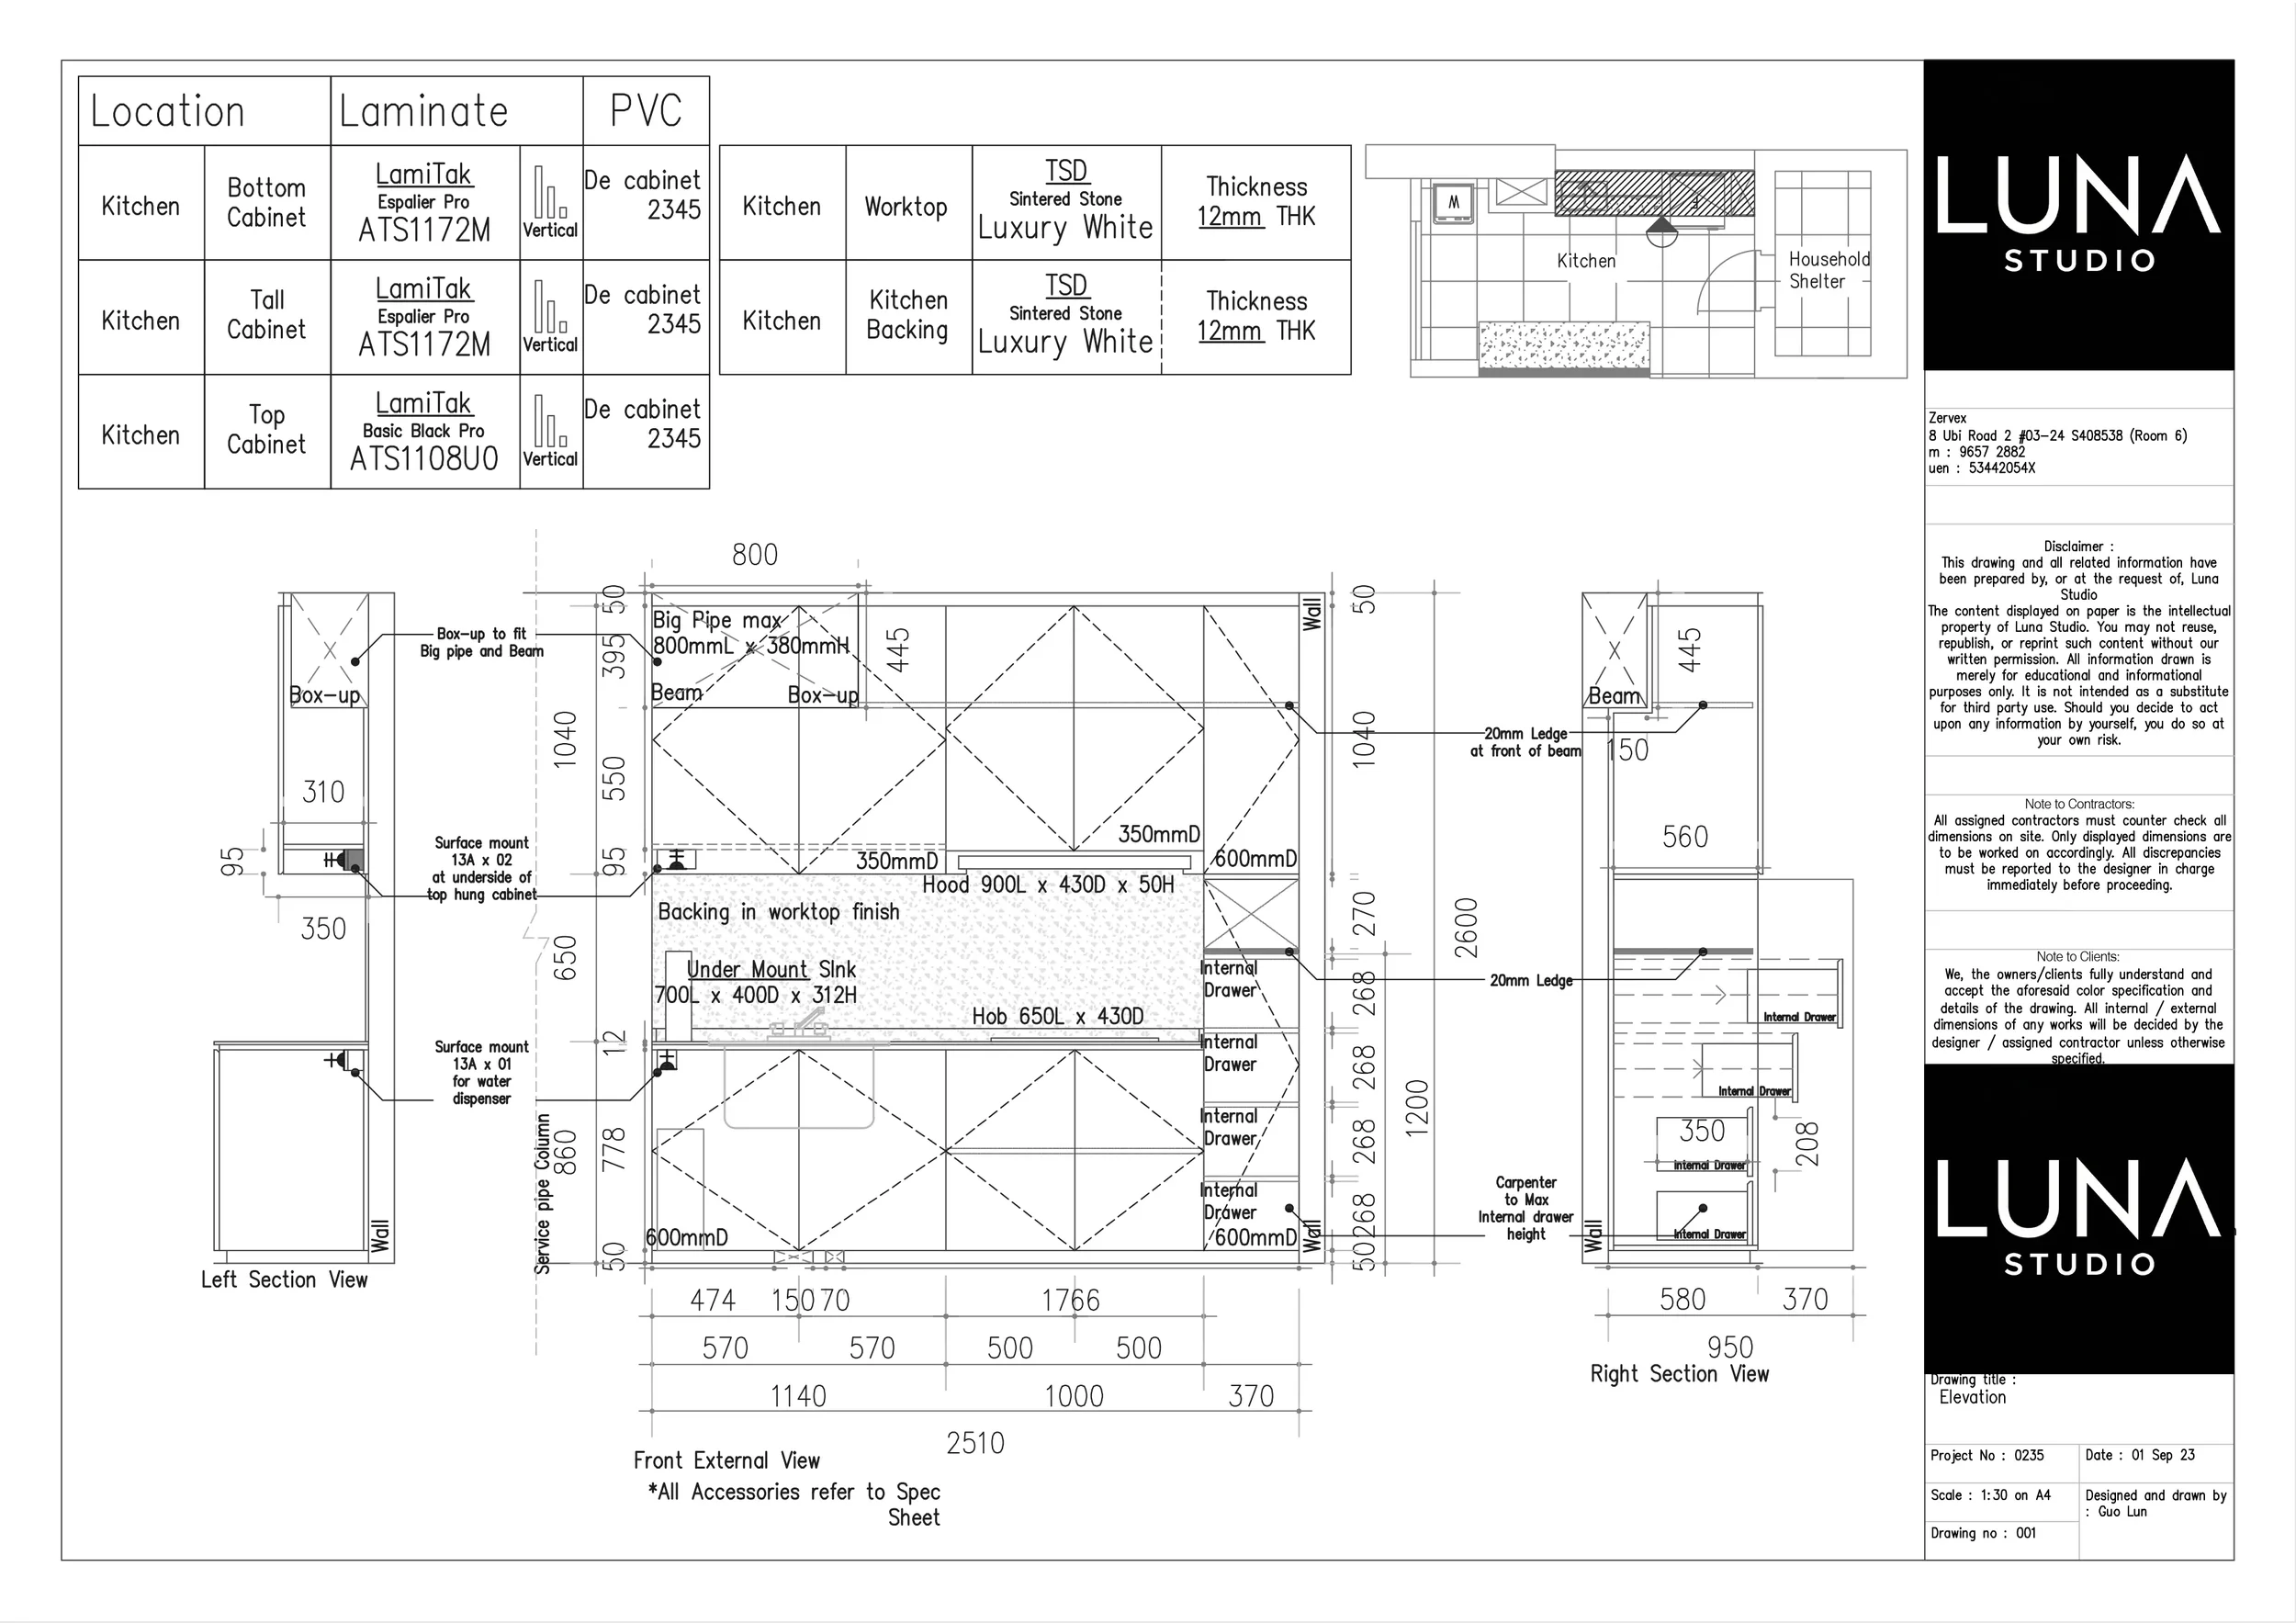
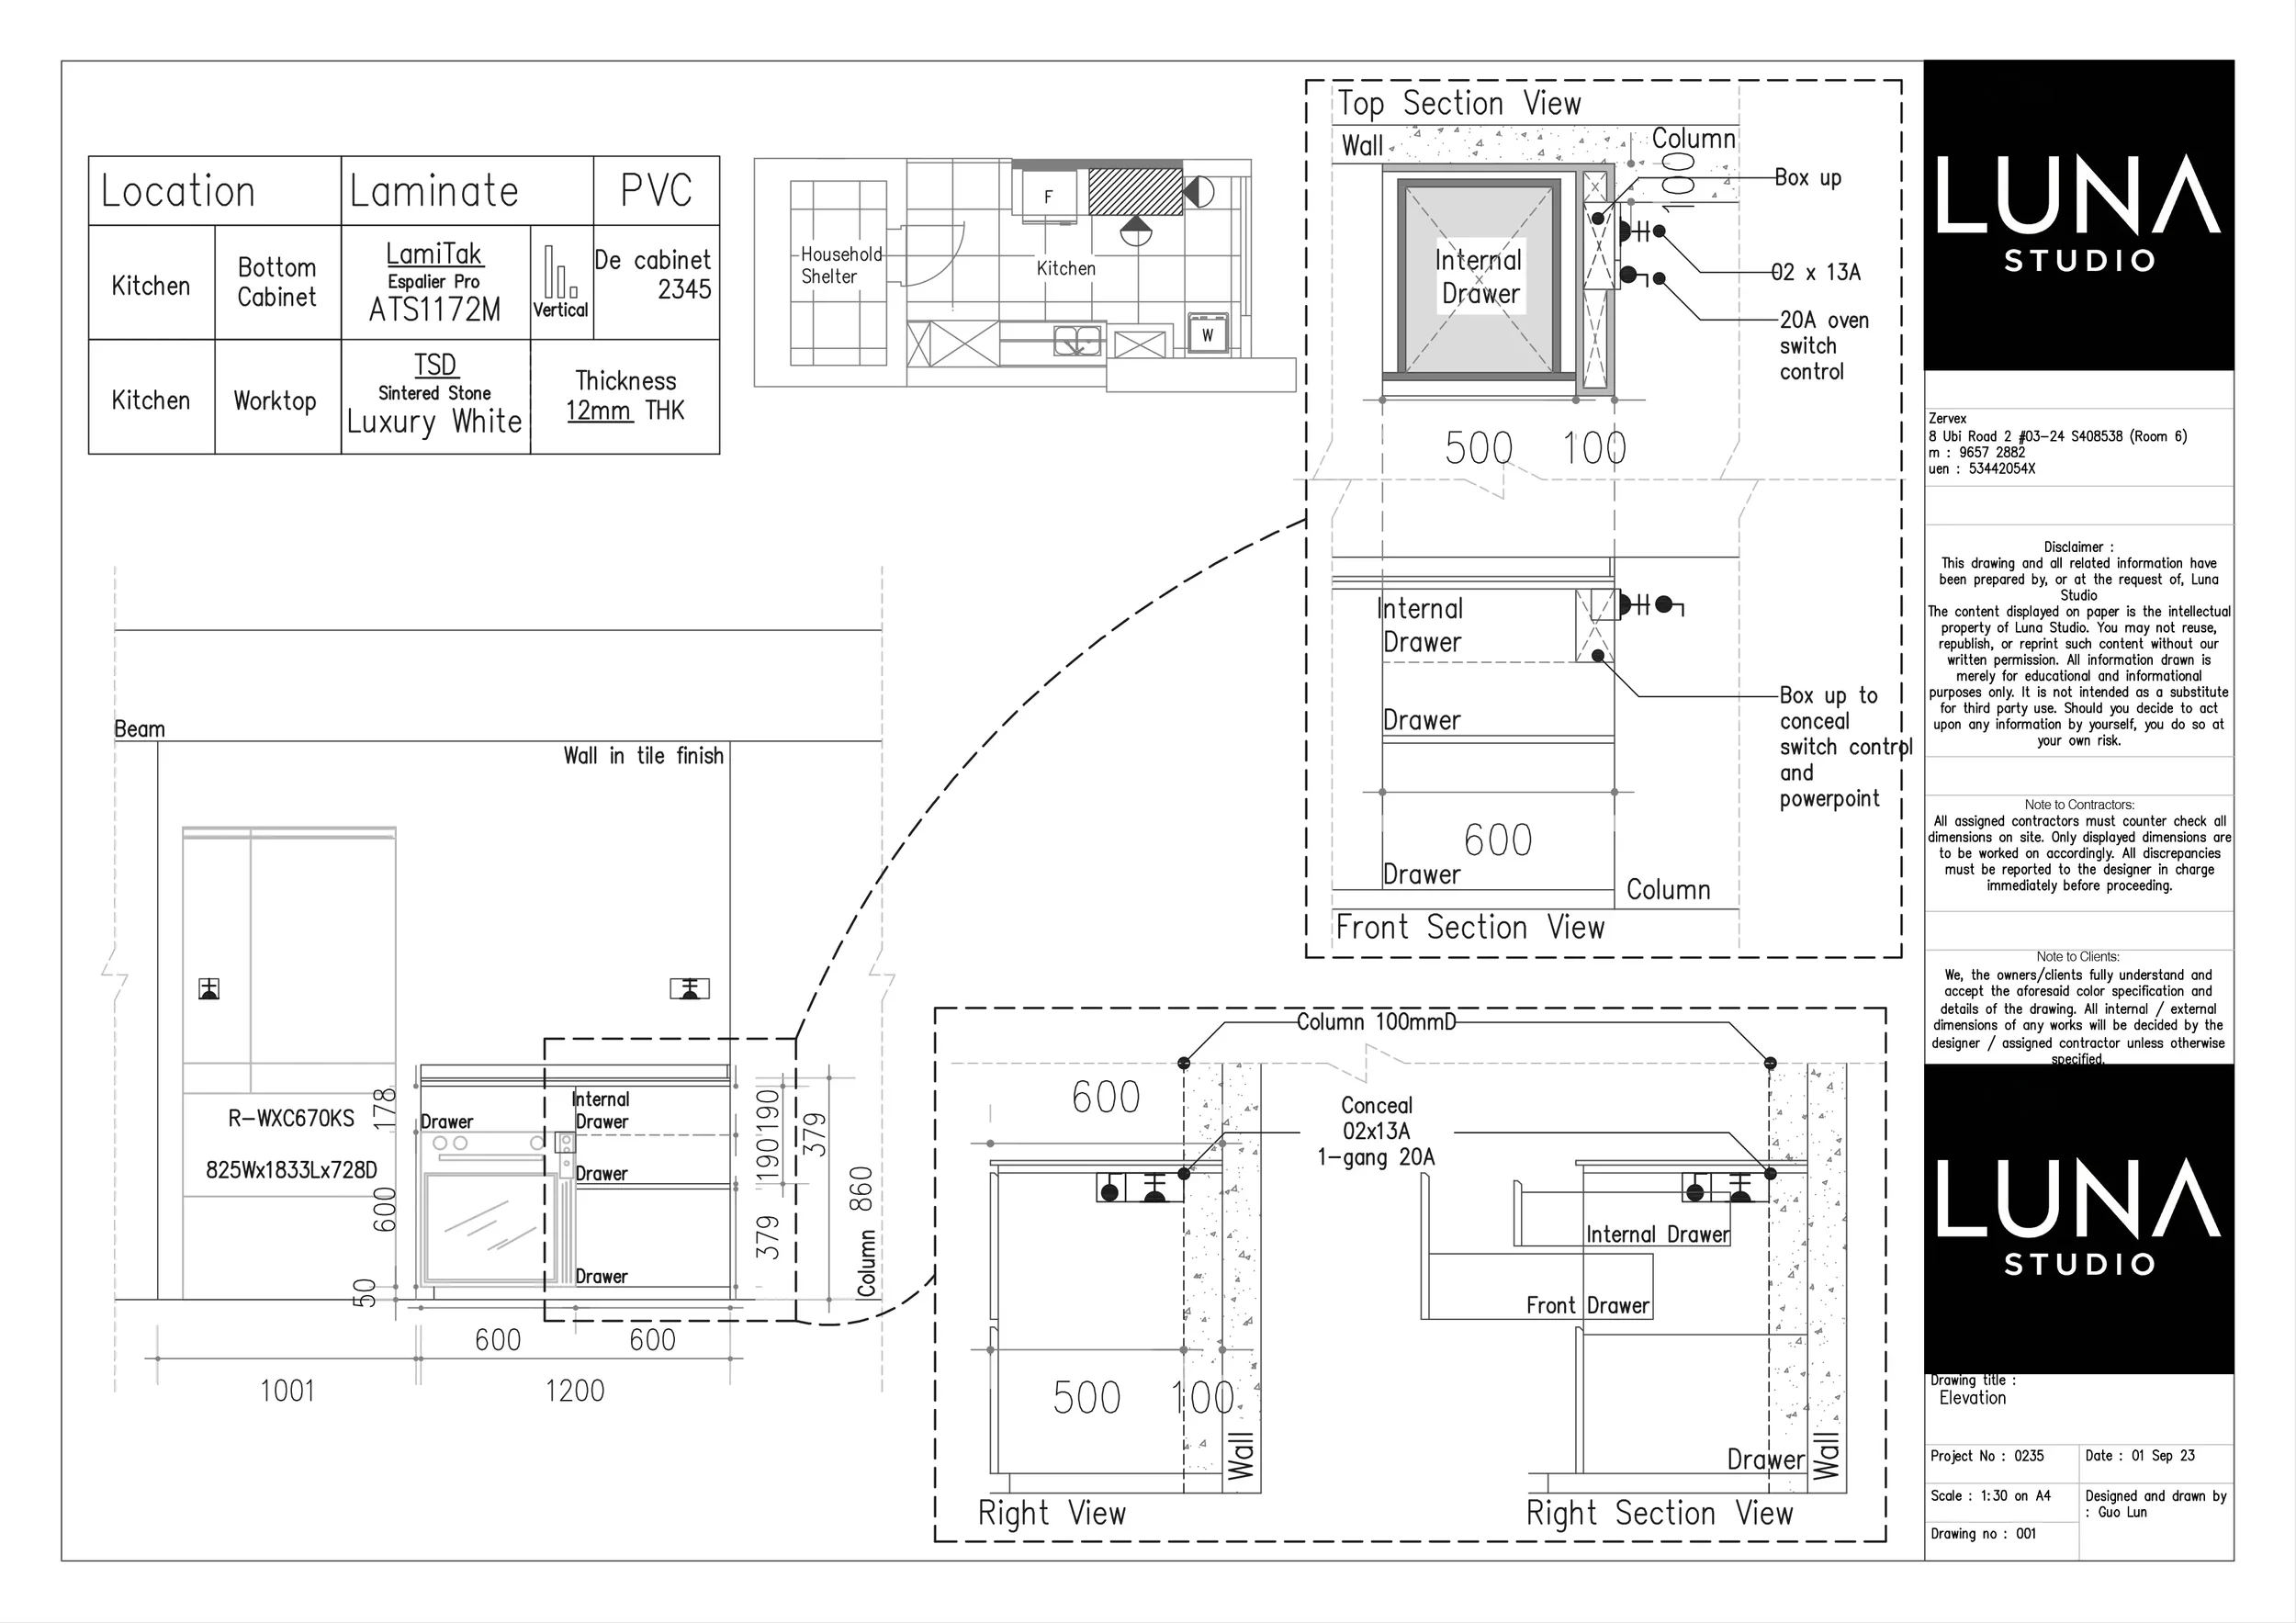
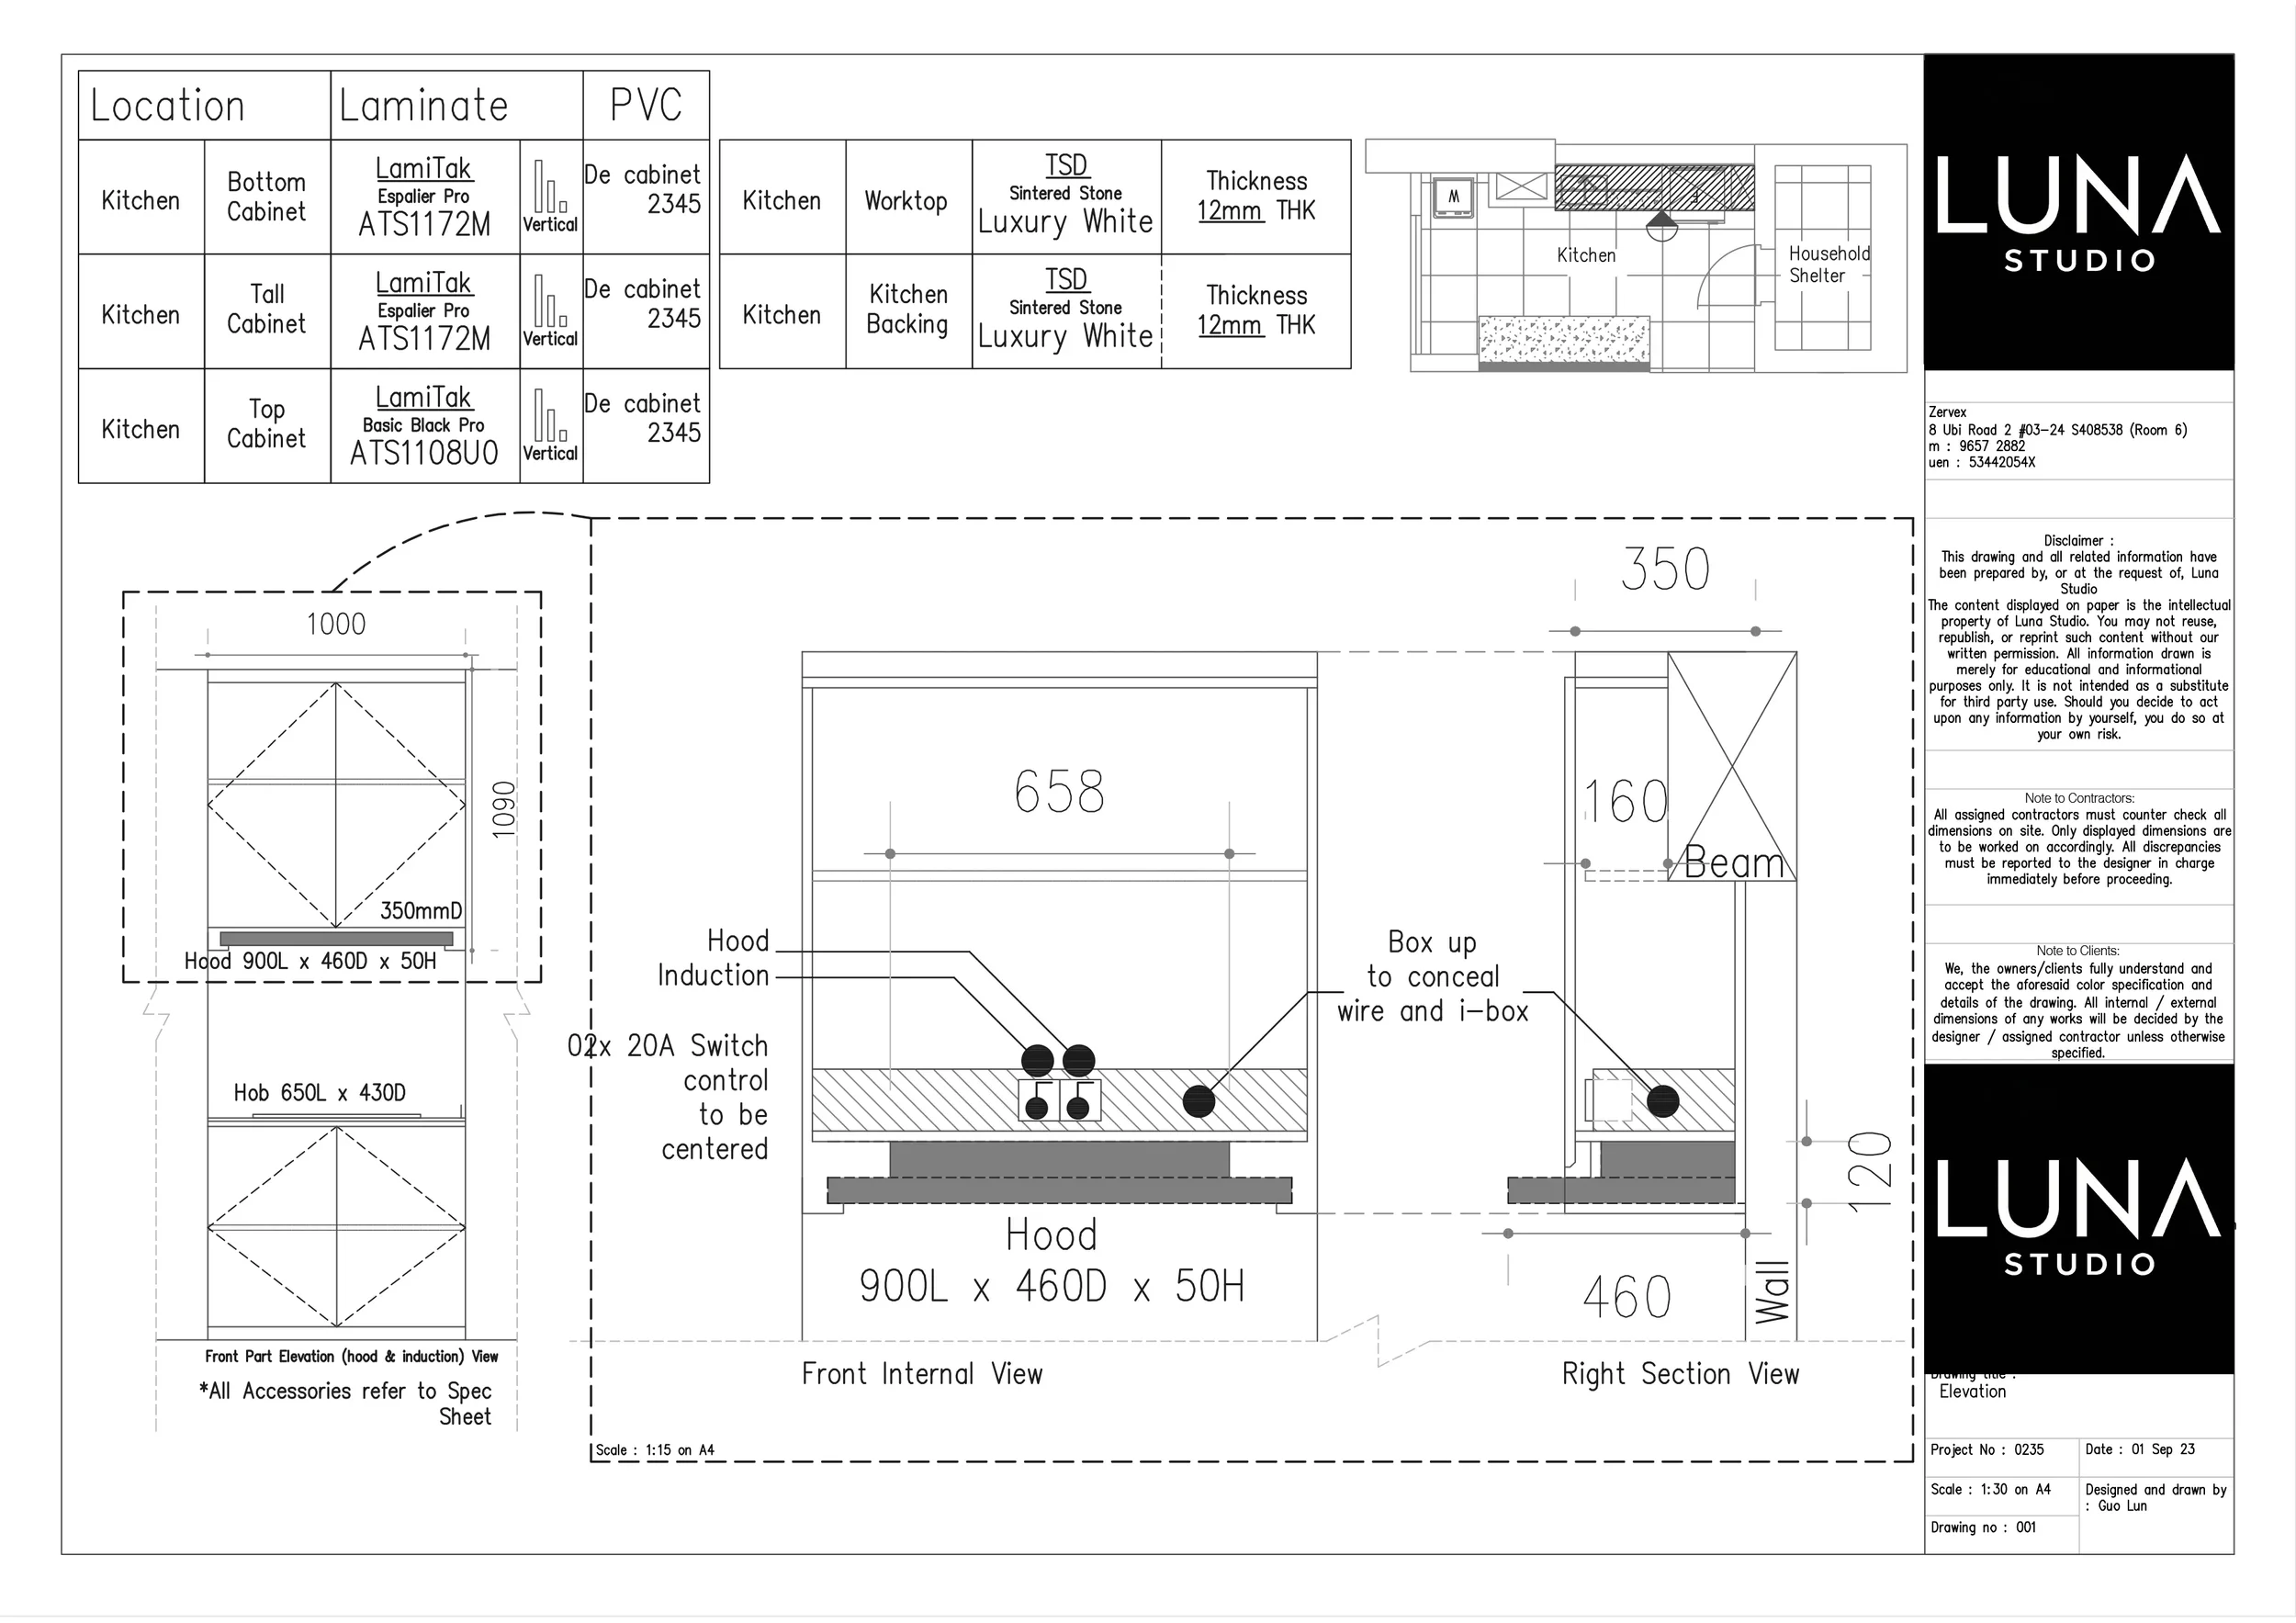
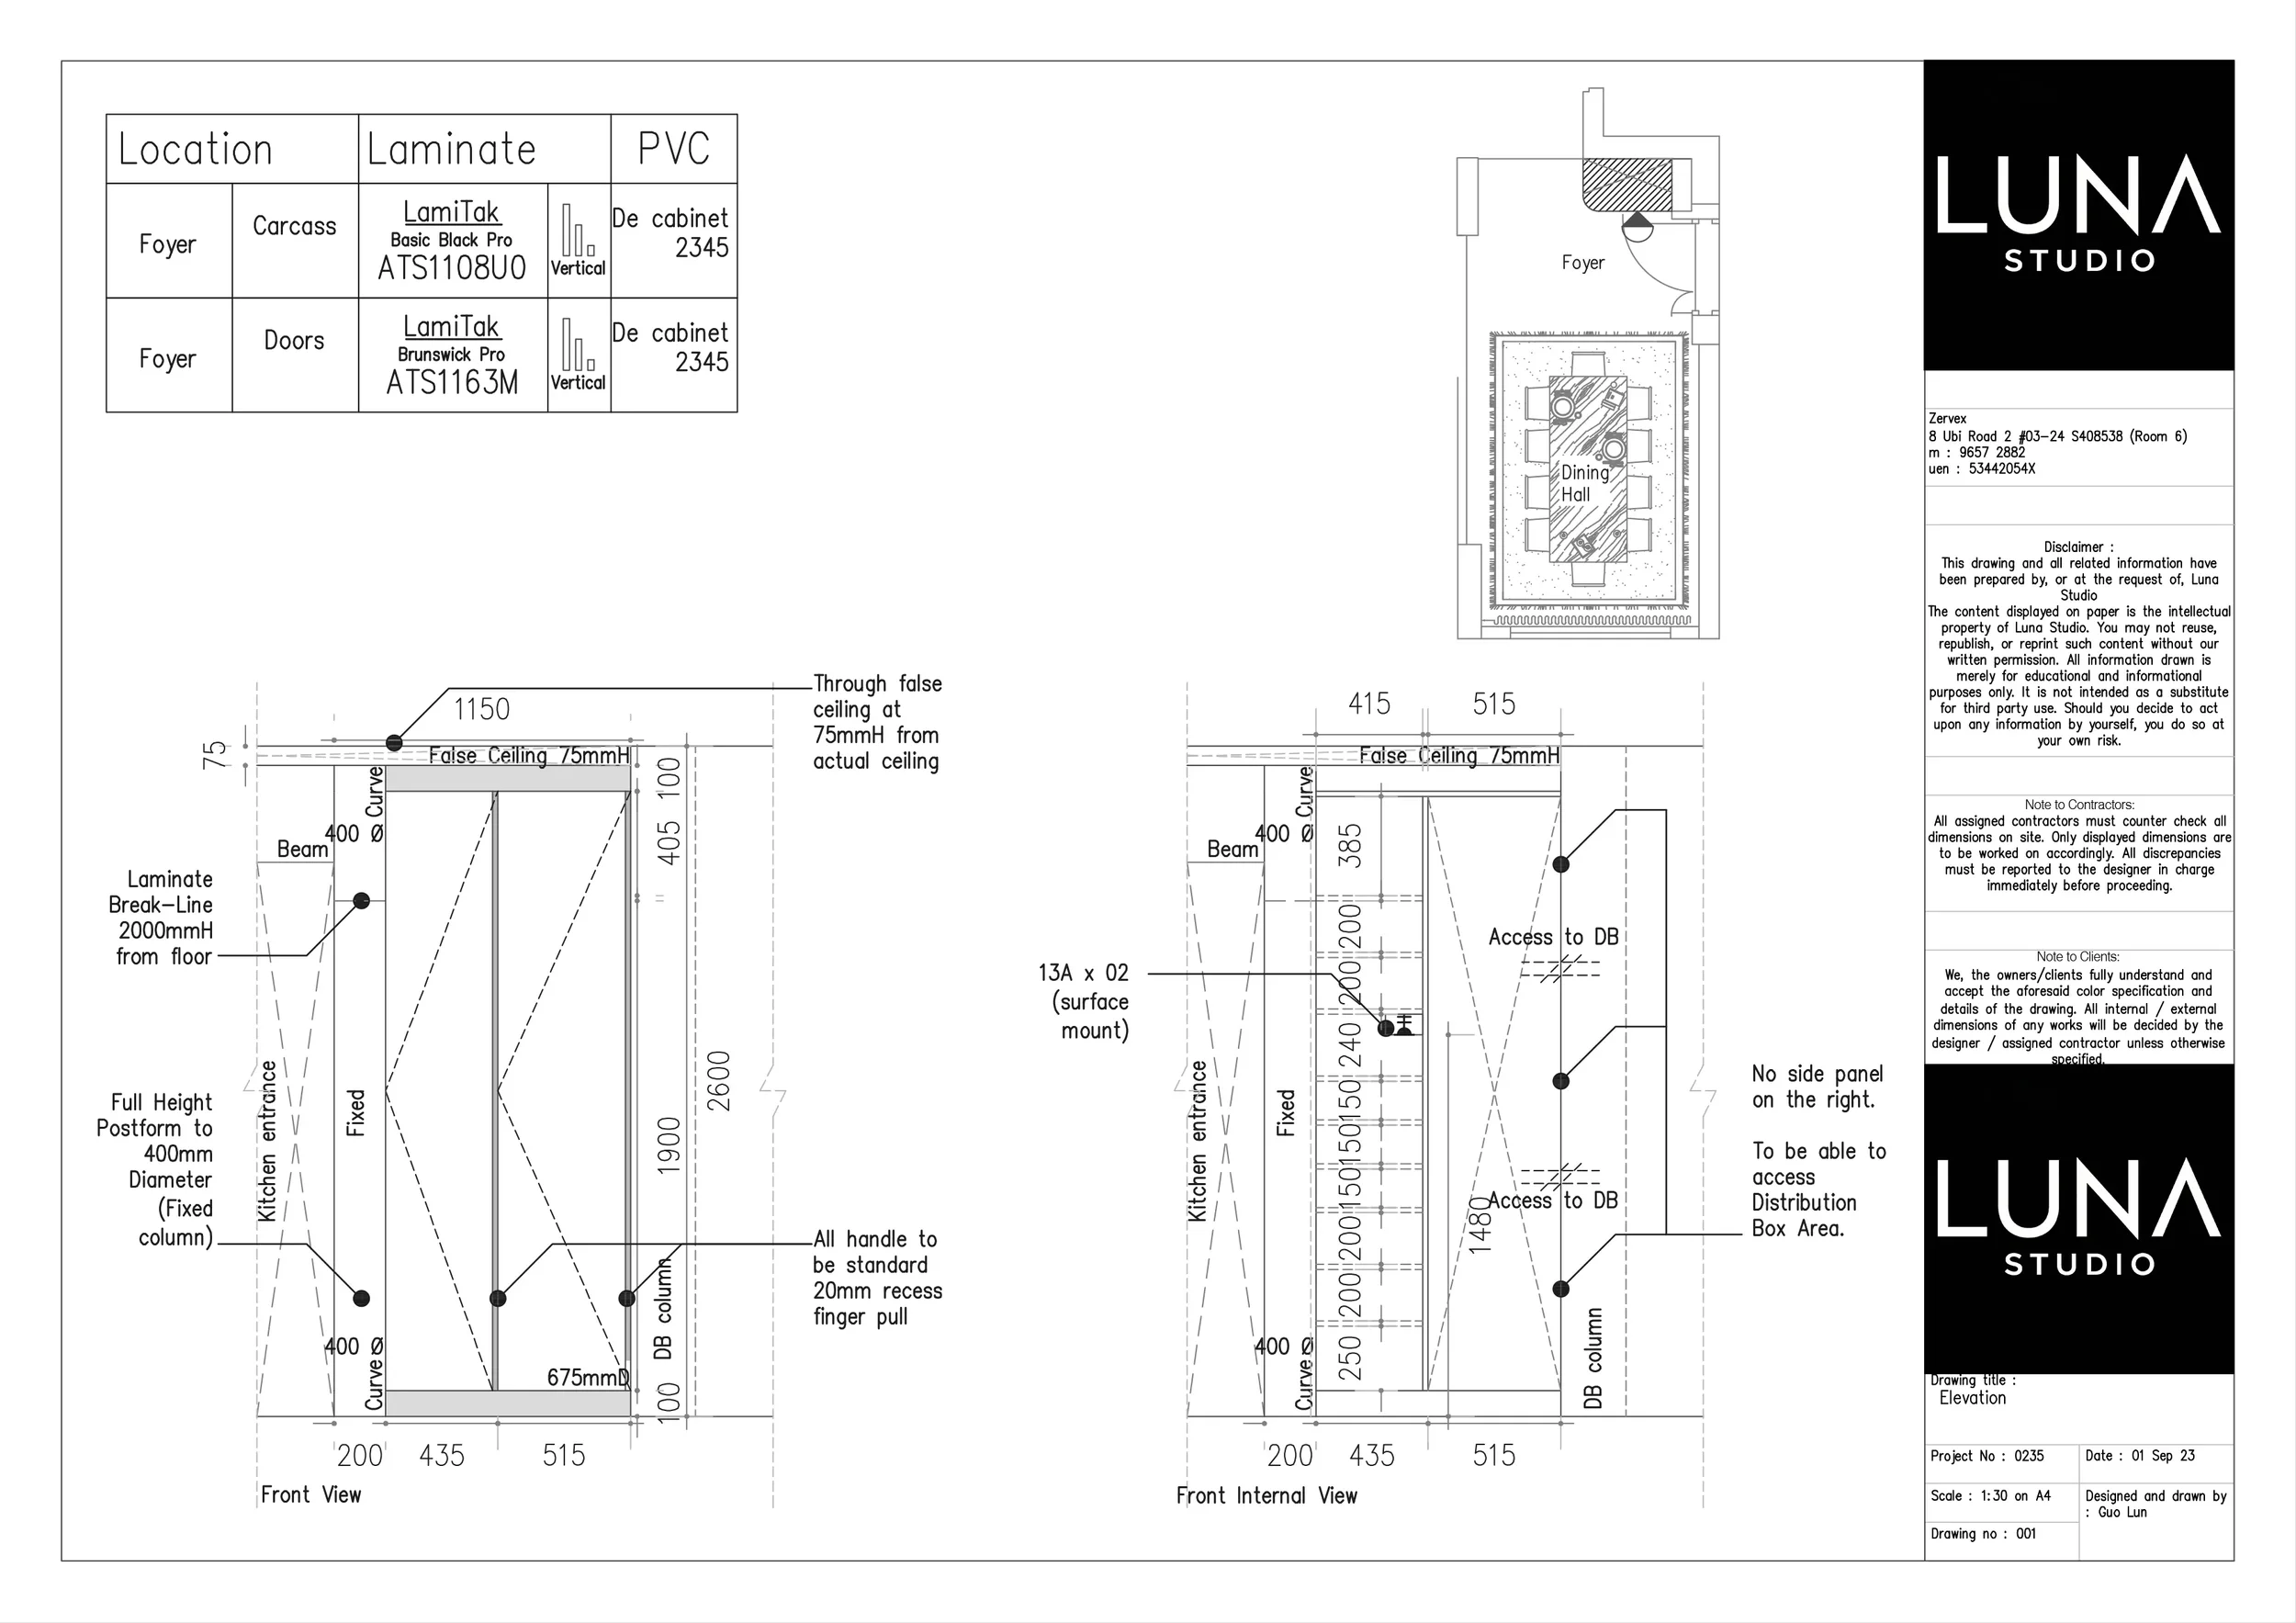
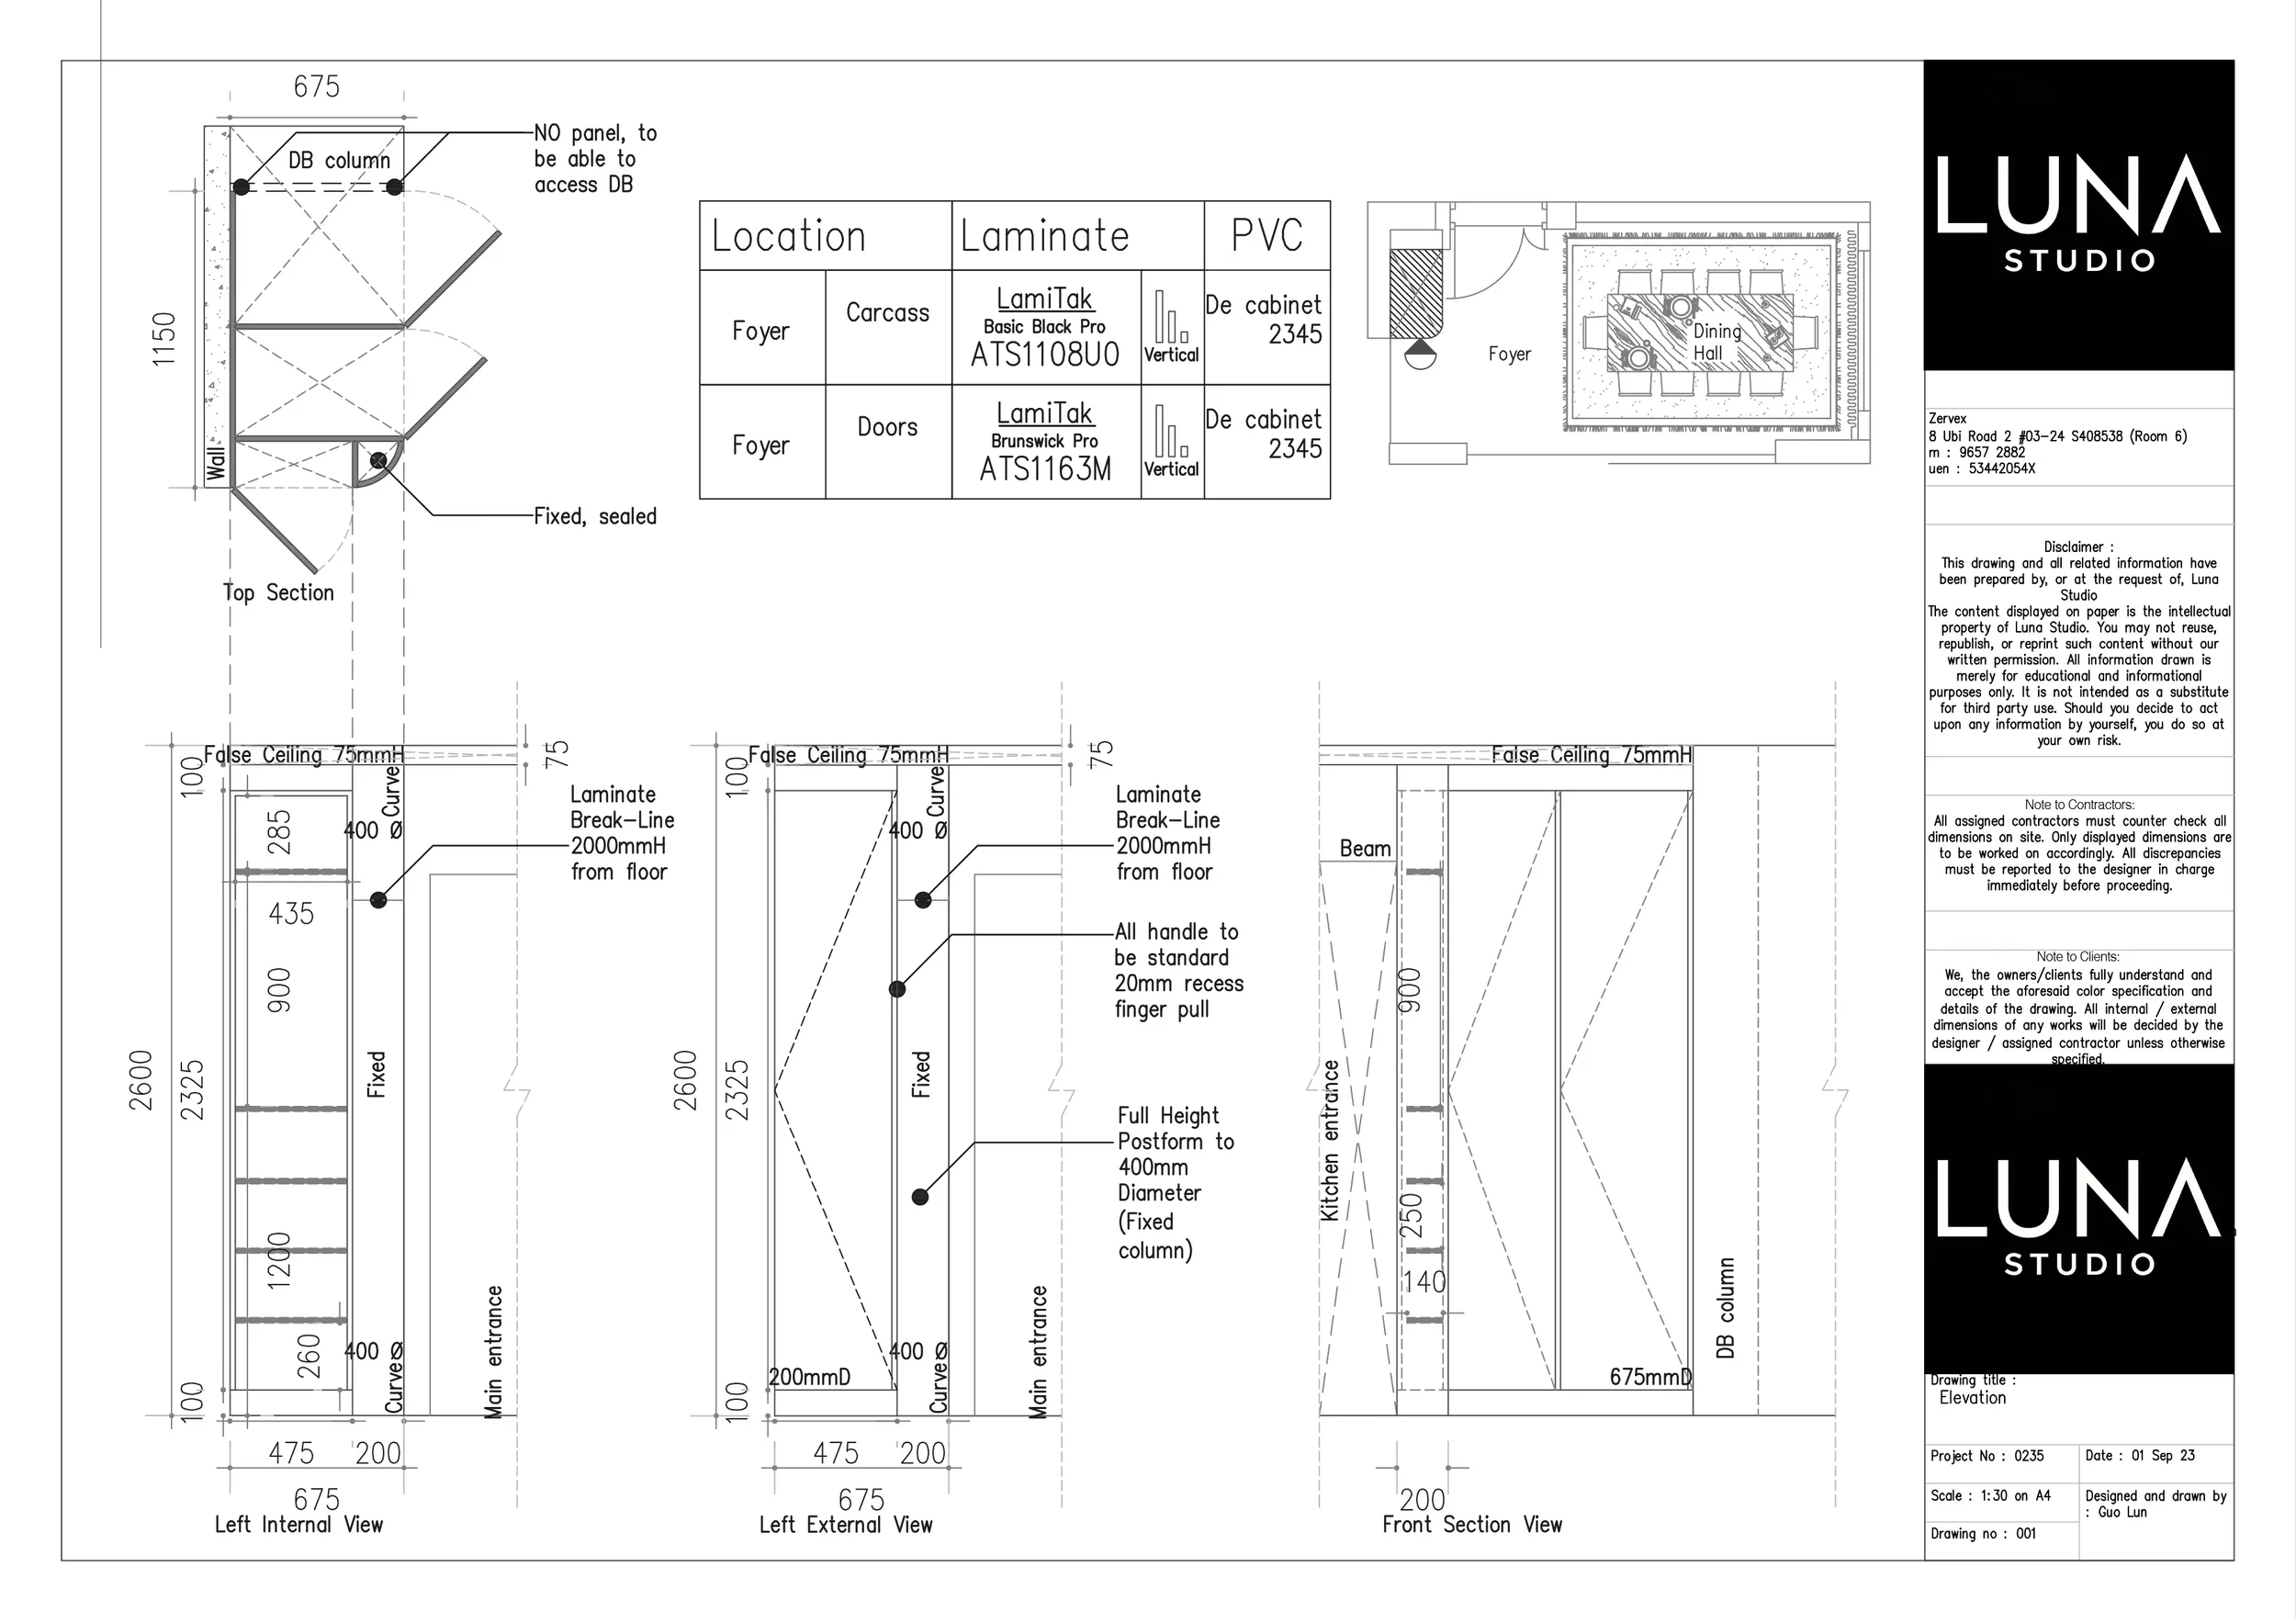
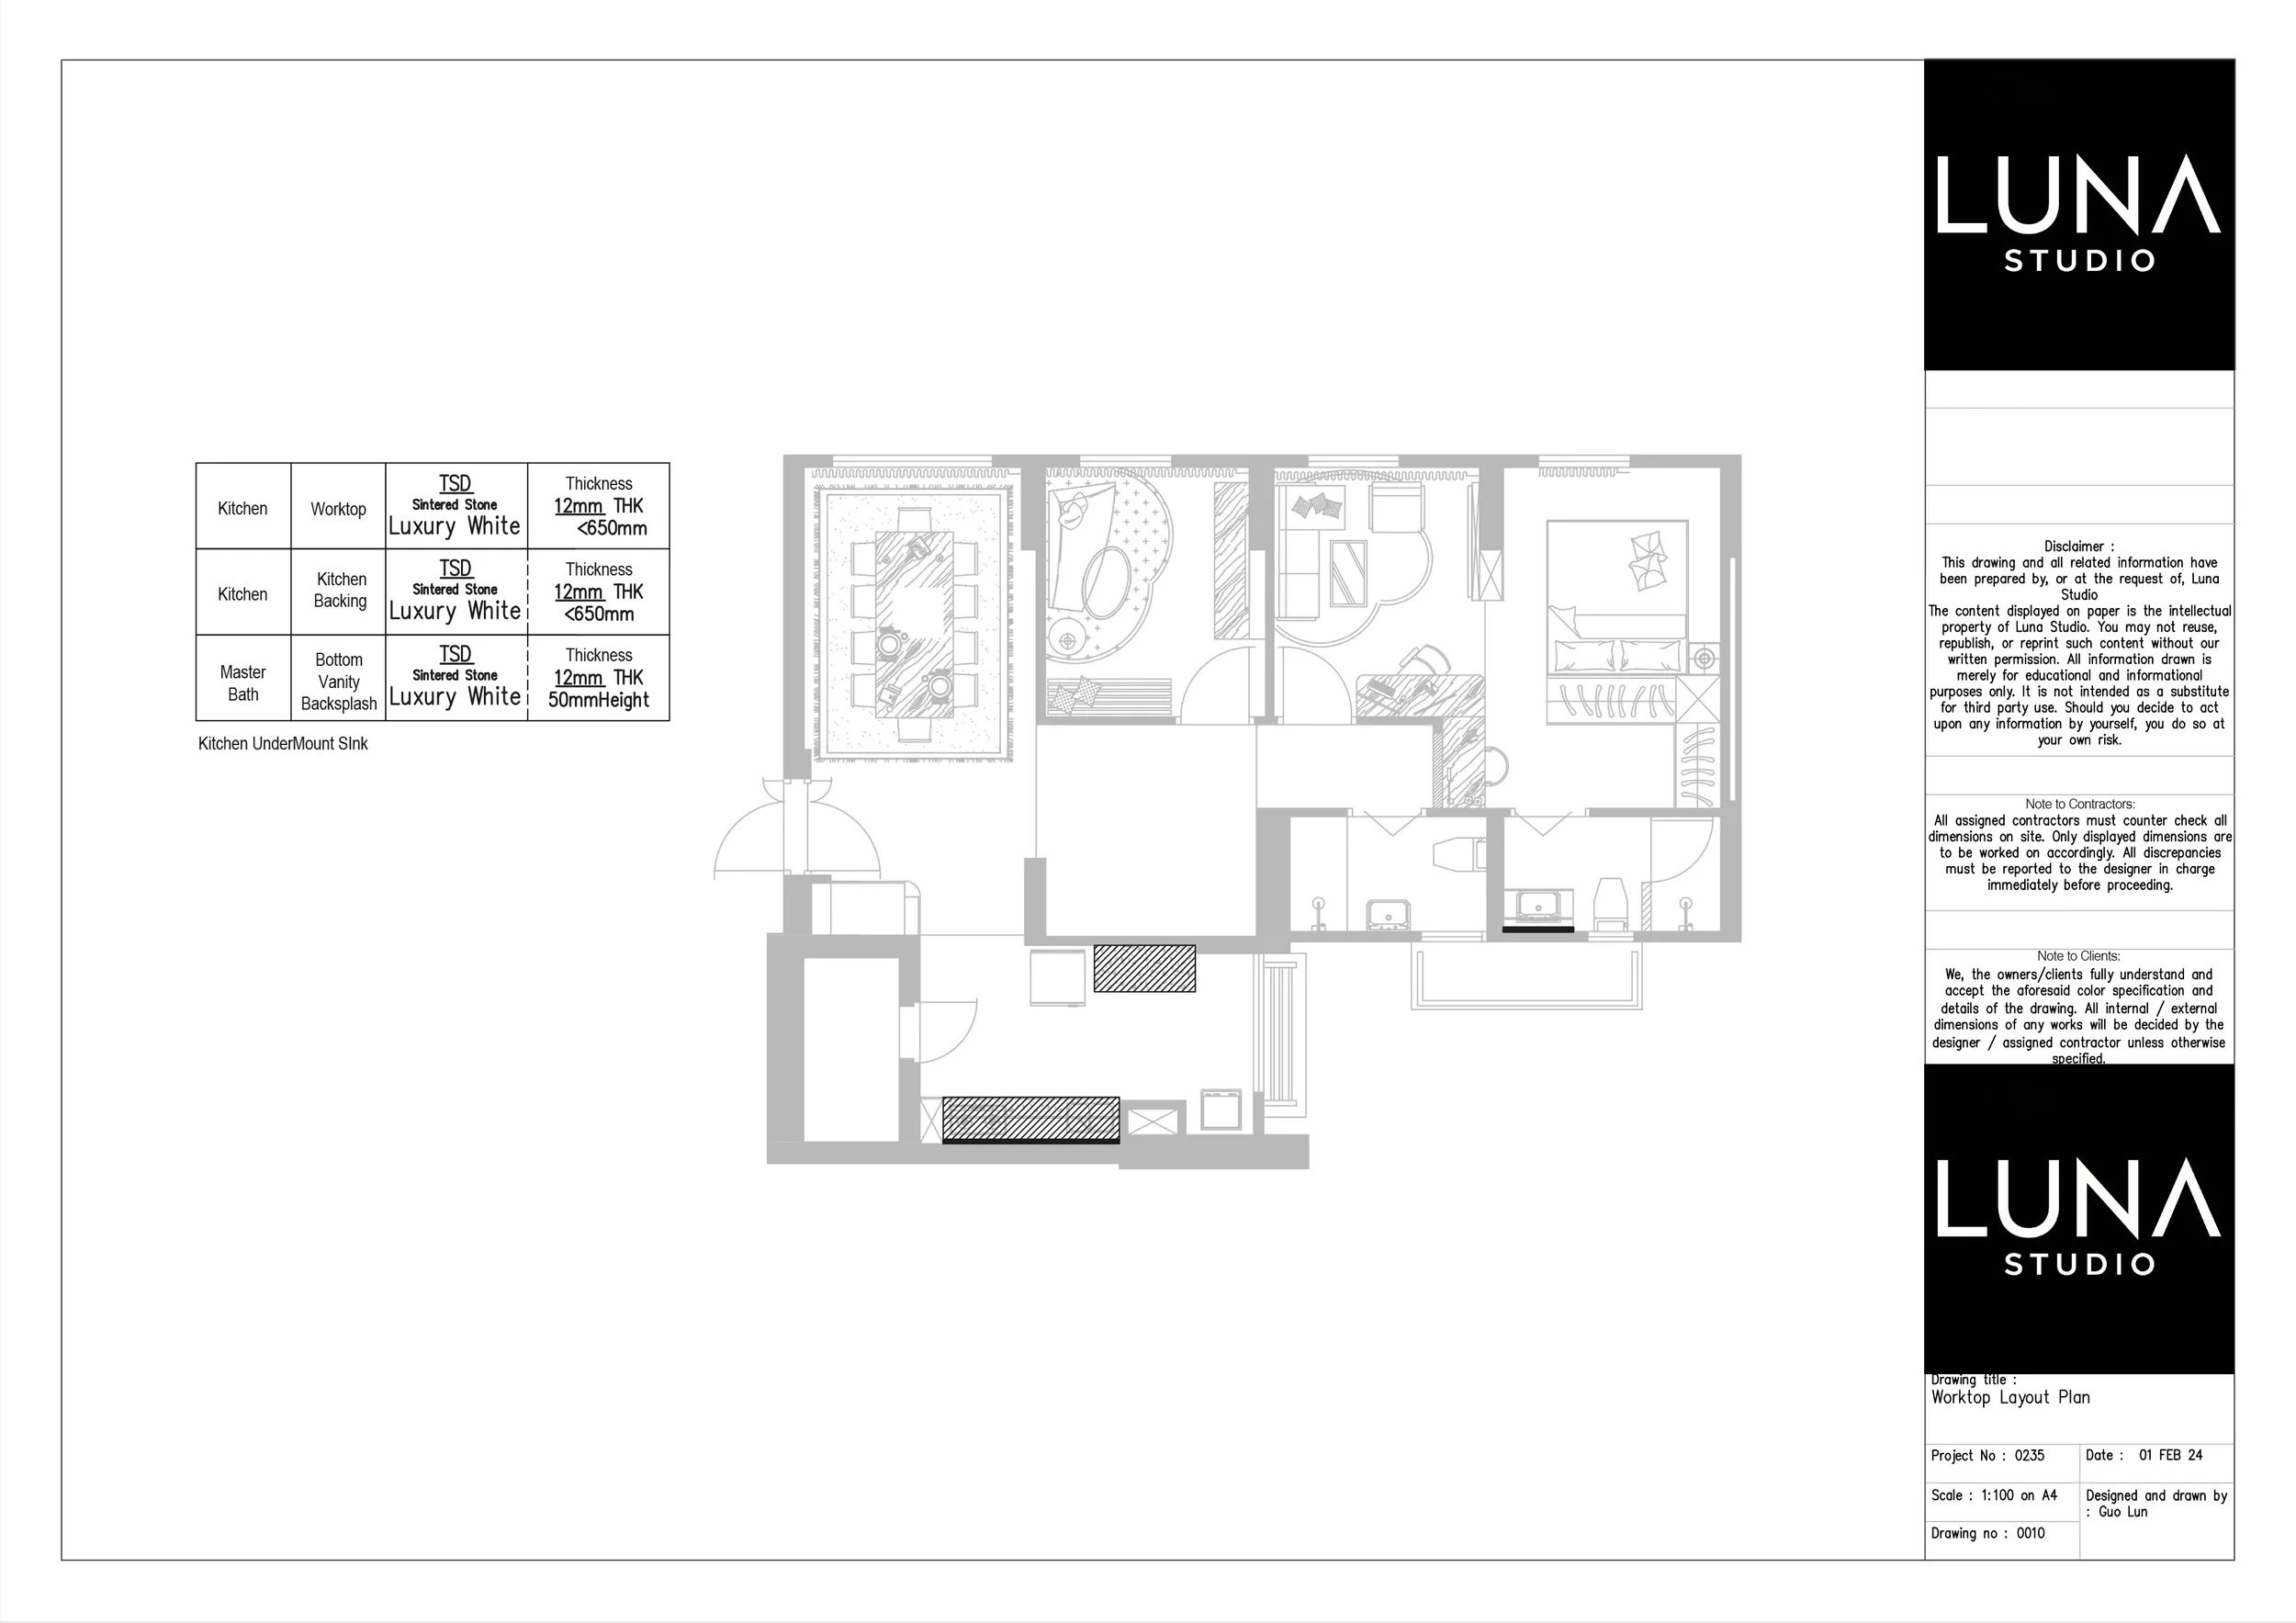
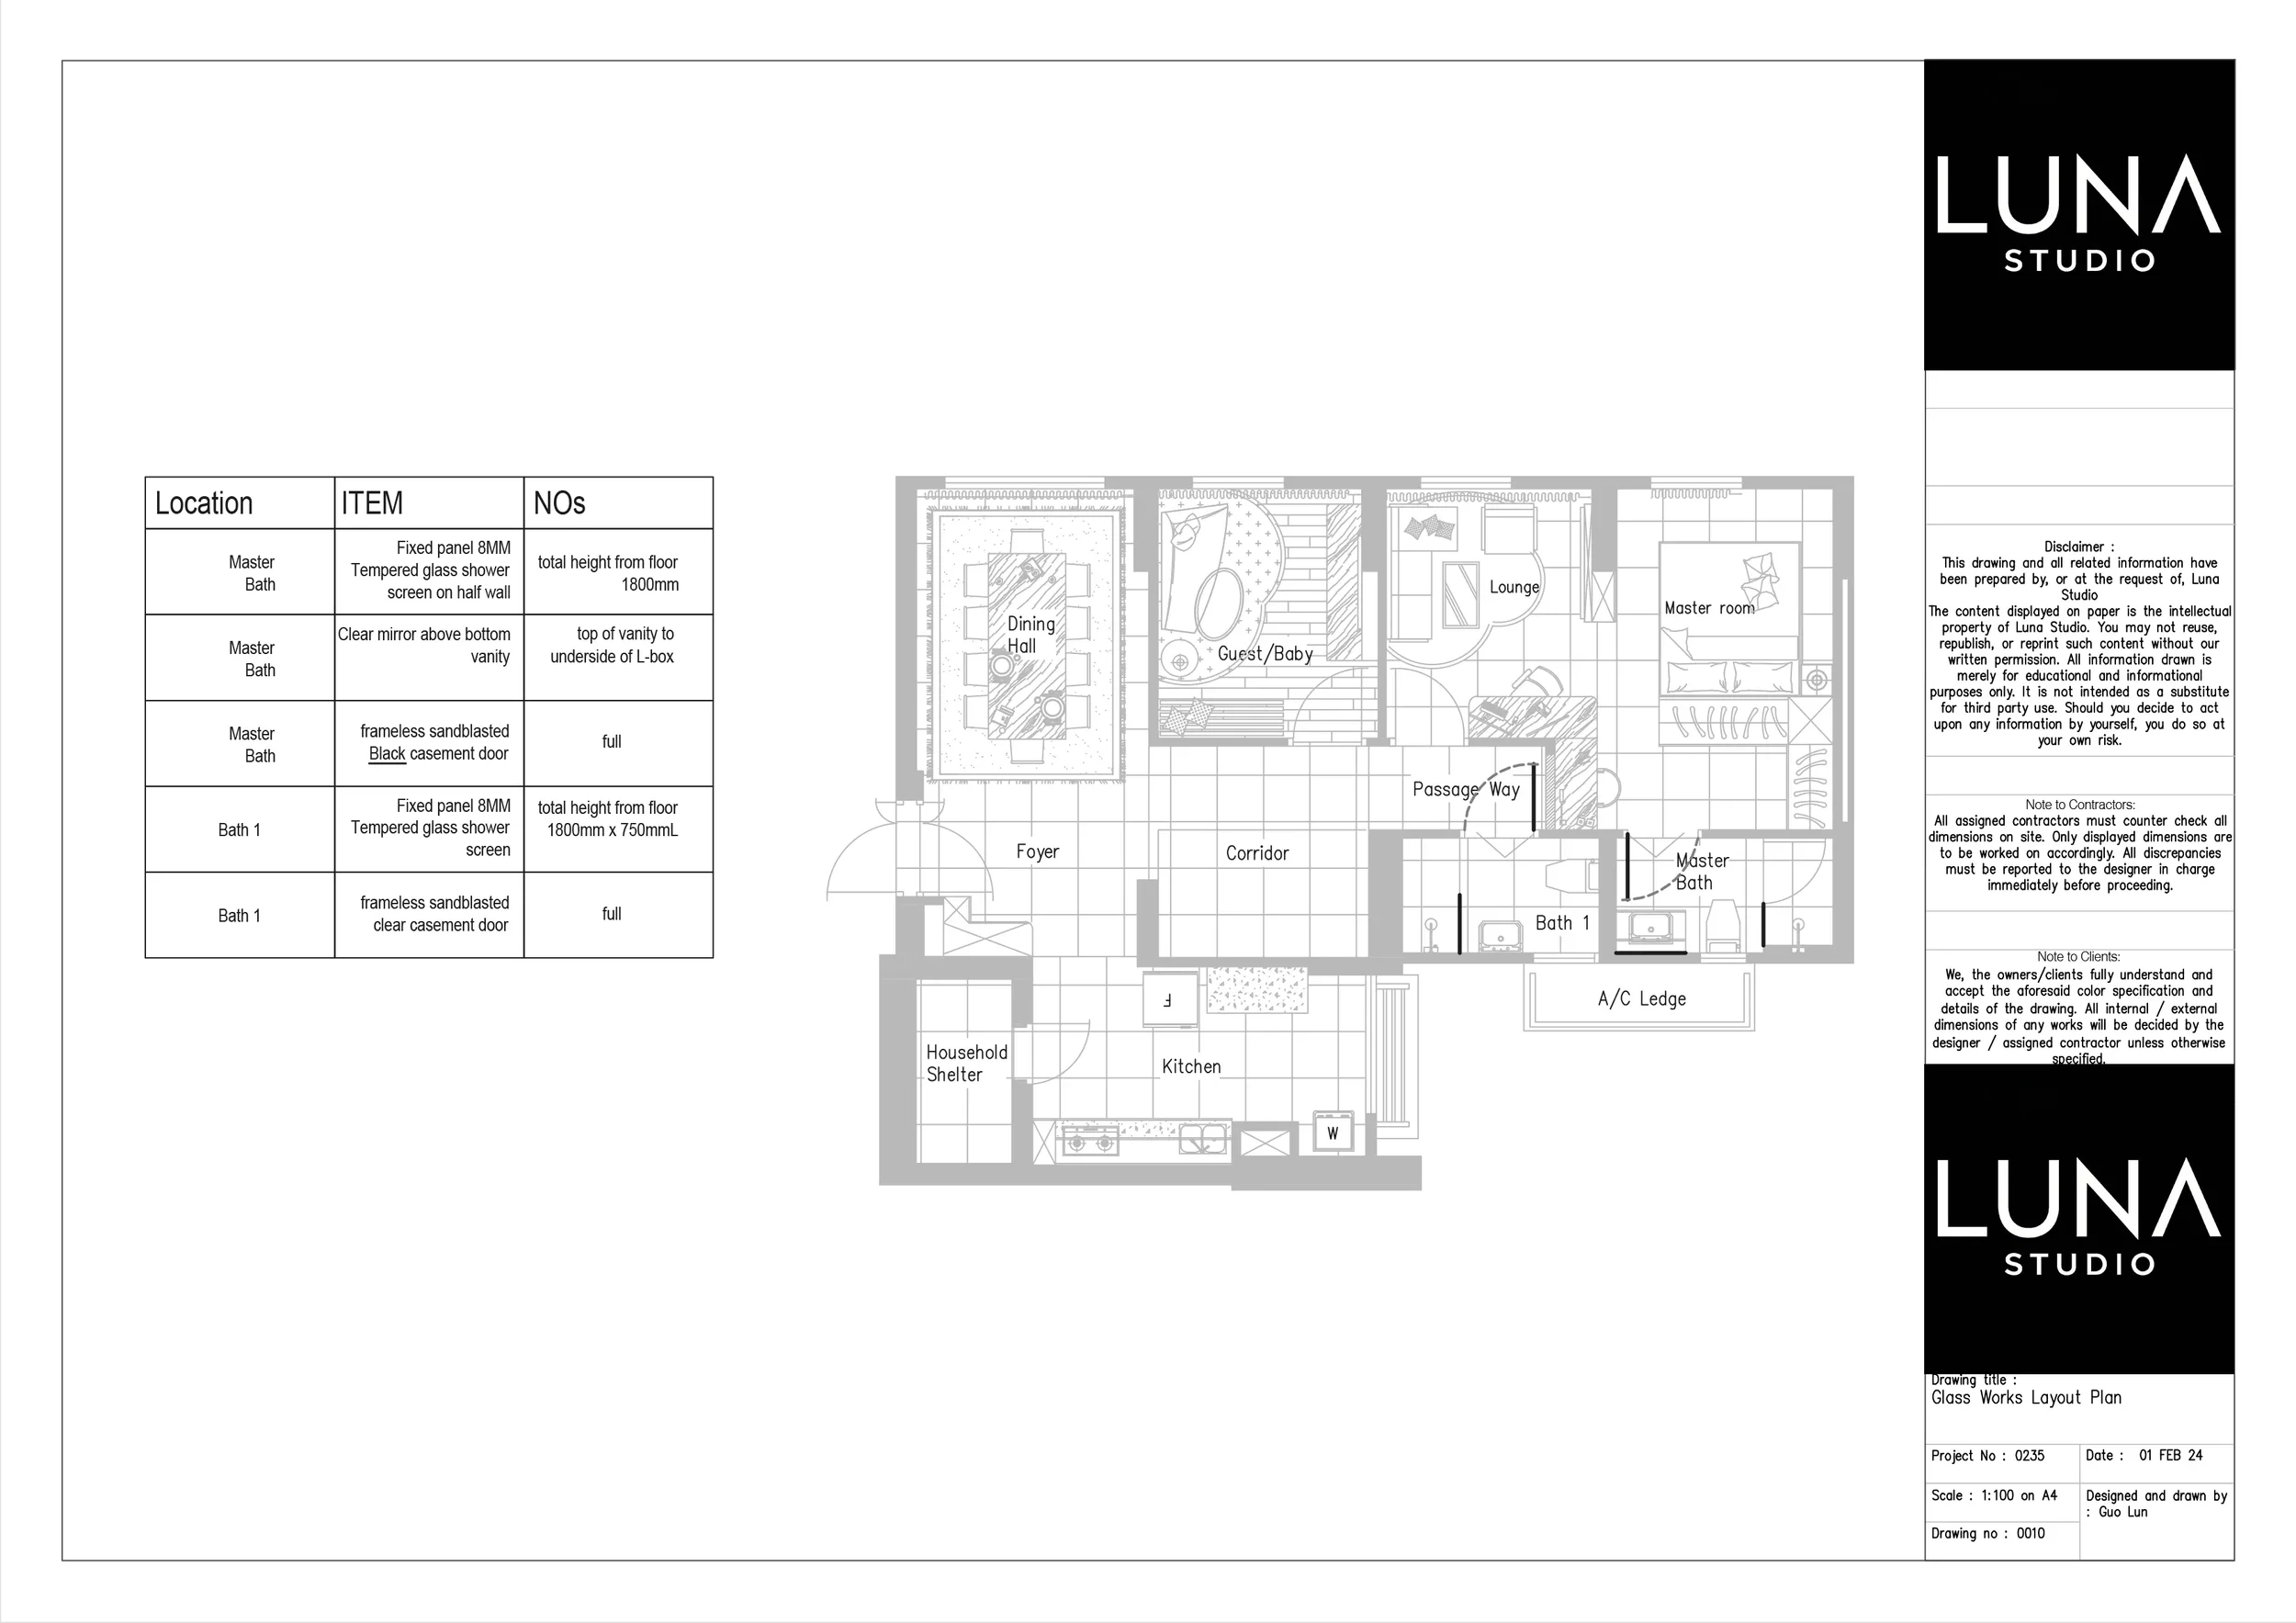
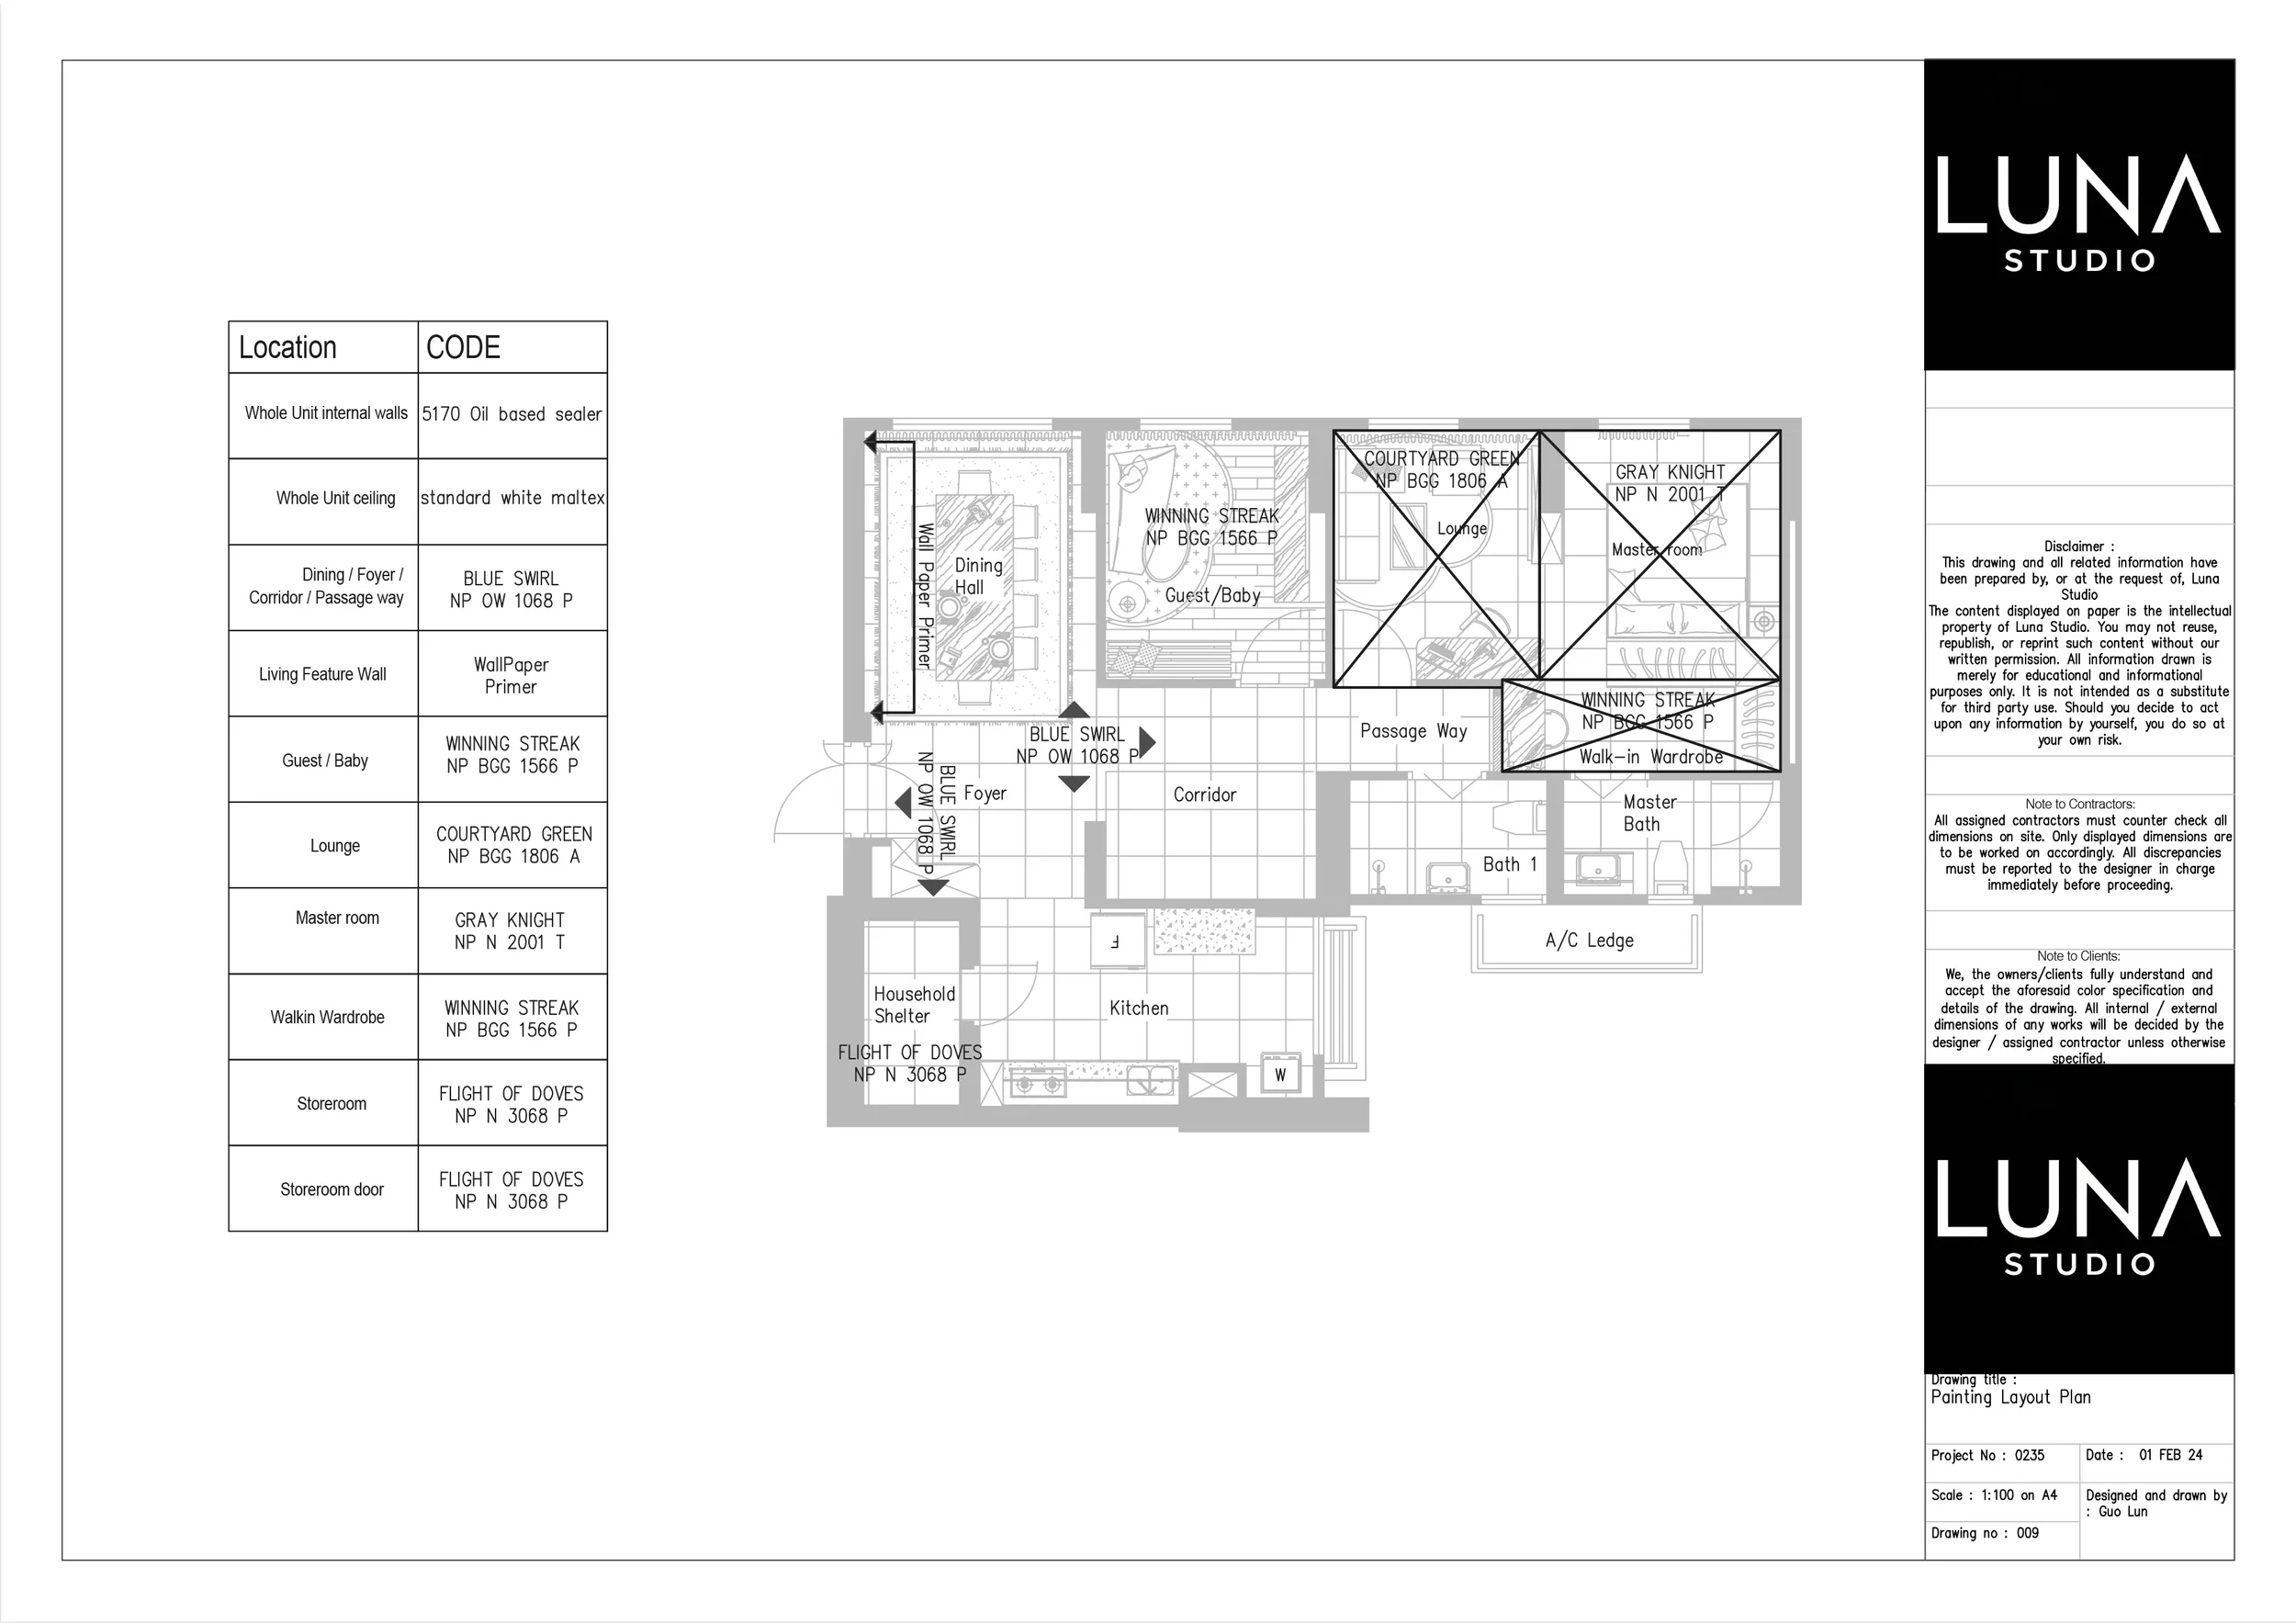
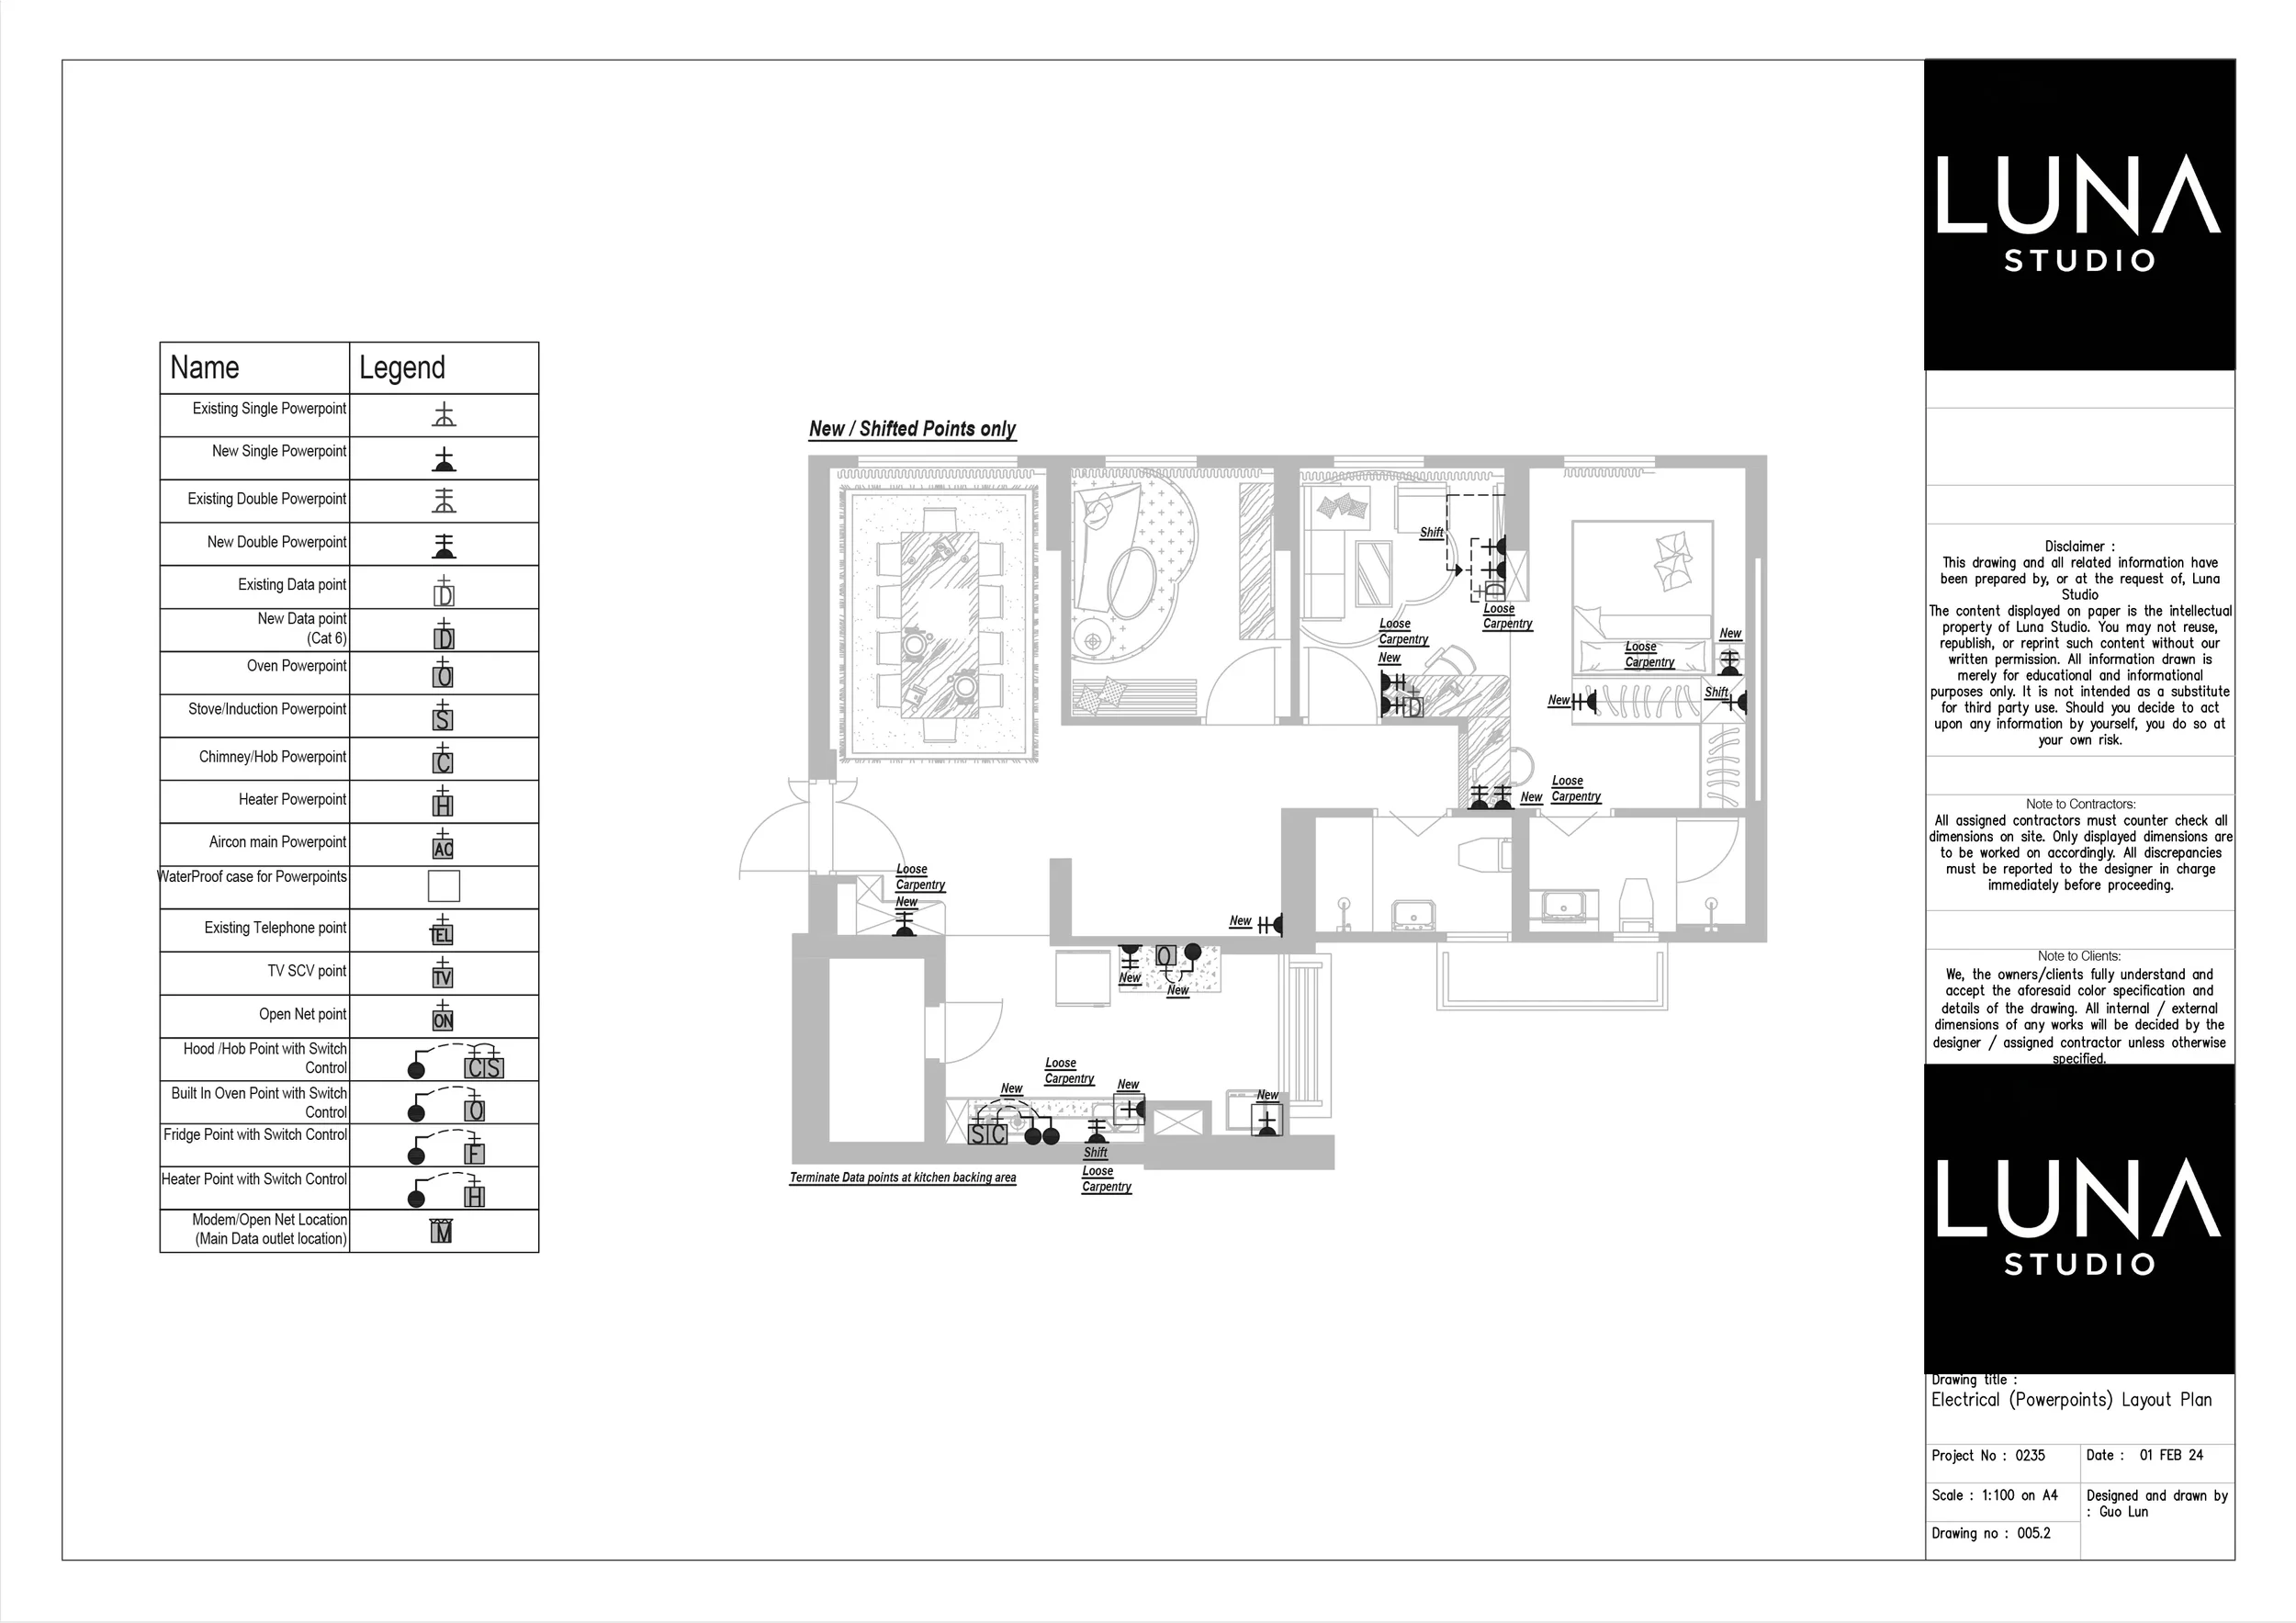
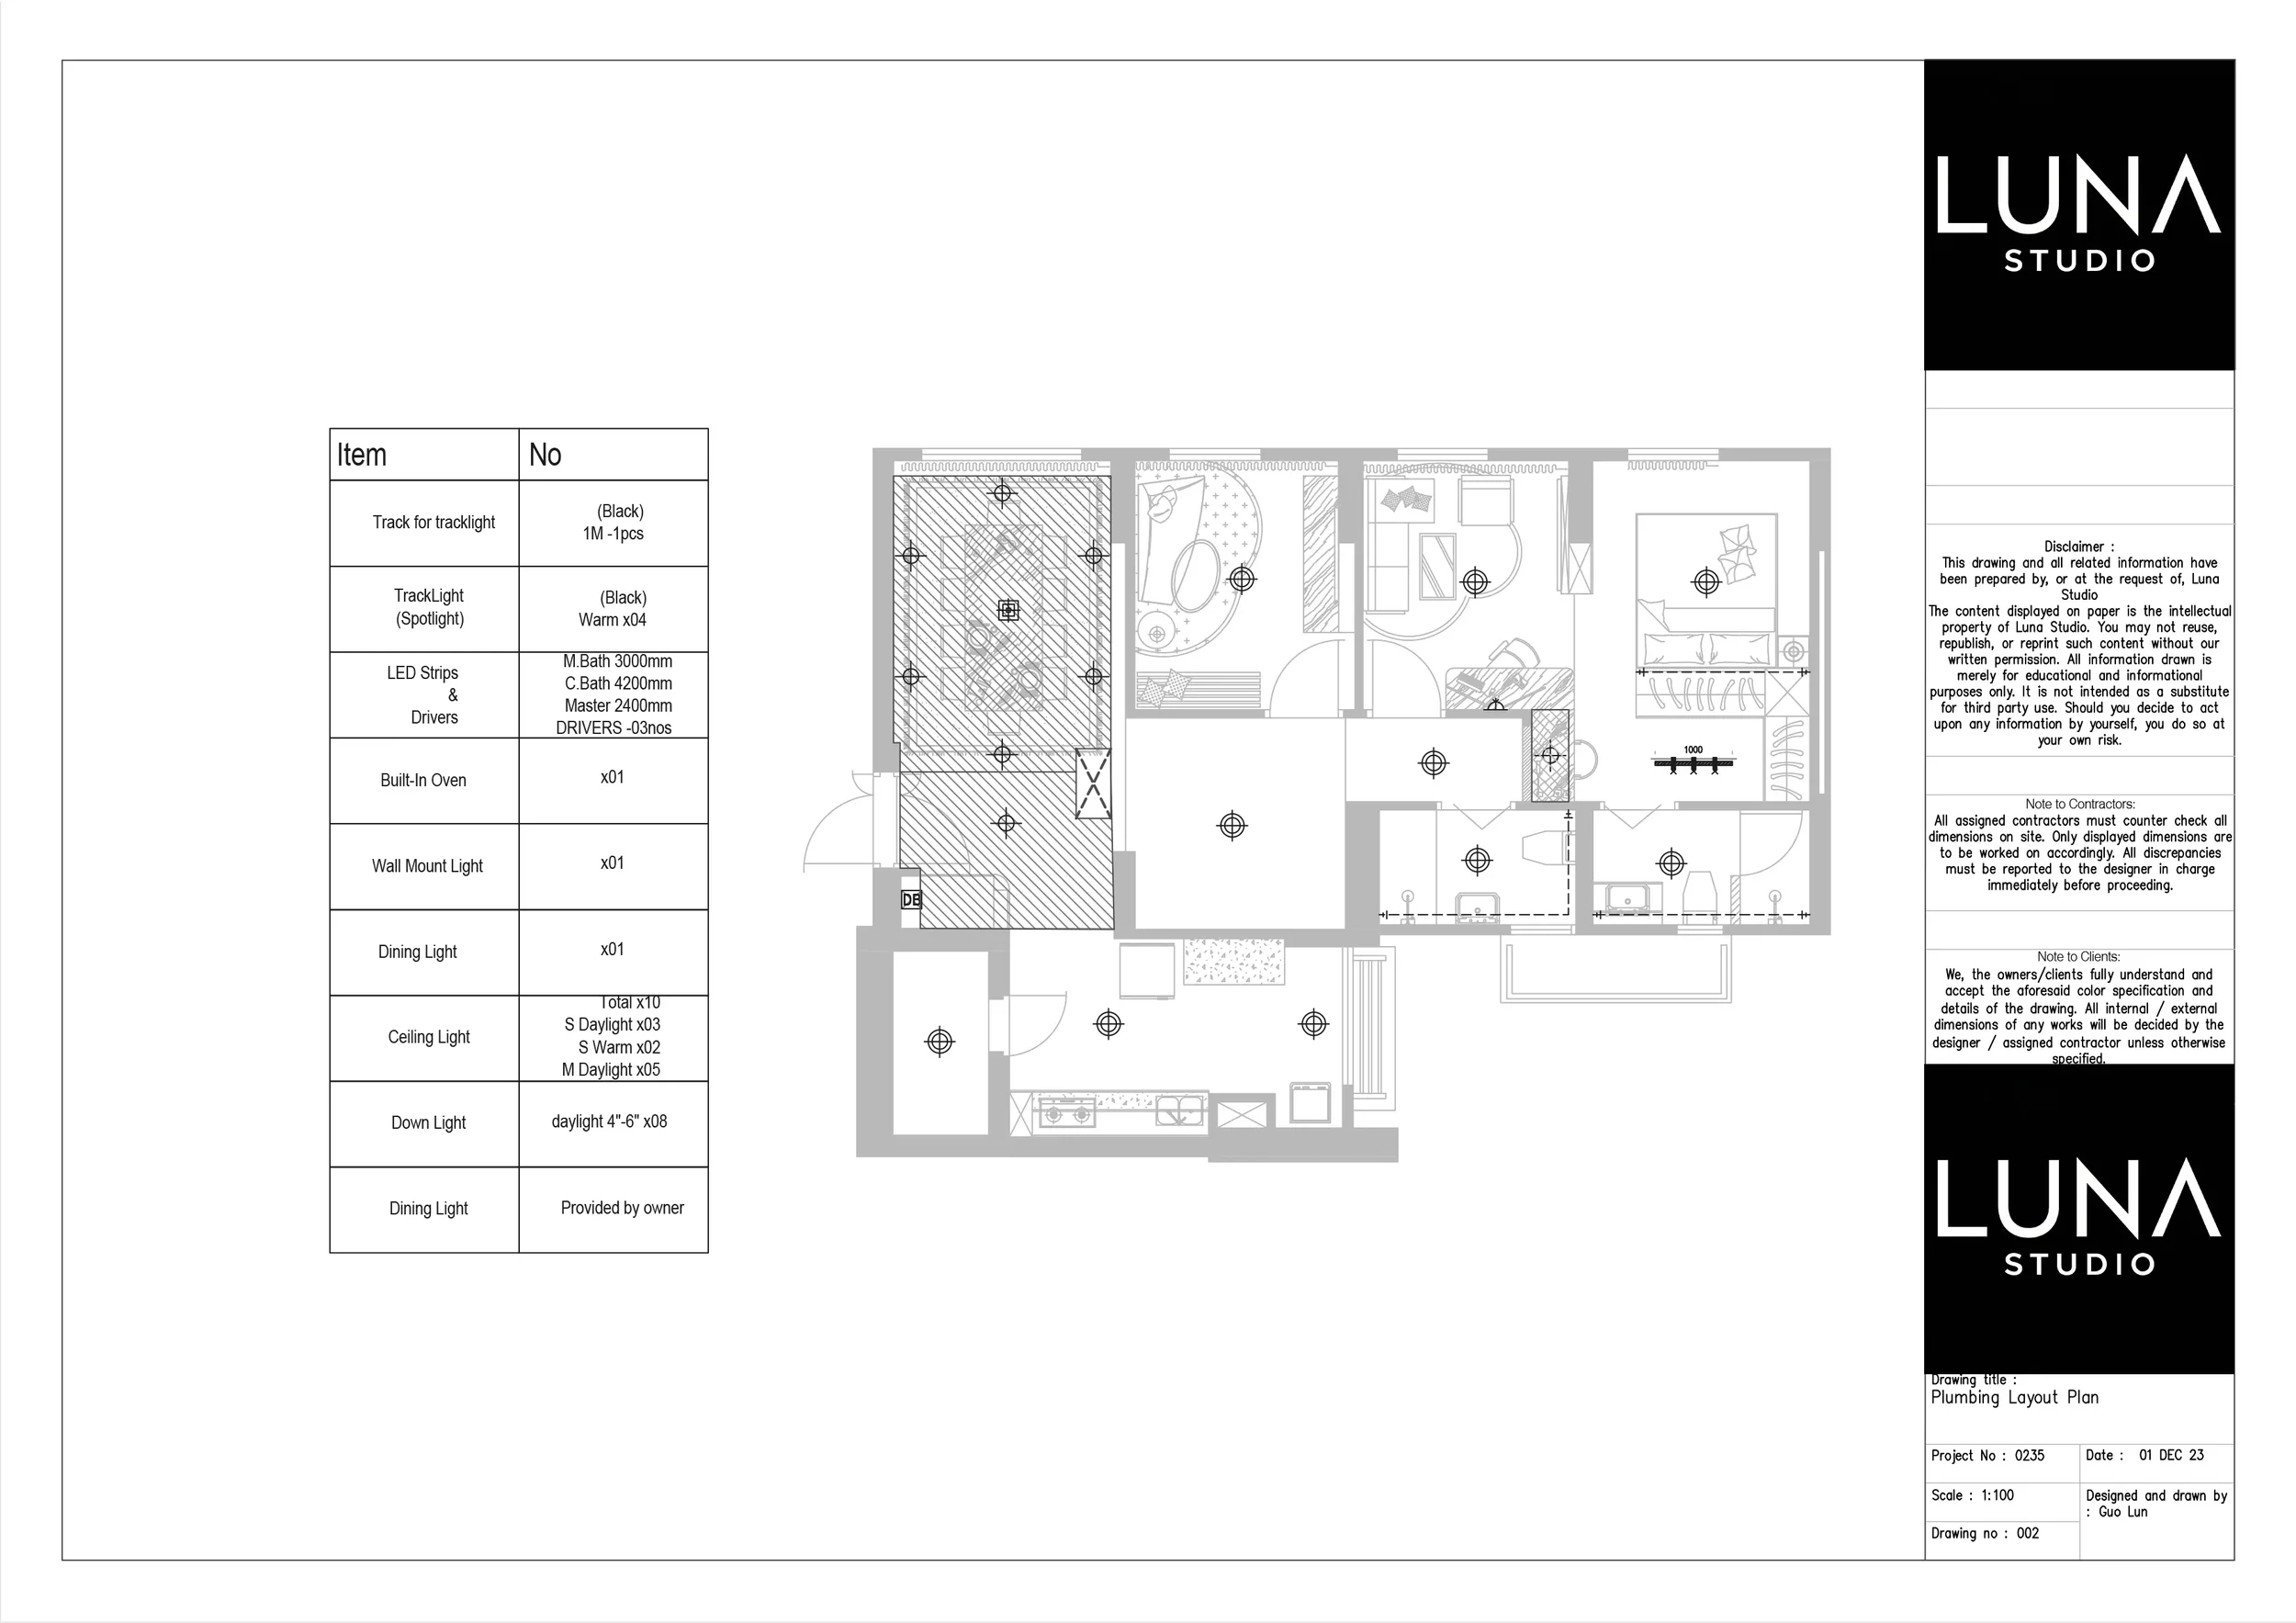
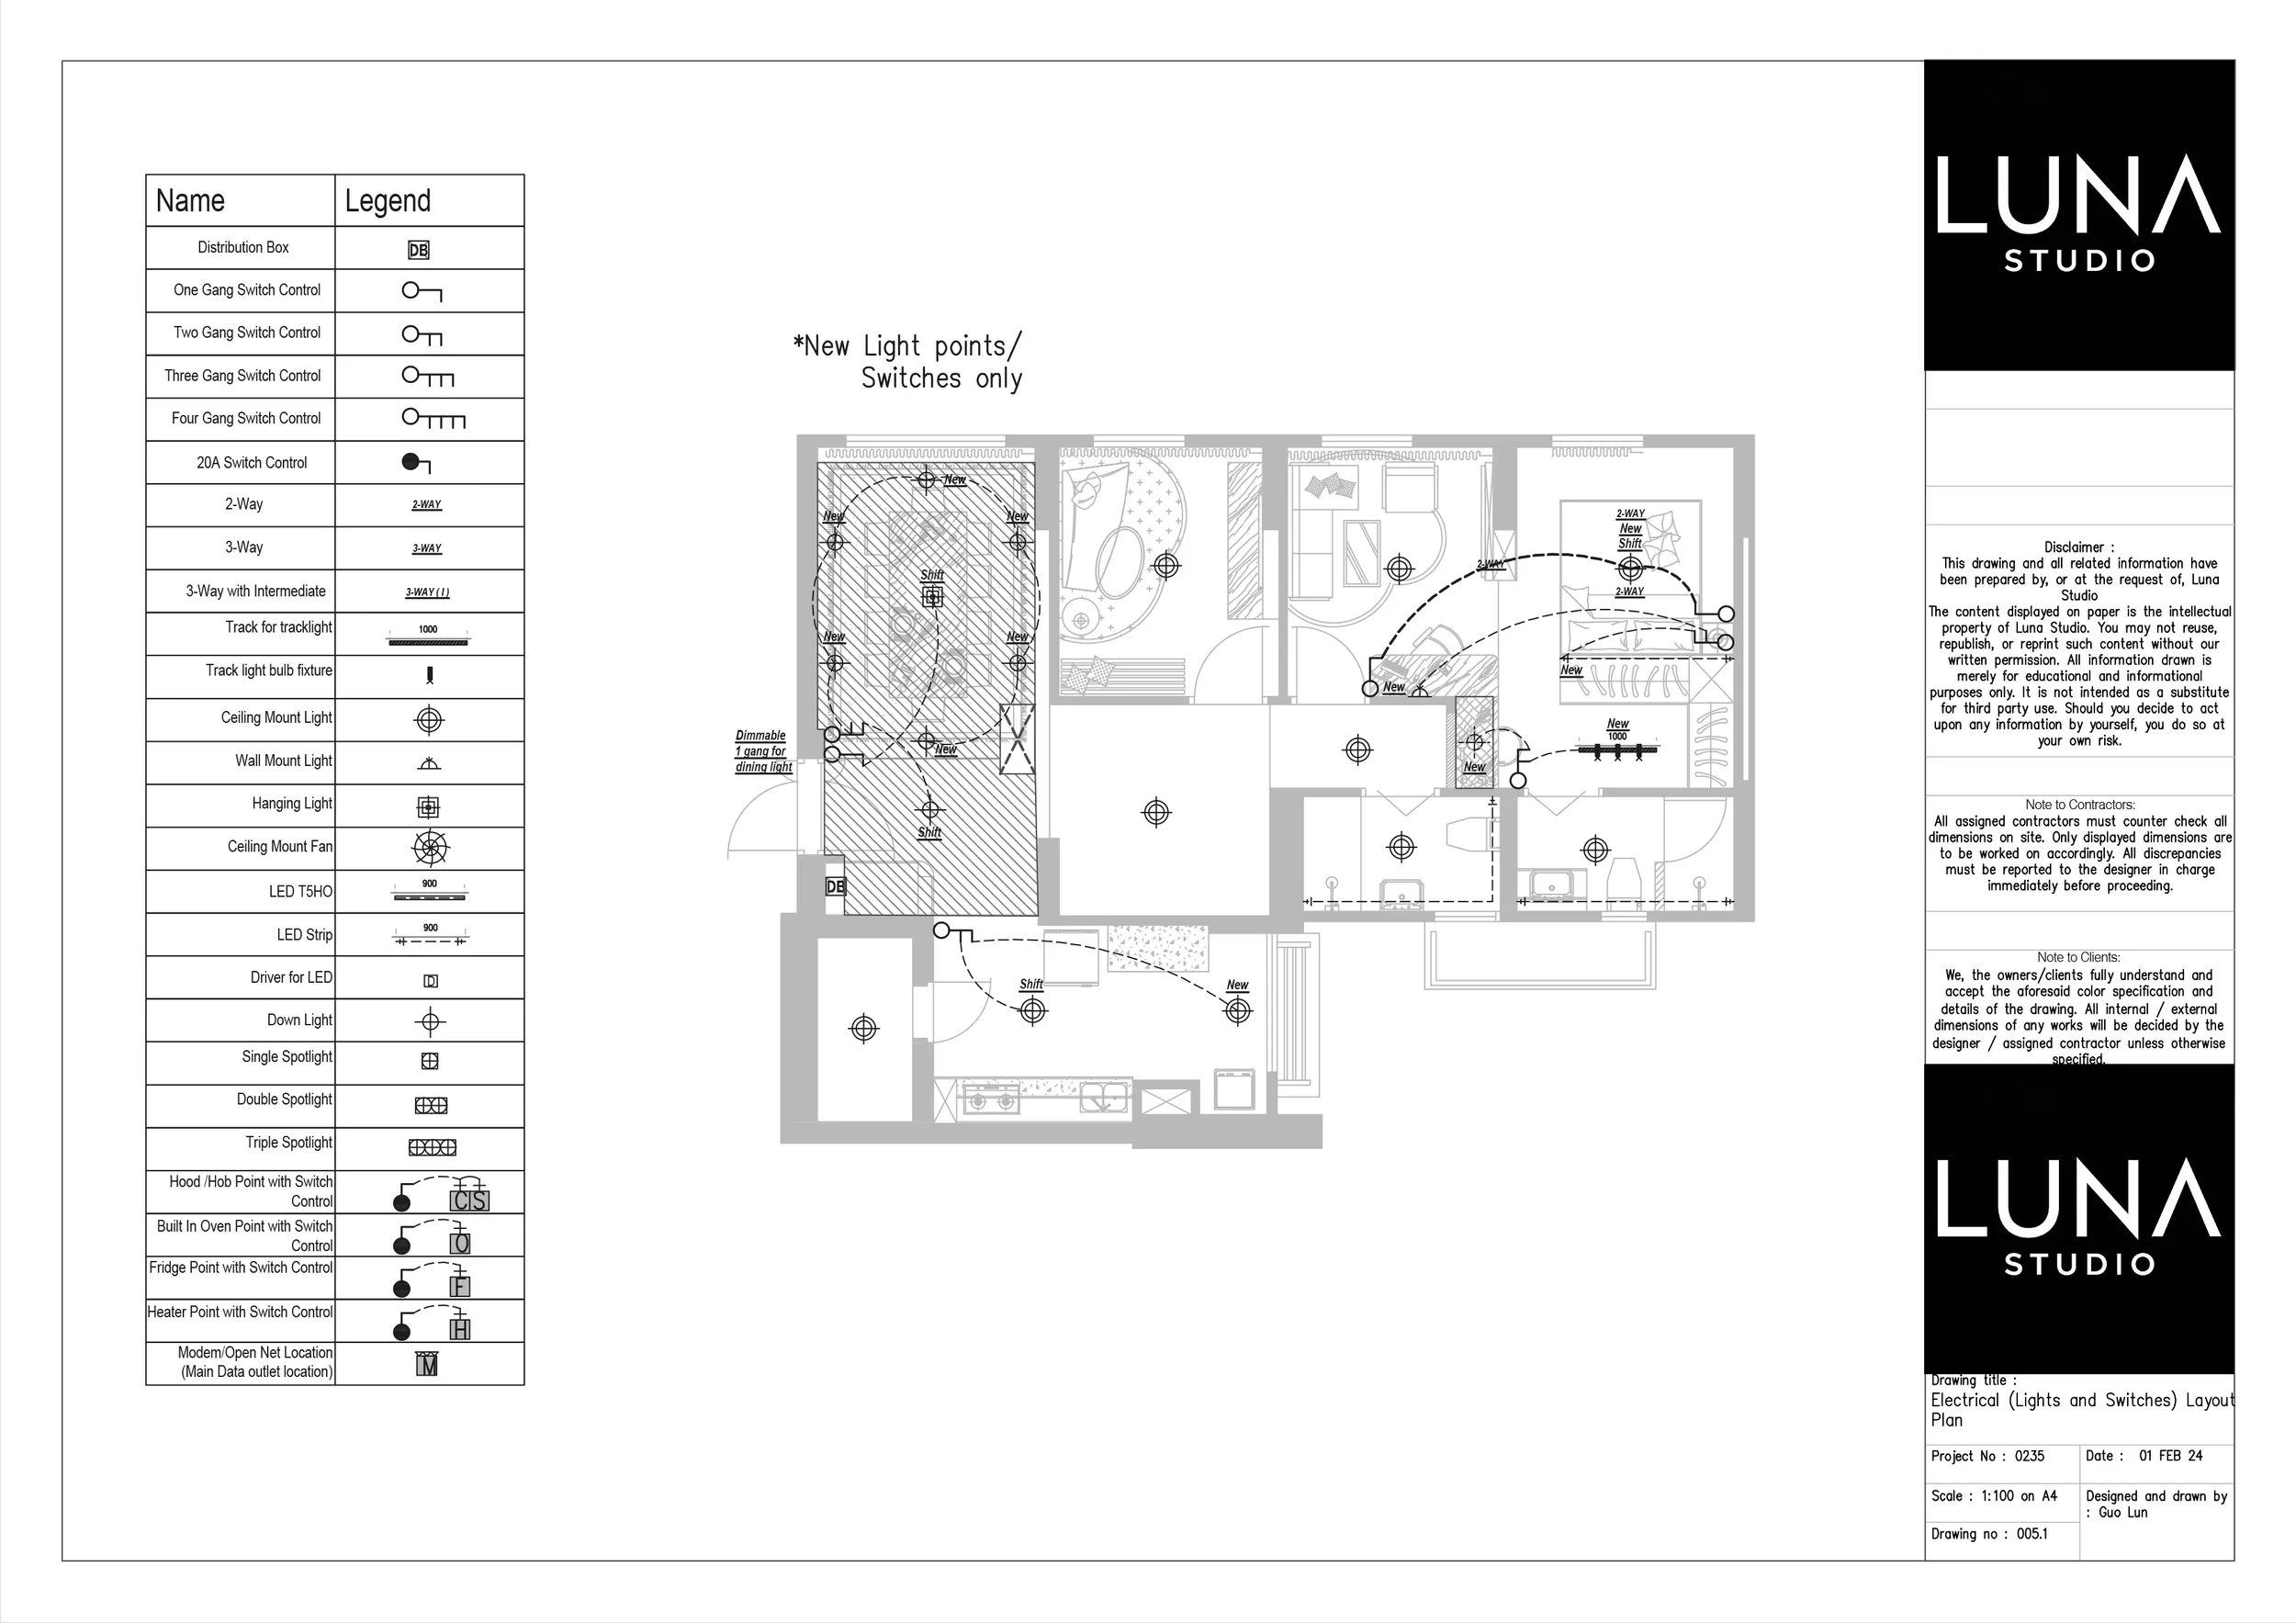
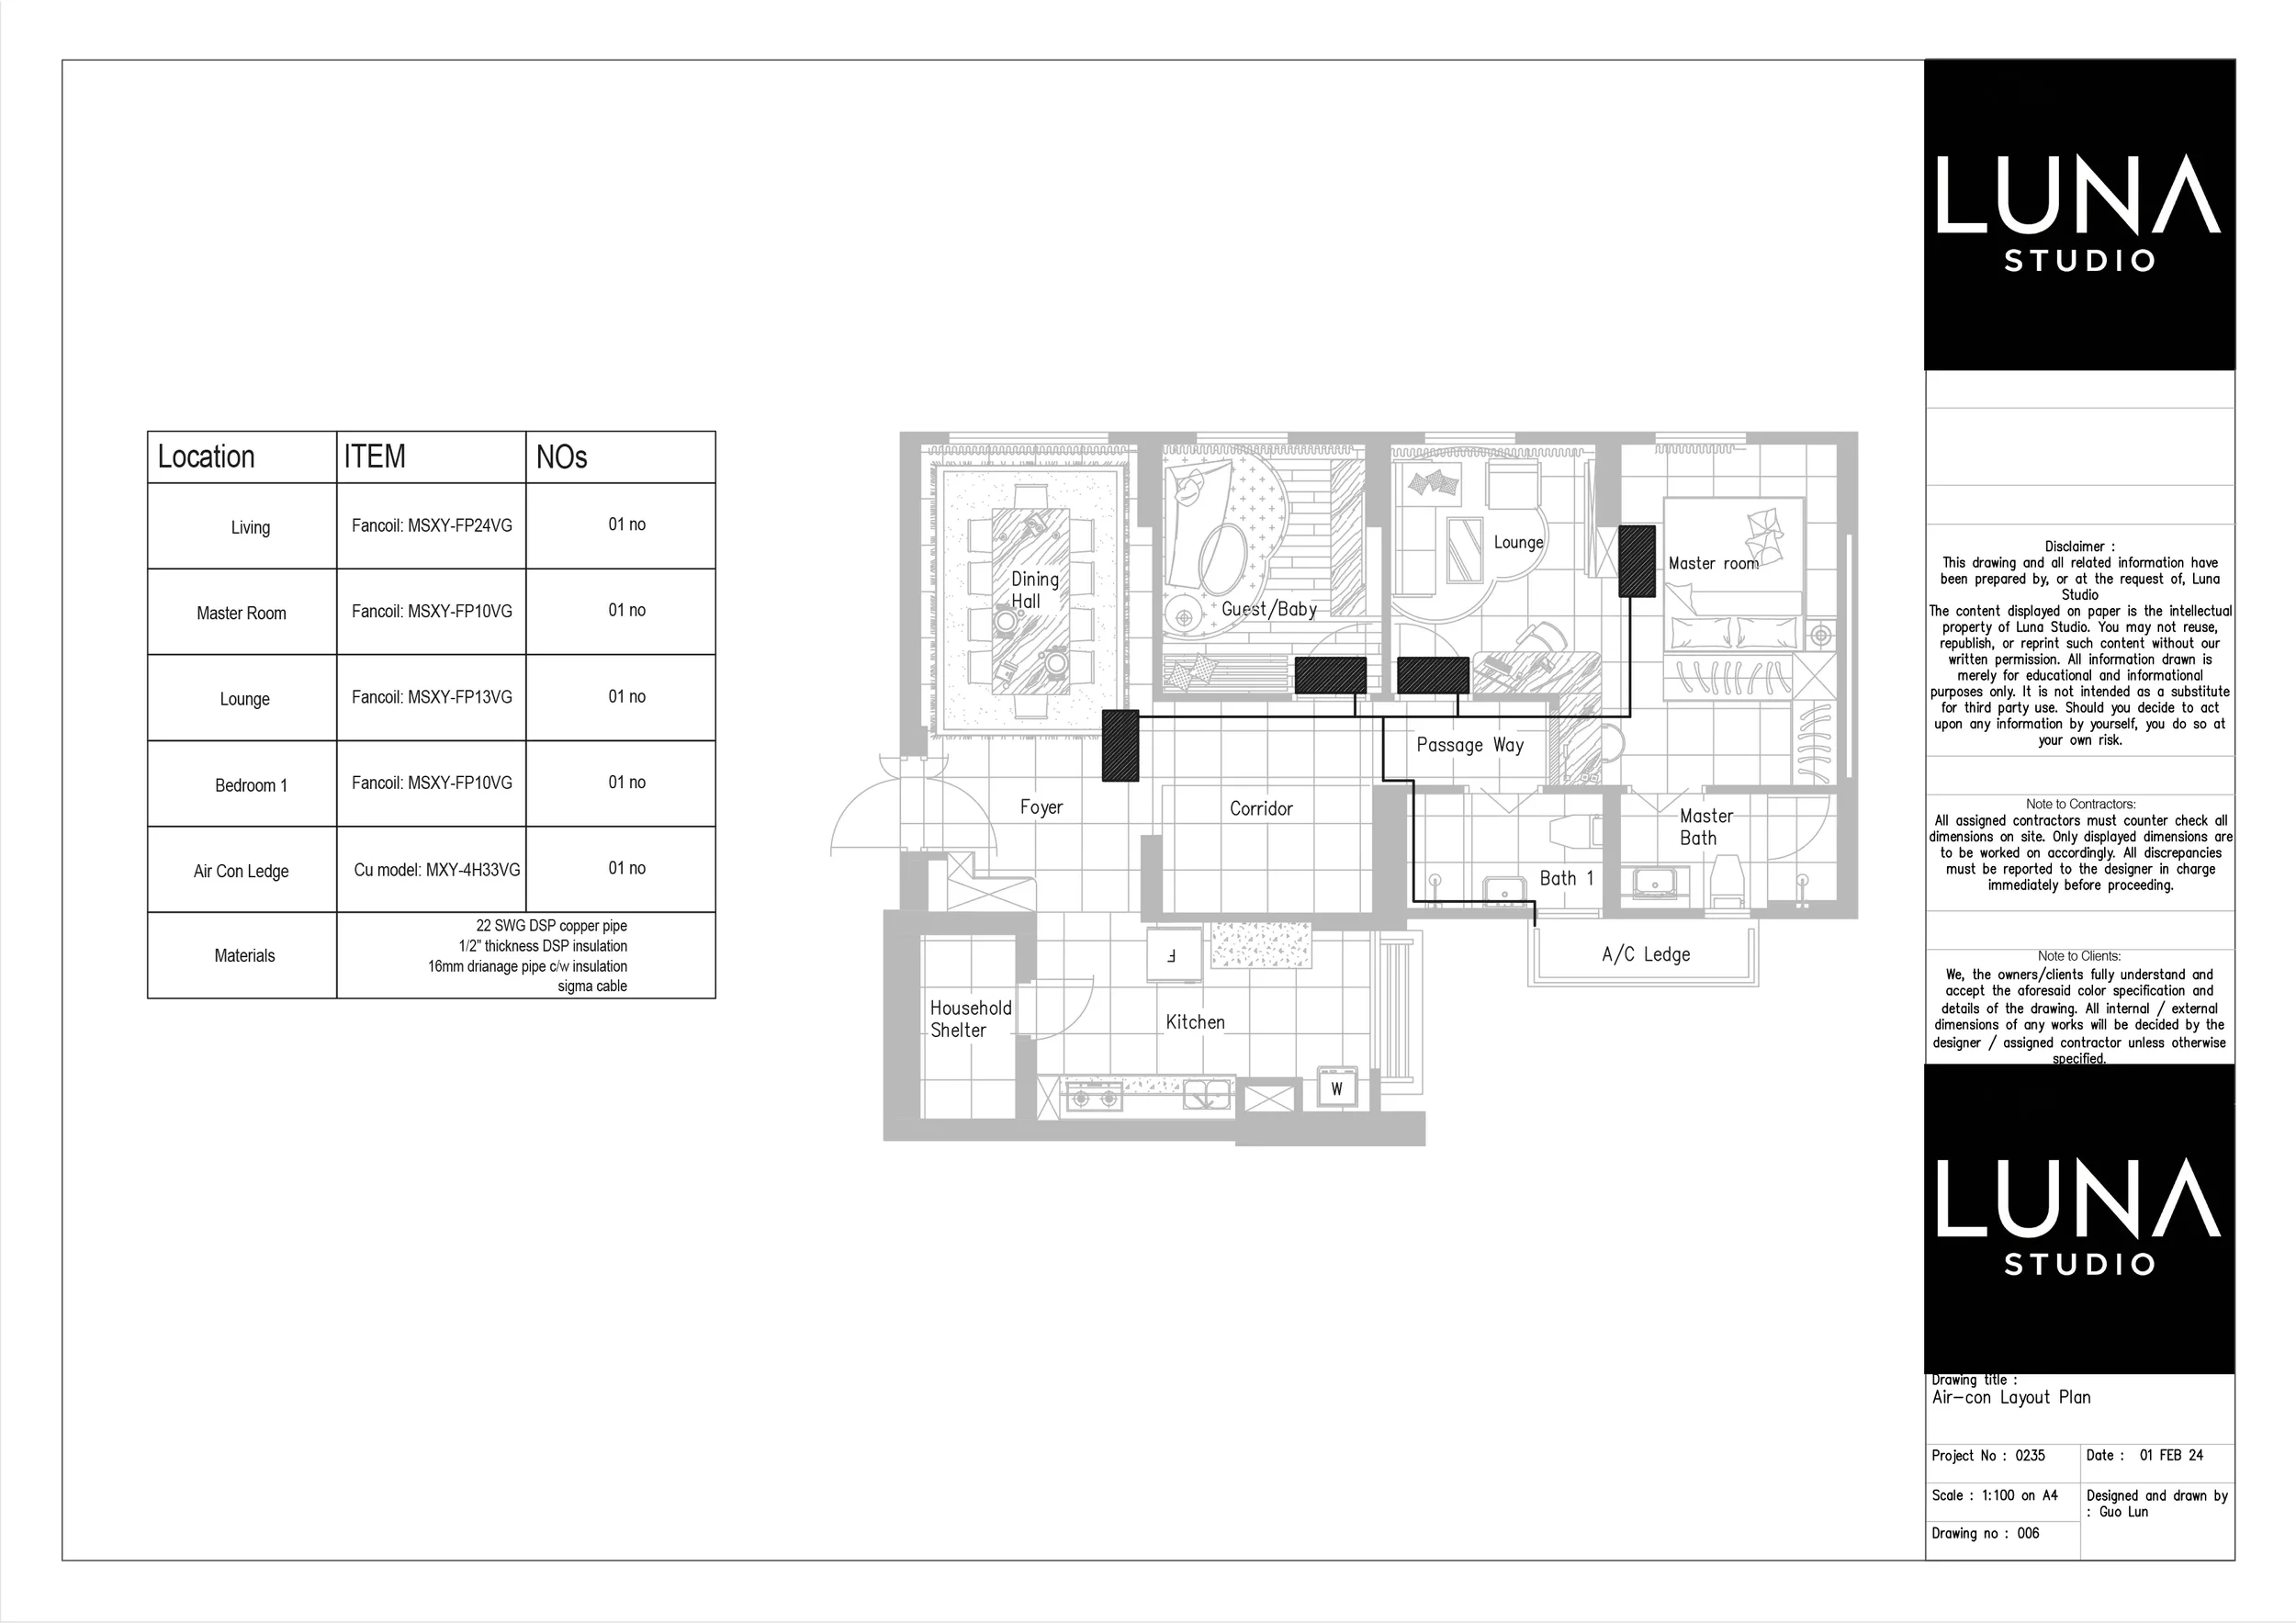
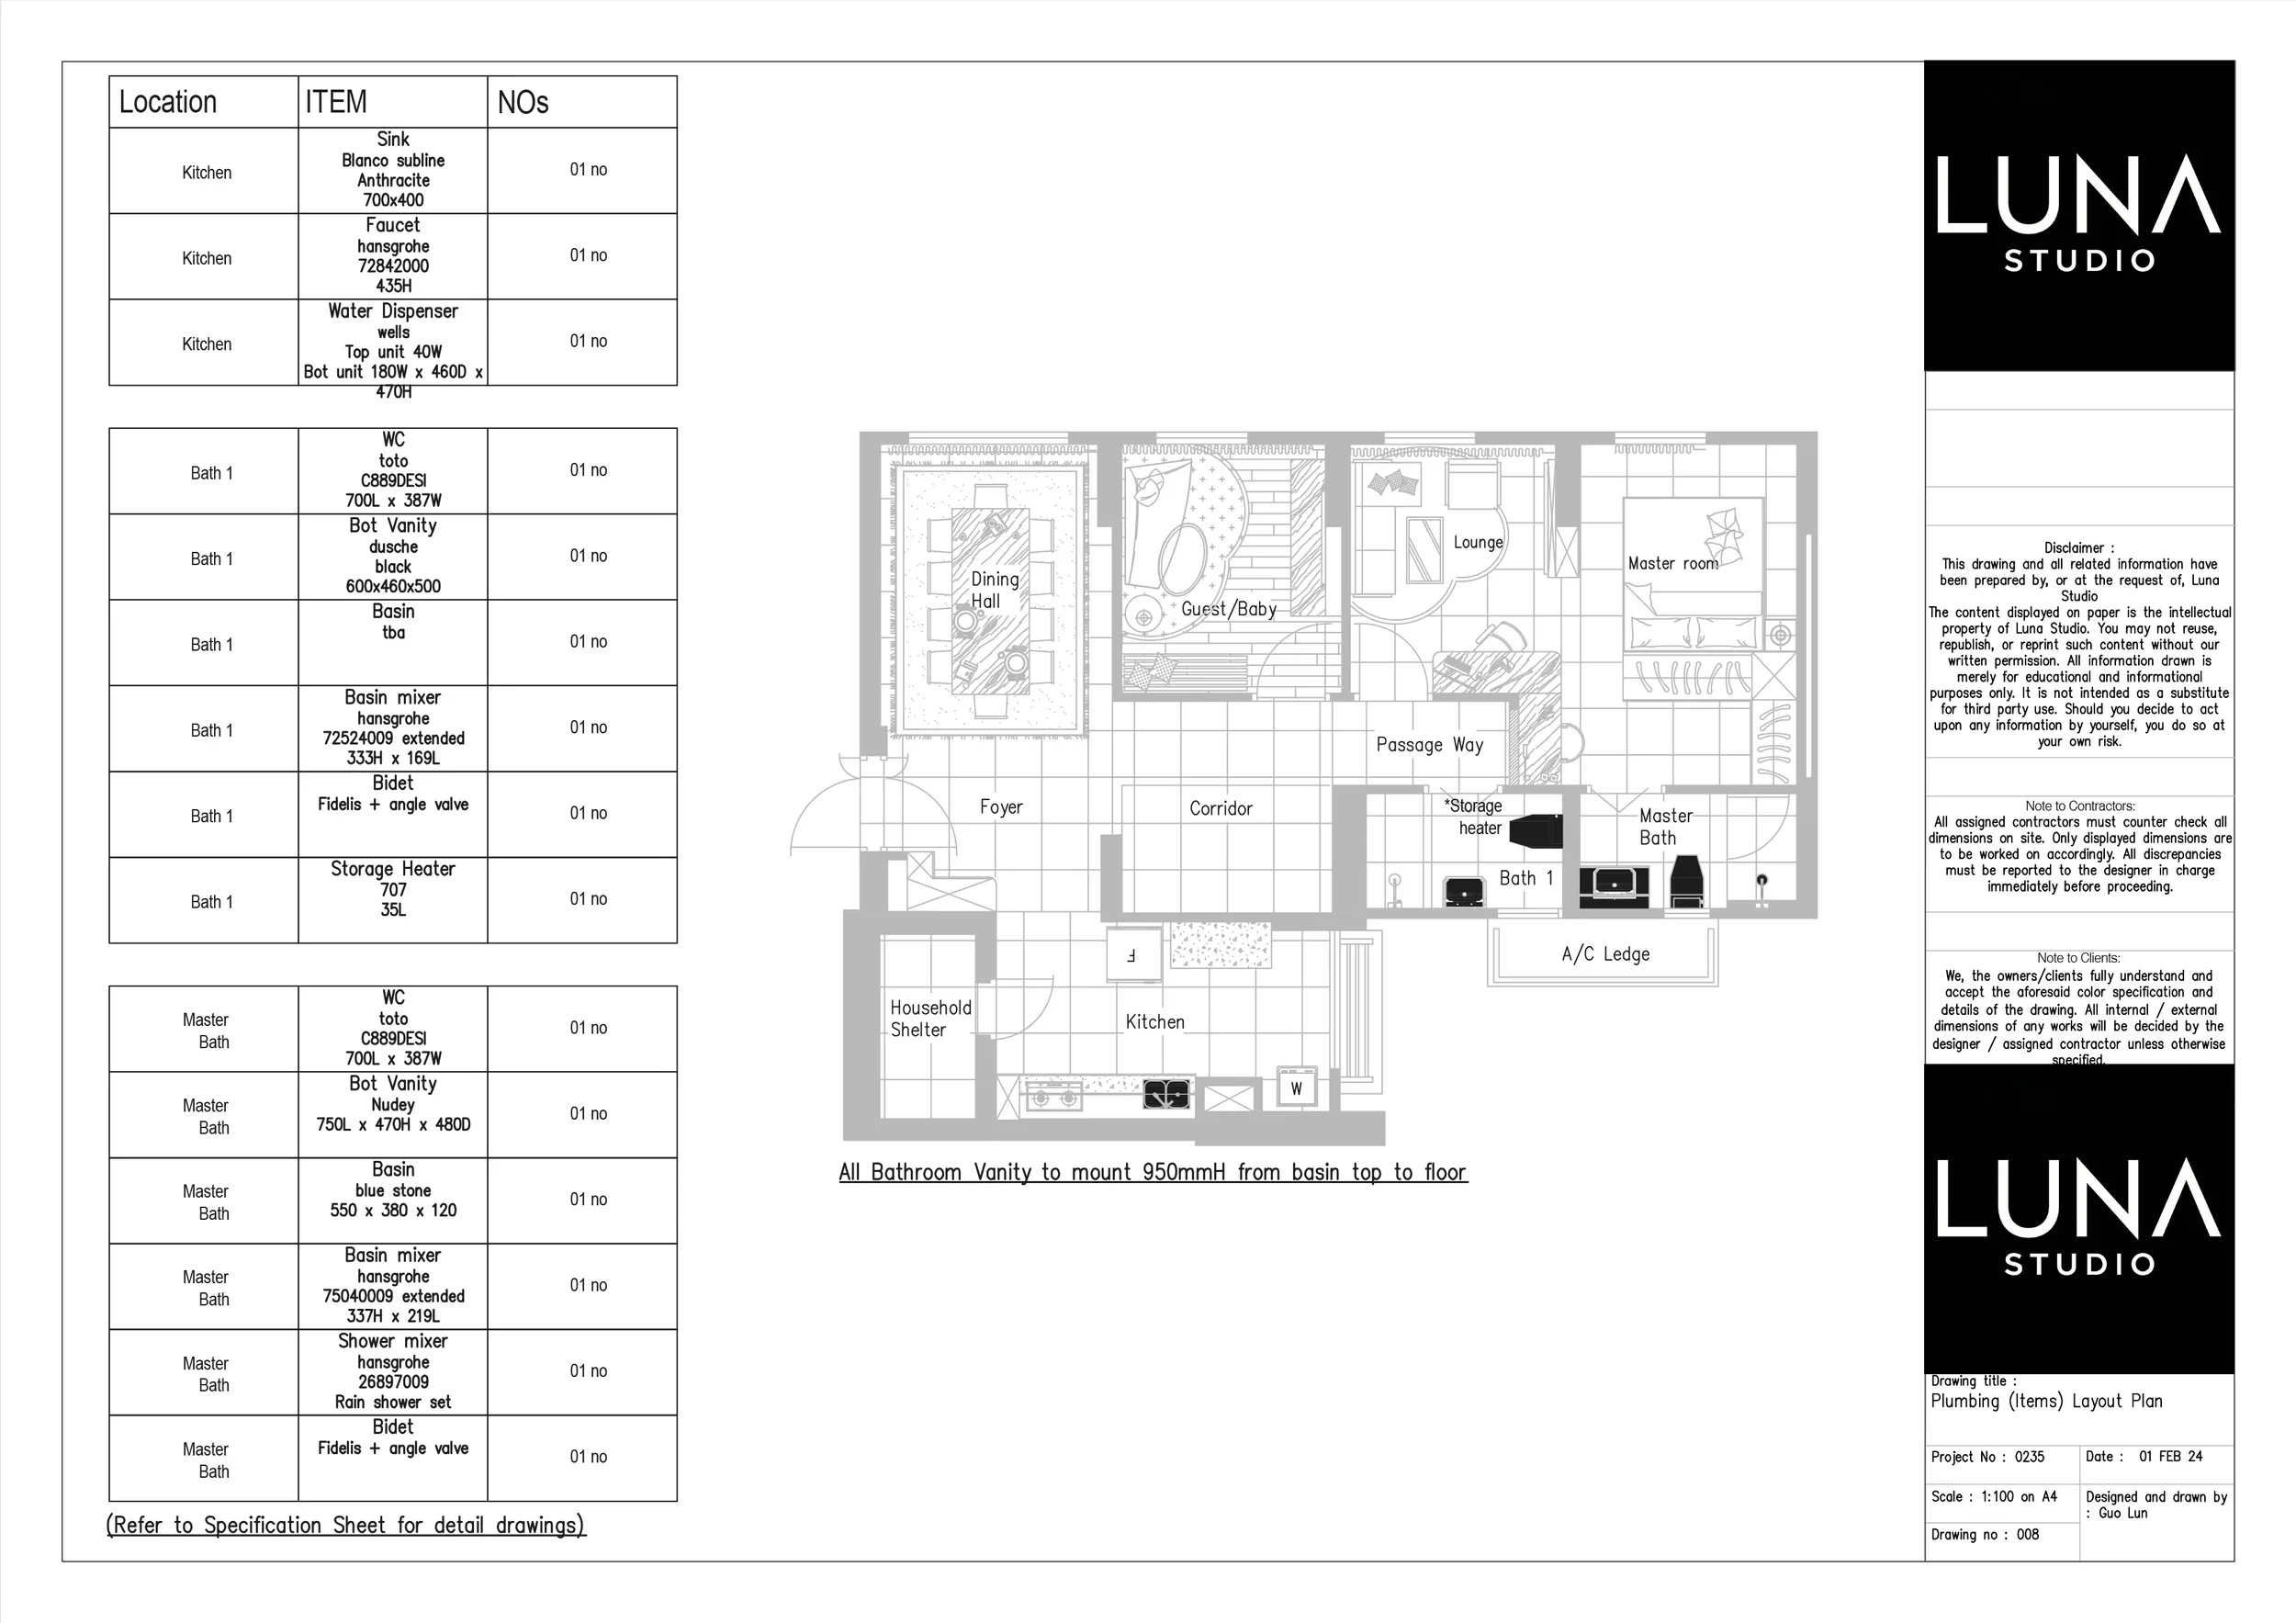
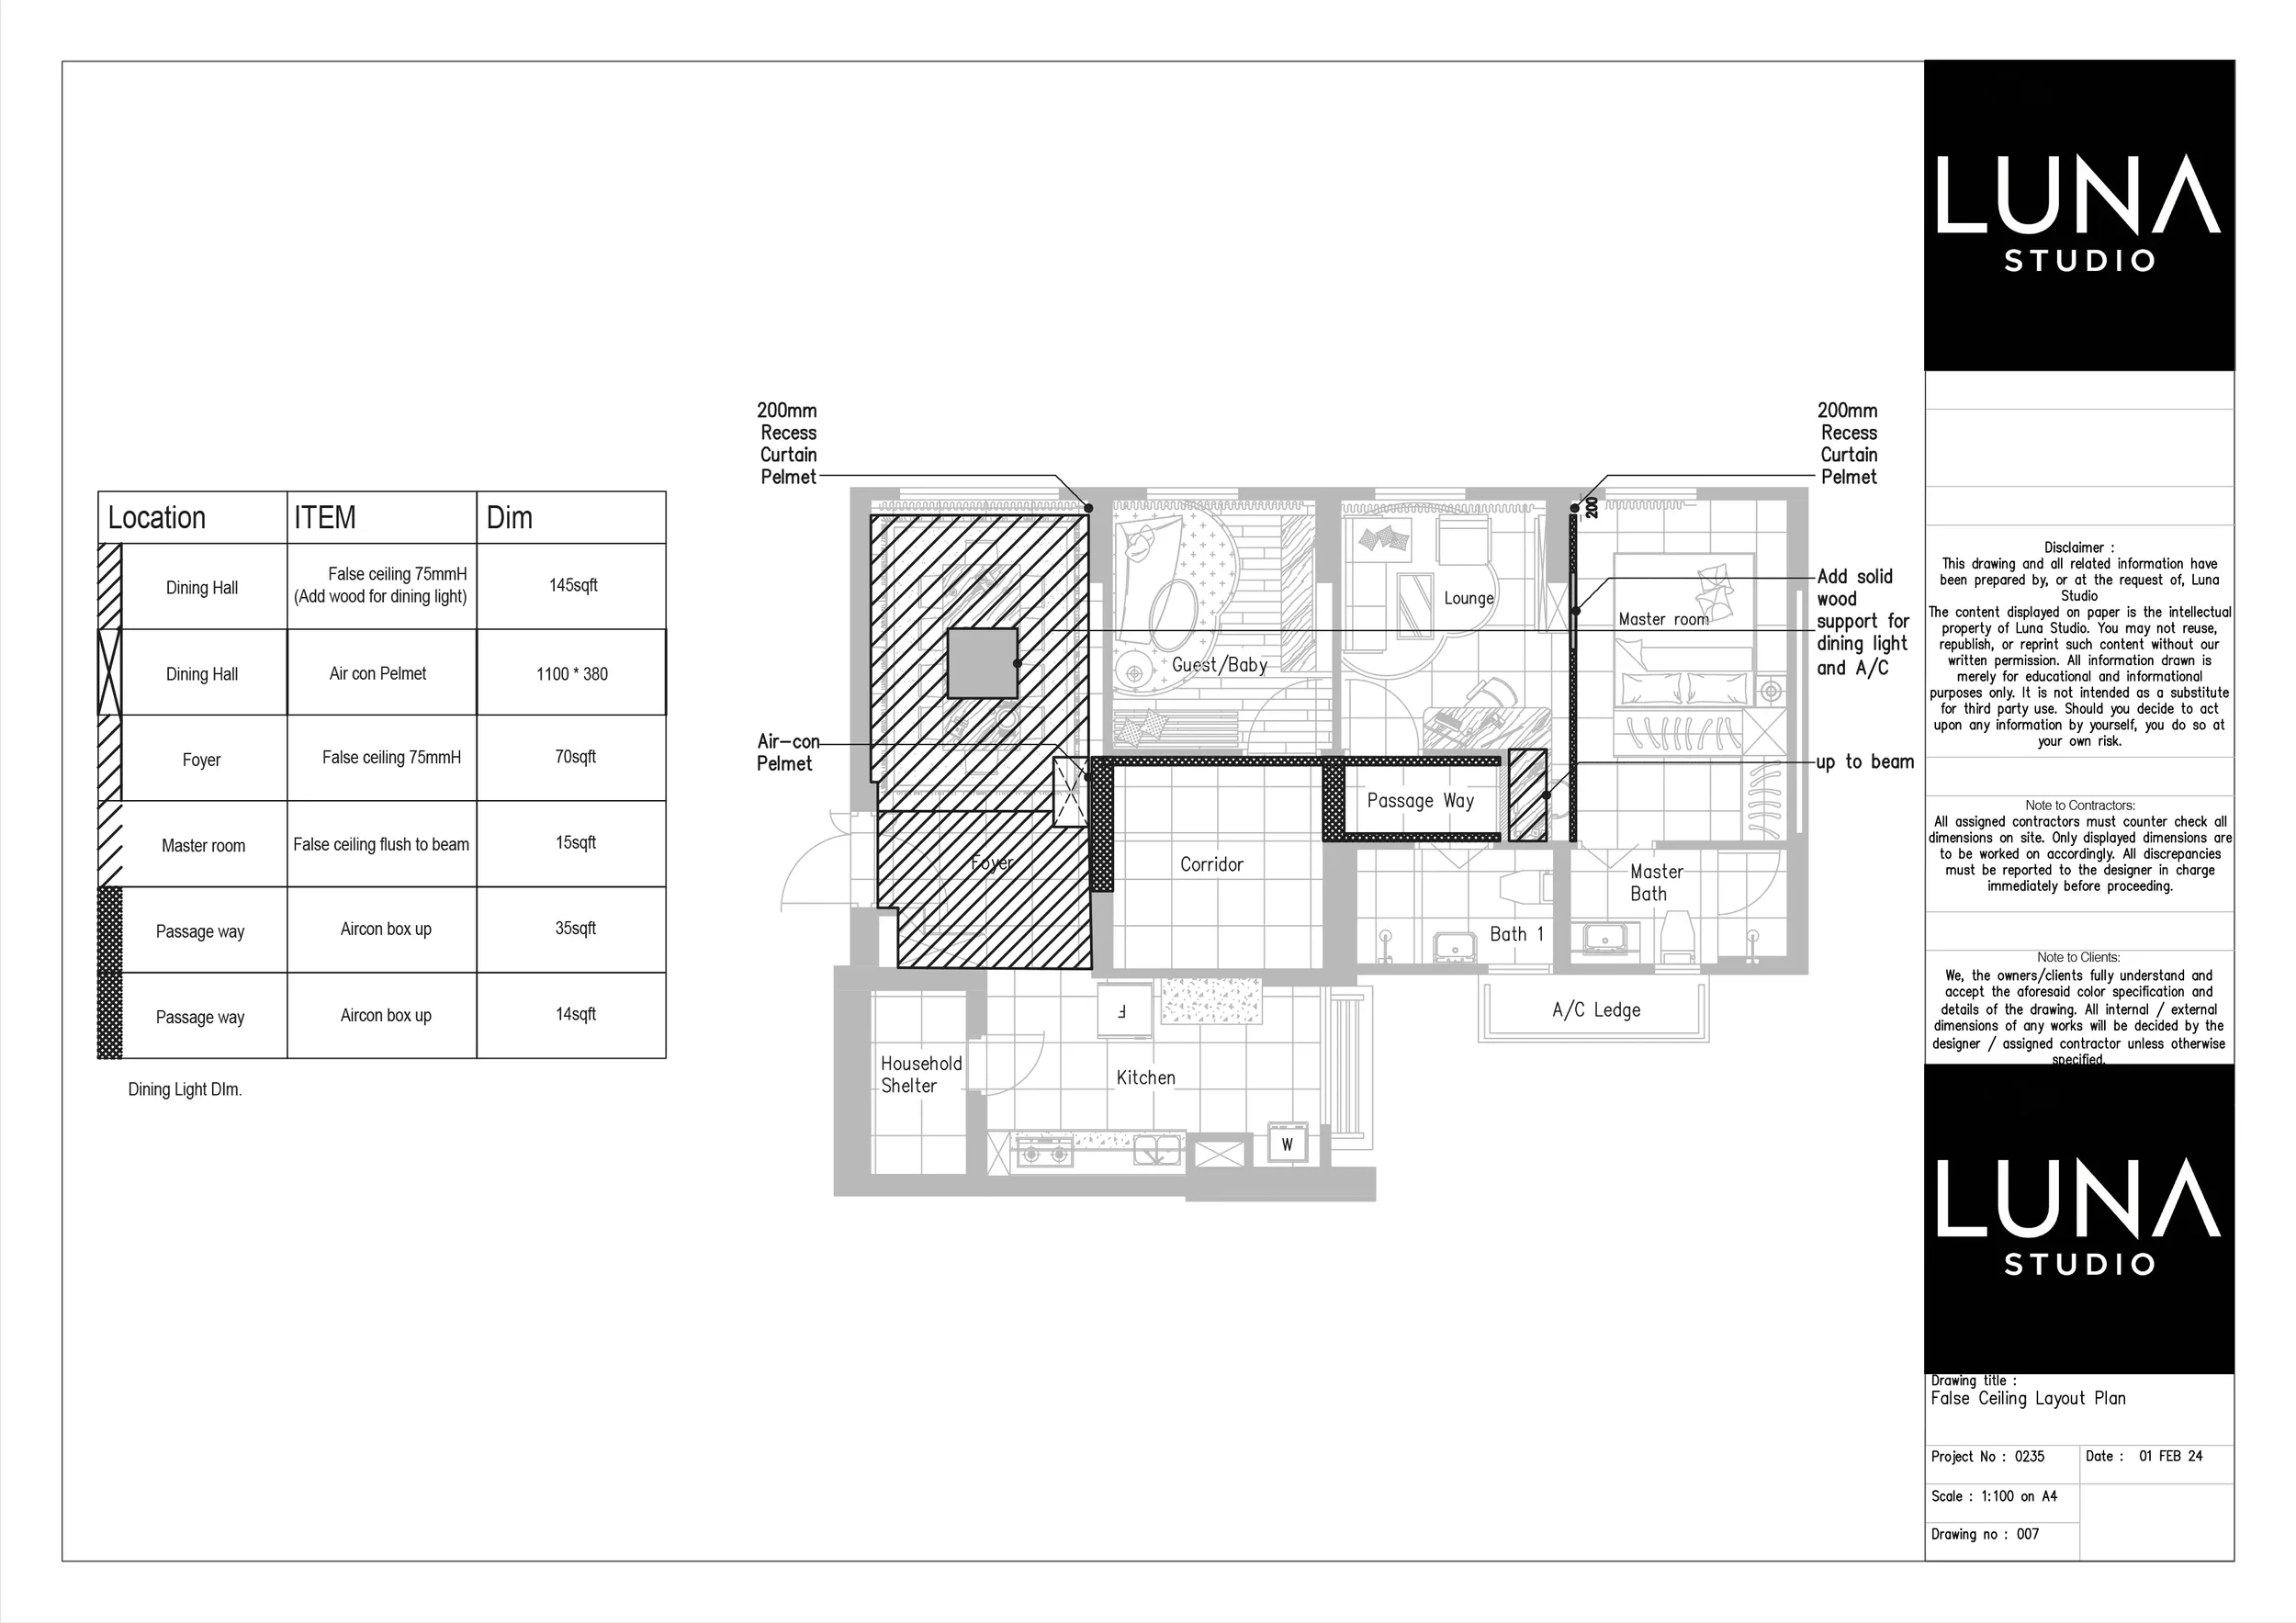
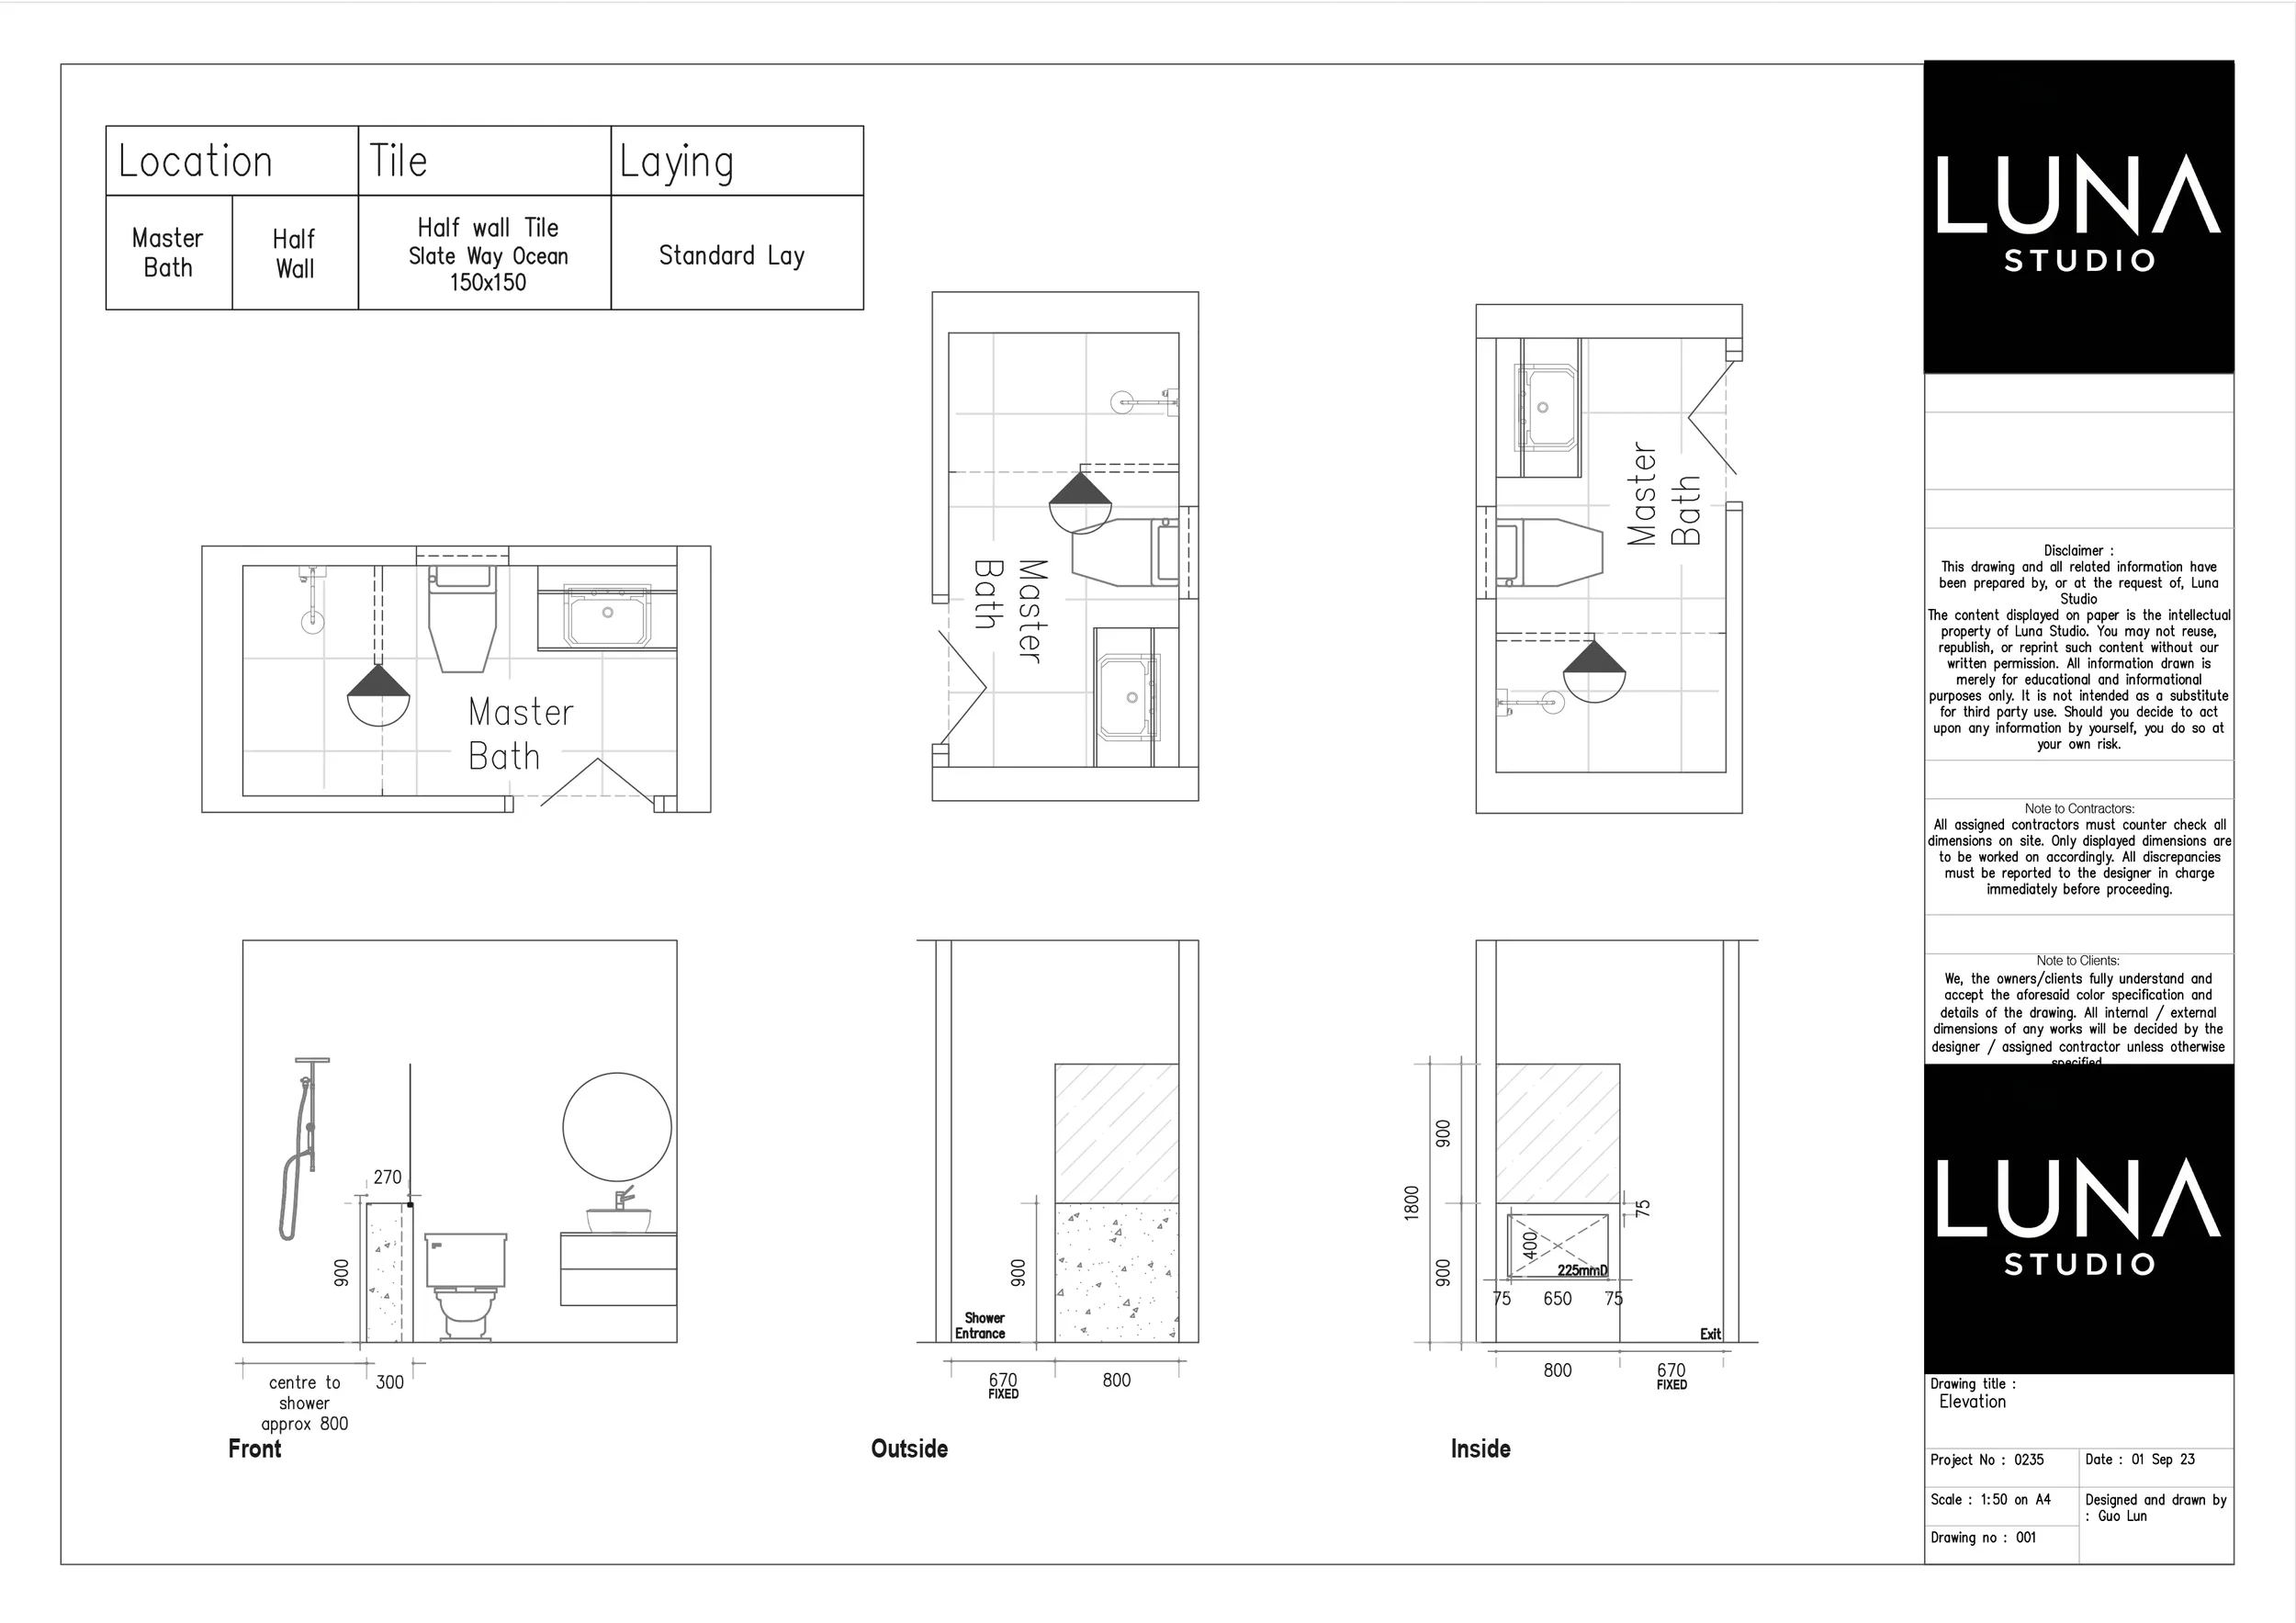
The design had to survive construction.
A 12-week scheduled programme.
Demolition began the sequence, followed by electrical and plumbing works, partitioning, carpentry fabrication and installation, worktop and glass fabrication, final fittings and handover. The schedule makes the dependency between trades visible.
The scope evolved.
| Item | Amount |
|---|---|
| Initial Contract | S$35,000 |
| Variation Order 01 | +S$12,000 |
| Variation Order 02 | +S$6,500 |
| Total Documented Variations | +S$18,500 |
| Documented Value | S$53,500 |
Renovation projects evolve. Thorough documentation keeps these decisions visible across the project cycle.
The apartment now works differently.
The front became social.
The original living-room footprint now supports the home's dining and hosting function.
The rear became private living.
Two bedrooms were consolidated into one larger master domain that incorporates lounge and study functions.
The room gained function without another enclosure.
Wardrobe, study and media elements organise the enlarged room without recreating unnecessary walls.
The reconfiguration became buildable.
The spatial idea was carried into demolition, construction, joinery and technical documentation by Luna Studio.