

Sage & Marble
A 5 room HDB reworked through spatial reconfiguration, integrated storage and a controlled material language within the realities of the existing home.
The project combined substantial reconfiguration with detailed joinery, wet area works, service coordination and a documented construction programme.
The home had to change before the style could work.
The starting point was an existing 5 room HDB whose internal relationships needed to be reconsidered. The project reworked room functions, circulation and storage while developing a stronger material identity across the home.
The objective was not simply to restyle the existing rooms. The plan itself had to do more work.
The existing home set the rules.
Selected partitions could be reconsidered, but the existing reinforced concrete structure could not simply be altered. Proposed demolition also depended on on site verification and specific HDB conditions.
Wet area work carried its own requirements around waterproofing, floor build up and existing services. One proposed kitchen configuration was also not allowed because the resulting route through the kitchen would compromise the required direct escape path.
The design therefore had to find the maximum useful change, not the maximum possible demolition.
How do you create a more connected home without ignoring the rules of the home that already exists?
The plan, reworked.
The spatial strategy began with the existing HDB framework rather than the finished aesthetic. Selected partitions were removed or repositioned, room functions were reconsidered, and the furniture plan was then used to test how the revised arrangement would work in everyday use.


Making more room without adding any.
An existing store zone was reconfigured toward a bedroom and walk in wardrobe arrangement, increasing the functional capacity of the plan without increasing the footprint.
The value was not simply the additional room. The surrounding circulation and doorway relationships also had to be reconsidered so the new space worked as part of the wider plan.
Open where it should be open.
The kitchen was intended to participate more strongly in the shared living space, but openness had to stop where it conflicted with the safety requirements of the home.
The final arrangement therefore treats openness as something to calibrate rather than maximise, removing selected boundaries while retaining the circulation and escape logic required by the home.

Ambition
The kitchen was meant to take part in the shared living space.
Limit
One proposed configuration was not allowed because it compromised the direct escape route.
Response
Selected boundaries were removed while the circulation and escape logic stayed intact.
Storage built into the plan.
Storage was treated as part of the architecture rather than something added after the room was designed.
Full height wardrobes, open display and integrated vanity elements were developed alongside the room configuration so that storage could absorb practical requirements without visually fragmenting the space.
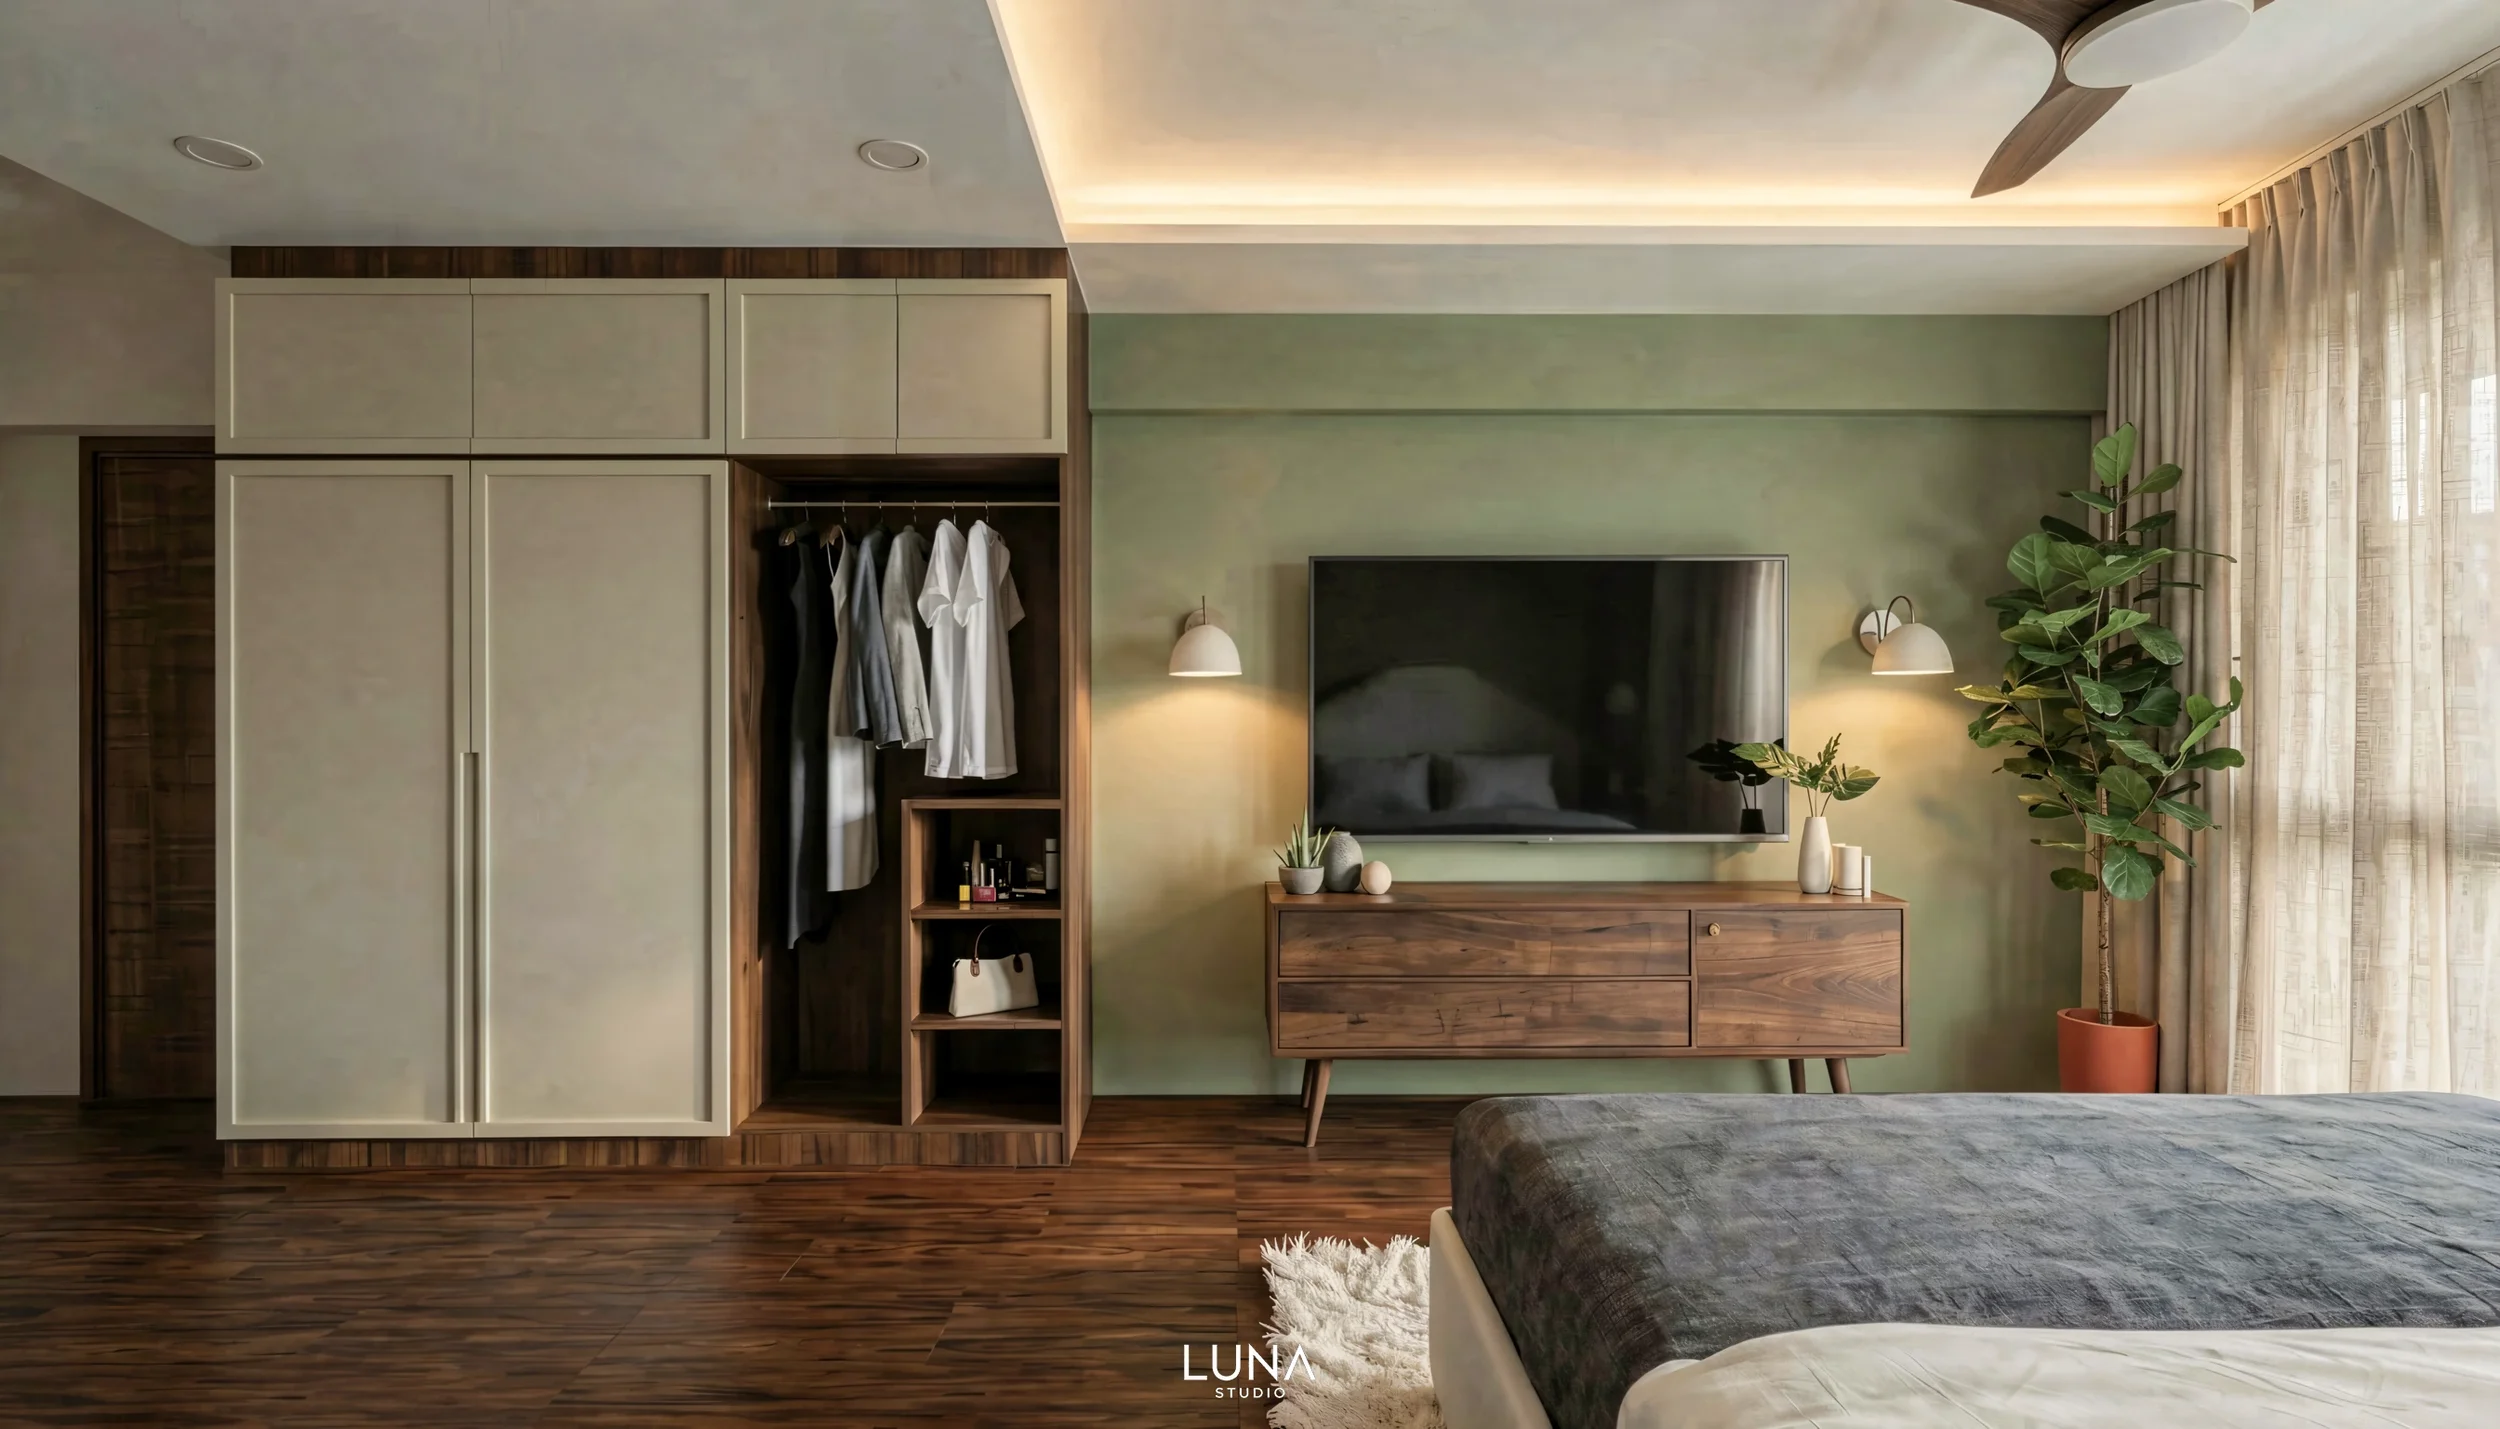


Full Height Wardrobes
Absorb the practical storage requirements of the room.
Open Display
Keeps selected items visible without fragmenting the wall.
Living Storage
Media and display built into the layout rather than freestanding.
Integrated Vanity
Built into the room rather than added to it.

Where the finish depends on what you cannot see.
The bathrooms were designed as strong material spaces, but the finished surfaces depended on a less visible layer of coordination.
Waterproofing, floor build up, drainage, plumbing, wall finishes and glass had to be resolved together before the final surfaces could be installed.

Waterproofing
Sealed before any finish is laid.
Floor Build Up
Set out against existing levels and services.
Plumbing and Drainage
Positioned before walls and floors close up.
Wall Finishes and Glass
Dimensioned so the visible surfaces land cleanly.


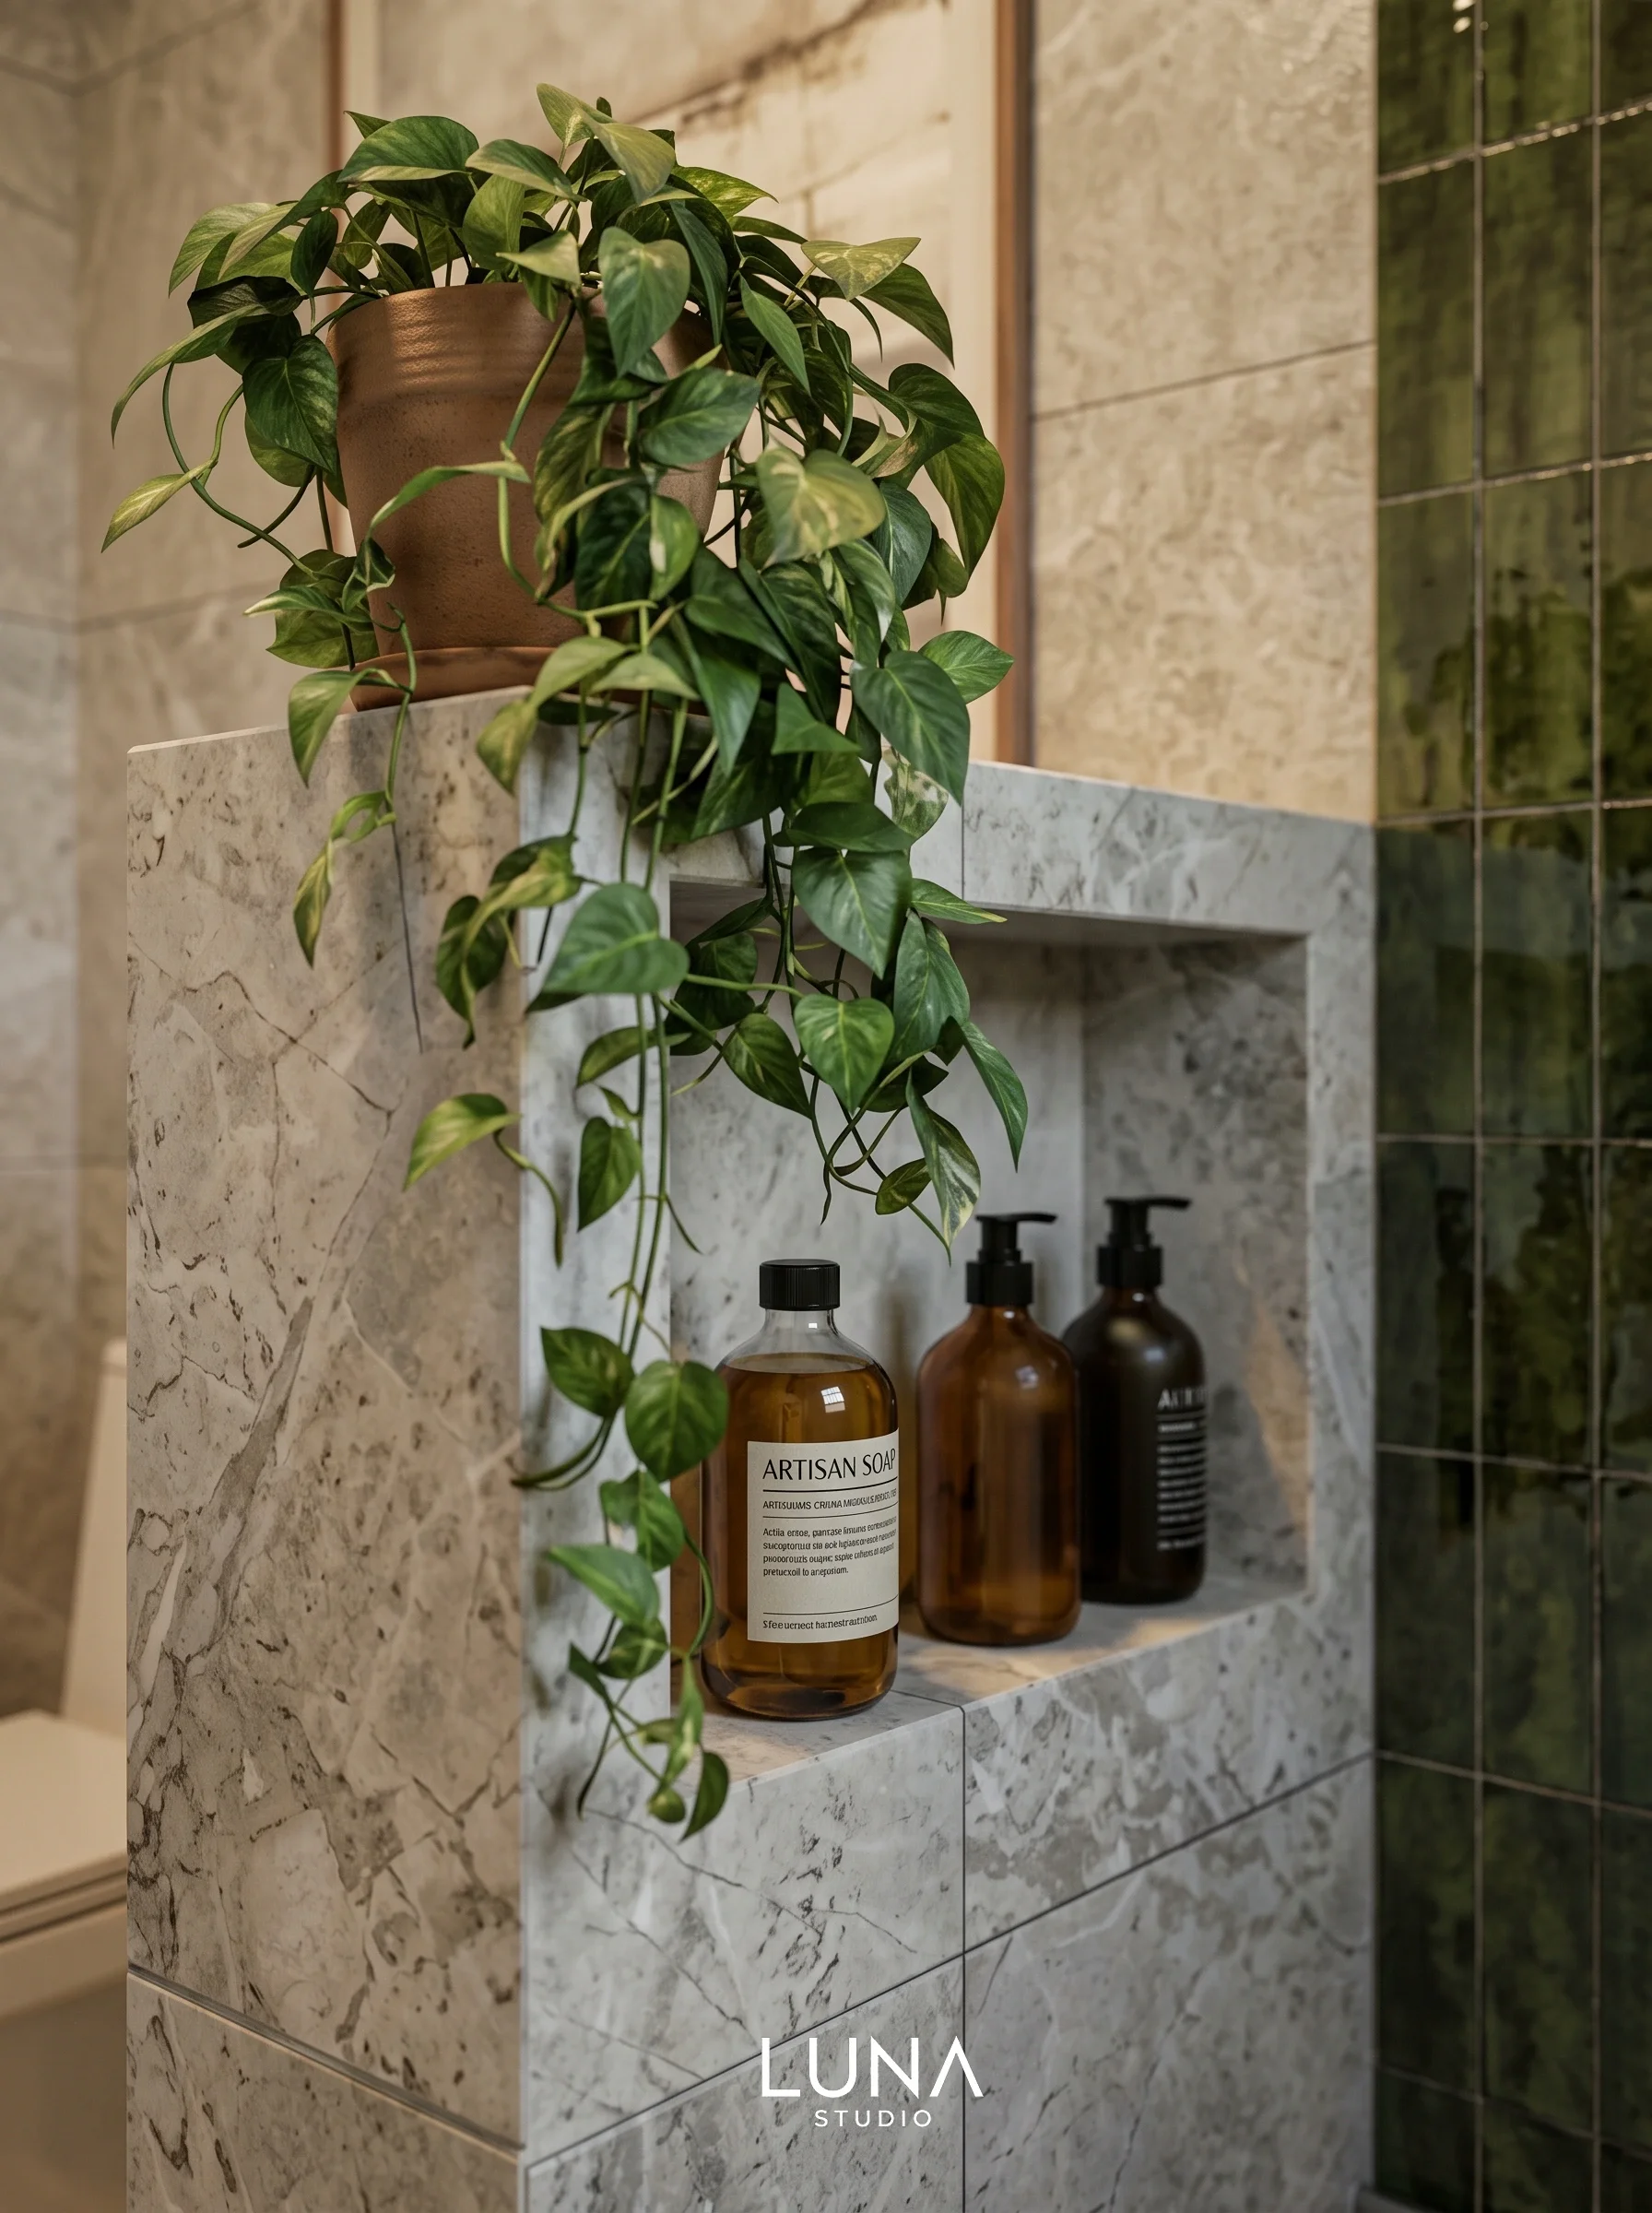

One palette, different roles.
The material palette was not repeated room by room. Each element was given a different job.
Sage
Establishes continuity across built in elements.
Stone
Creates moments of visual weight and connects the kitchen and wet areas.
Timber
Softens the cooler palette and introduces warmth where needed.
The result is one visual language that moves between rooms without making every room identical.
What Luna Studio handled.
Spatial Planning
Layout development and spatial reconfiguration.
Design Development
Design development and refinement across the proposed spaces.
Technical Documentation
Construction and joinery information needed to translate the design.
Material Direction
Material selection and specification development.
Project Continuity
Design decisions carried forward into the documented project process.
The design had to survive the site
The information behind the interior.
A finished photograph shows the result. Behind it are drawings, dimensions, service coordination, specifications and site decisions that make the design specific enough to build.
Selected technical drawings
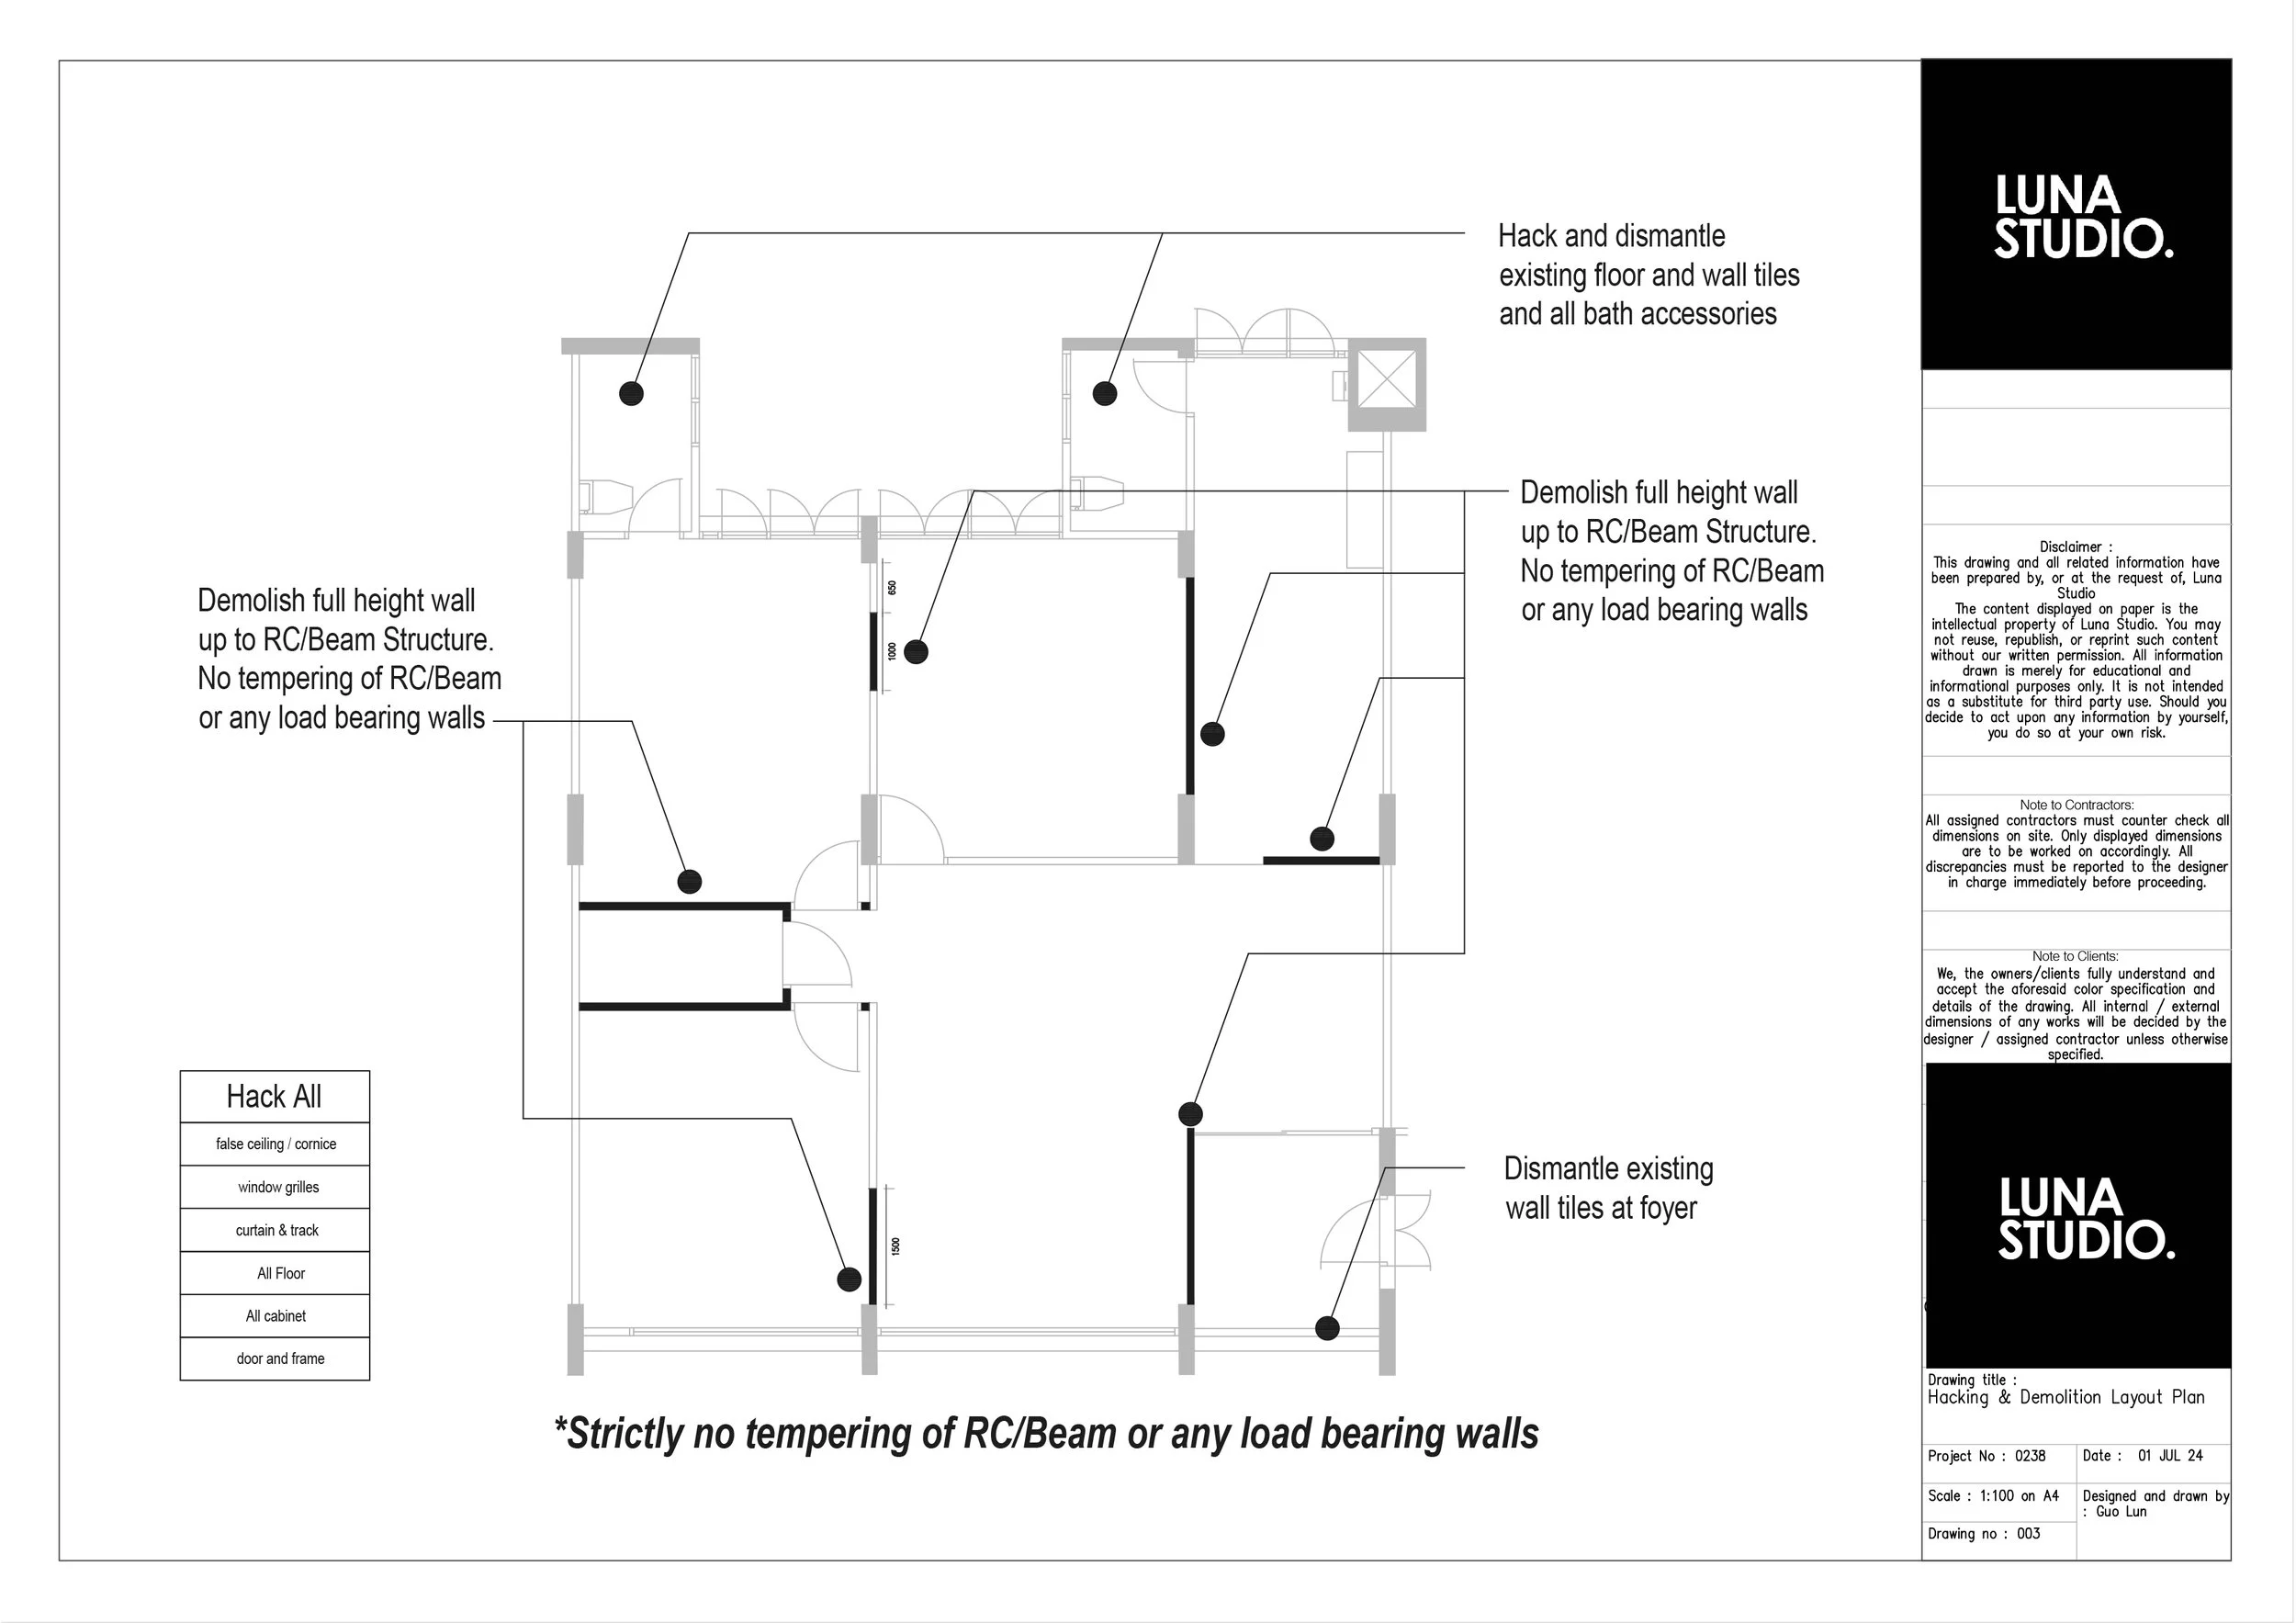


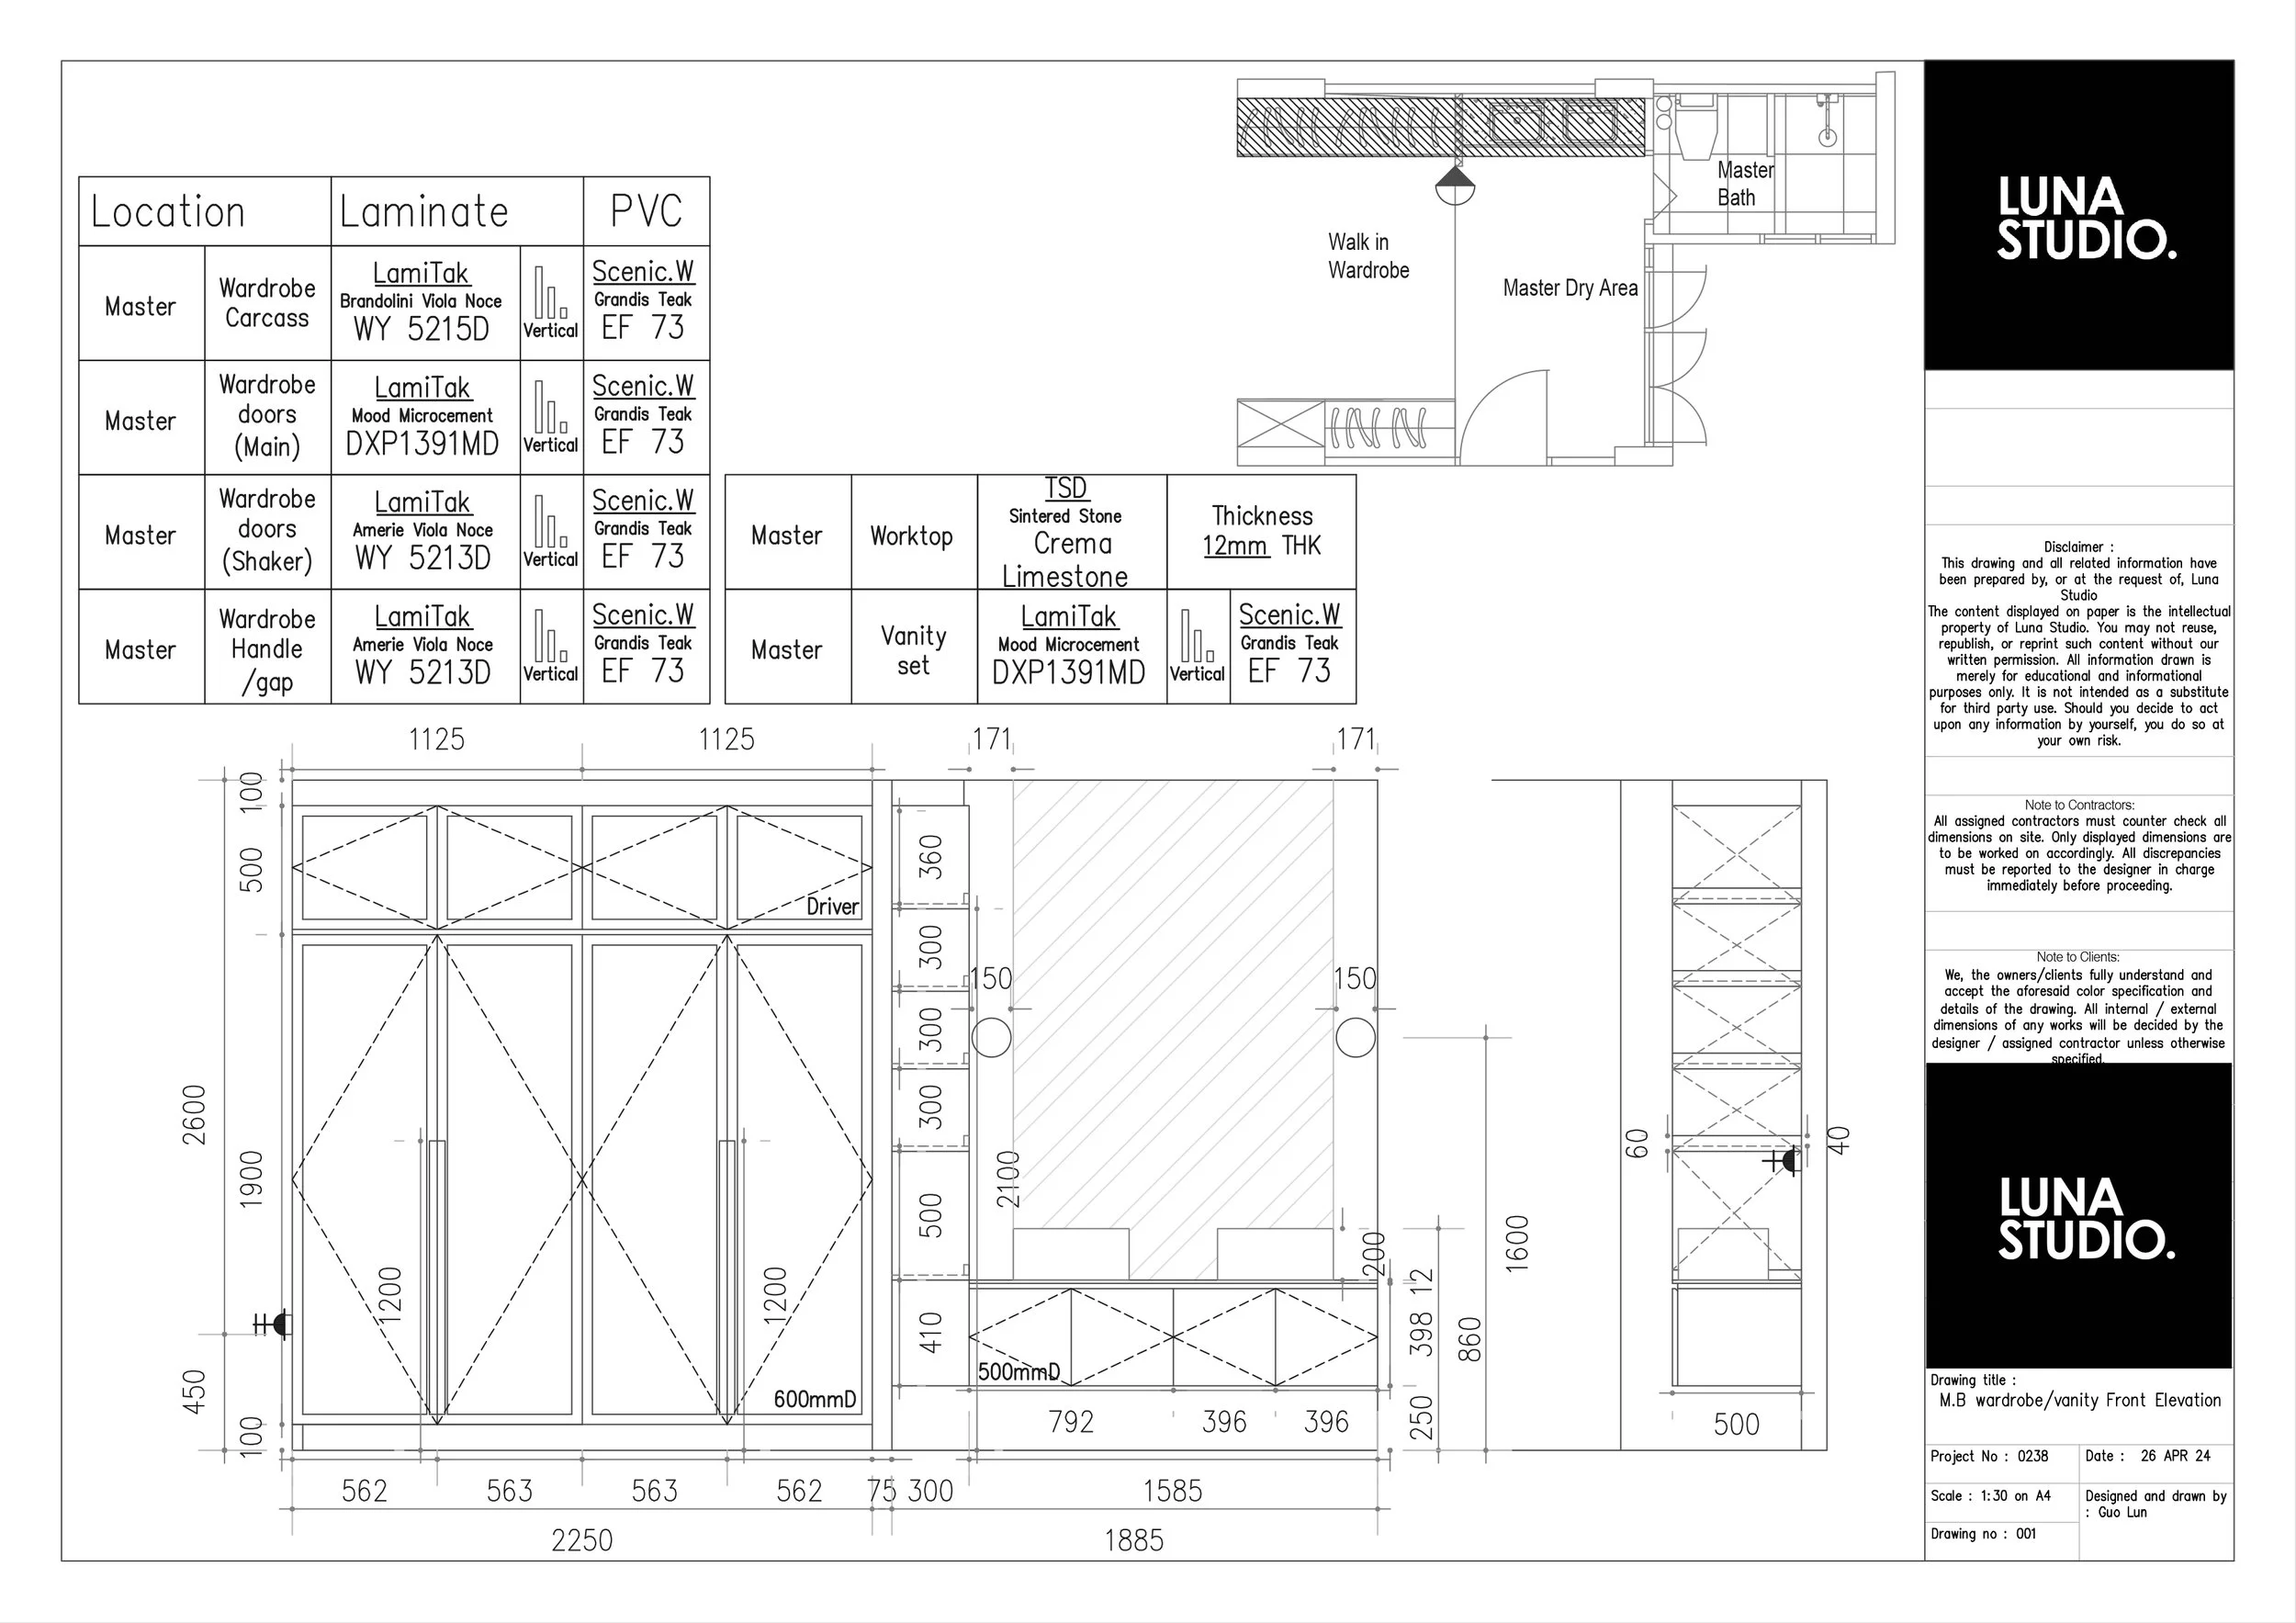

View the wider technical set

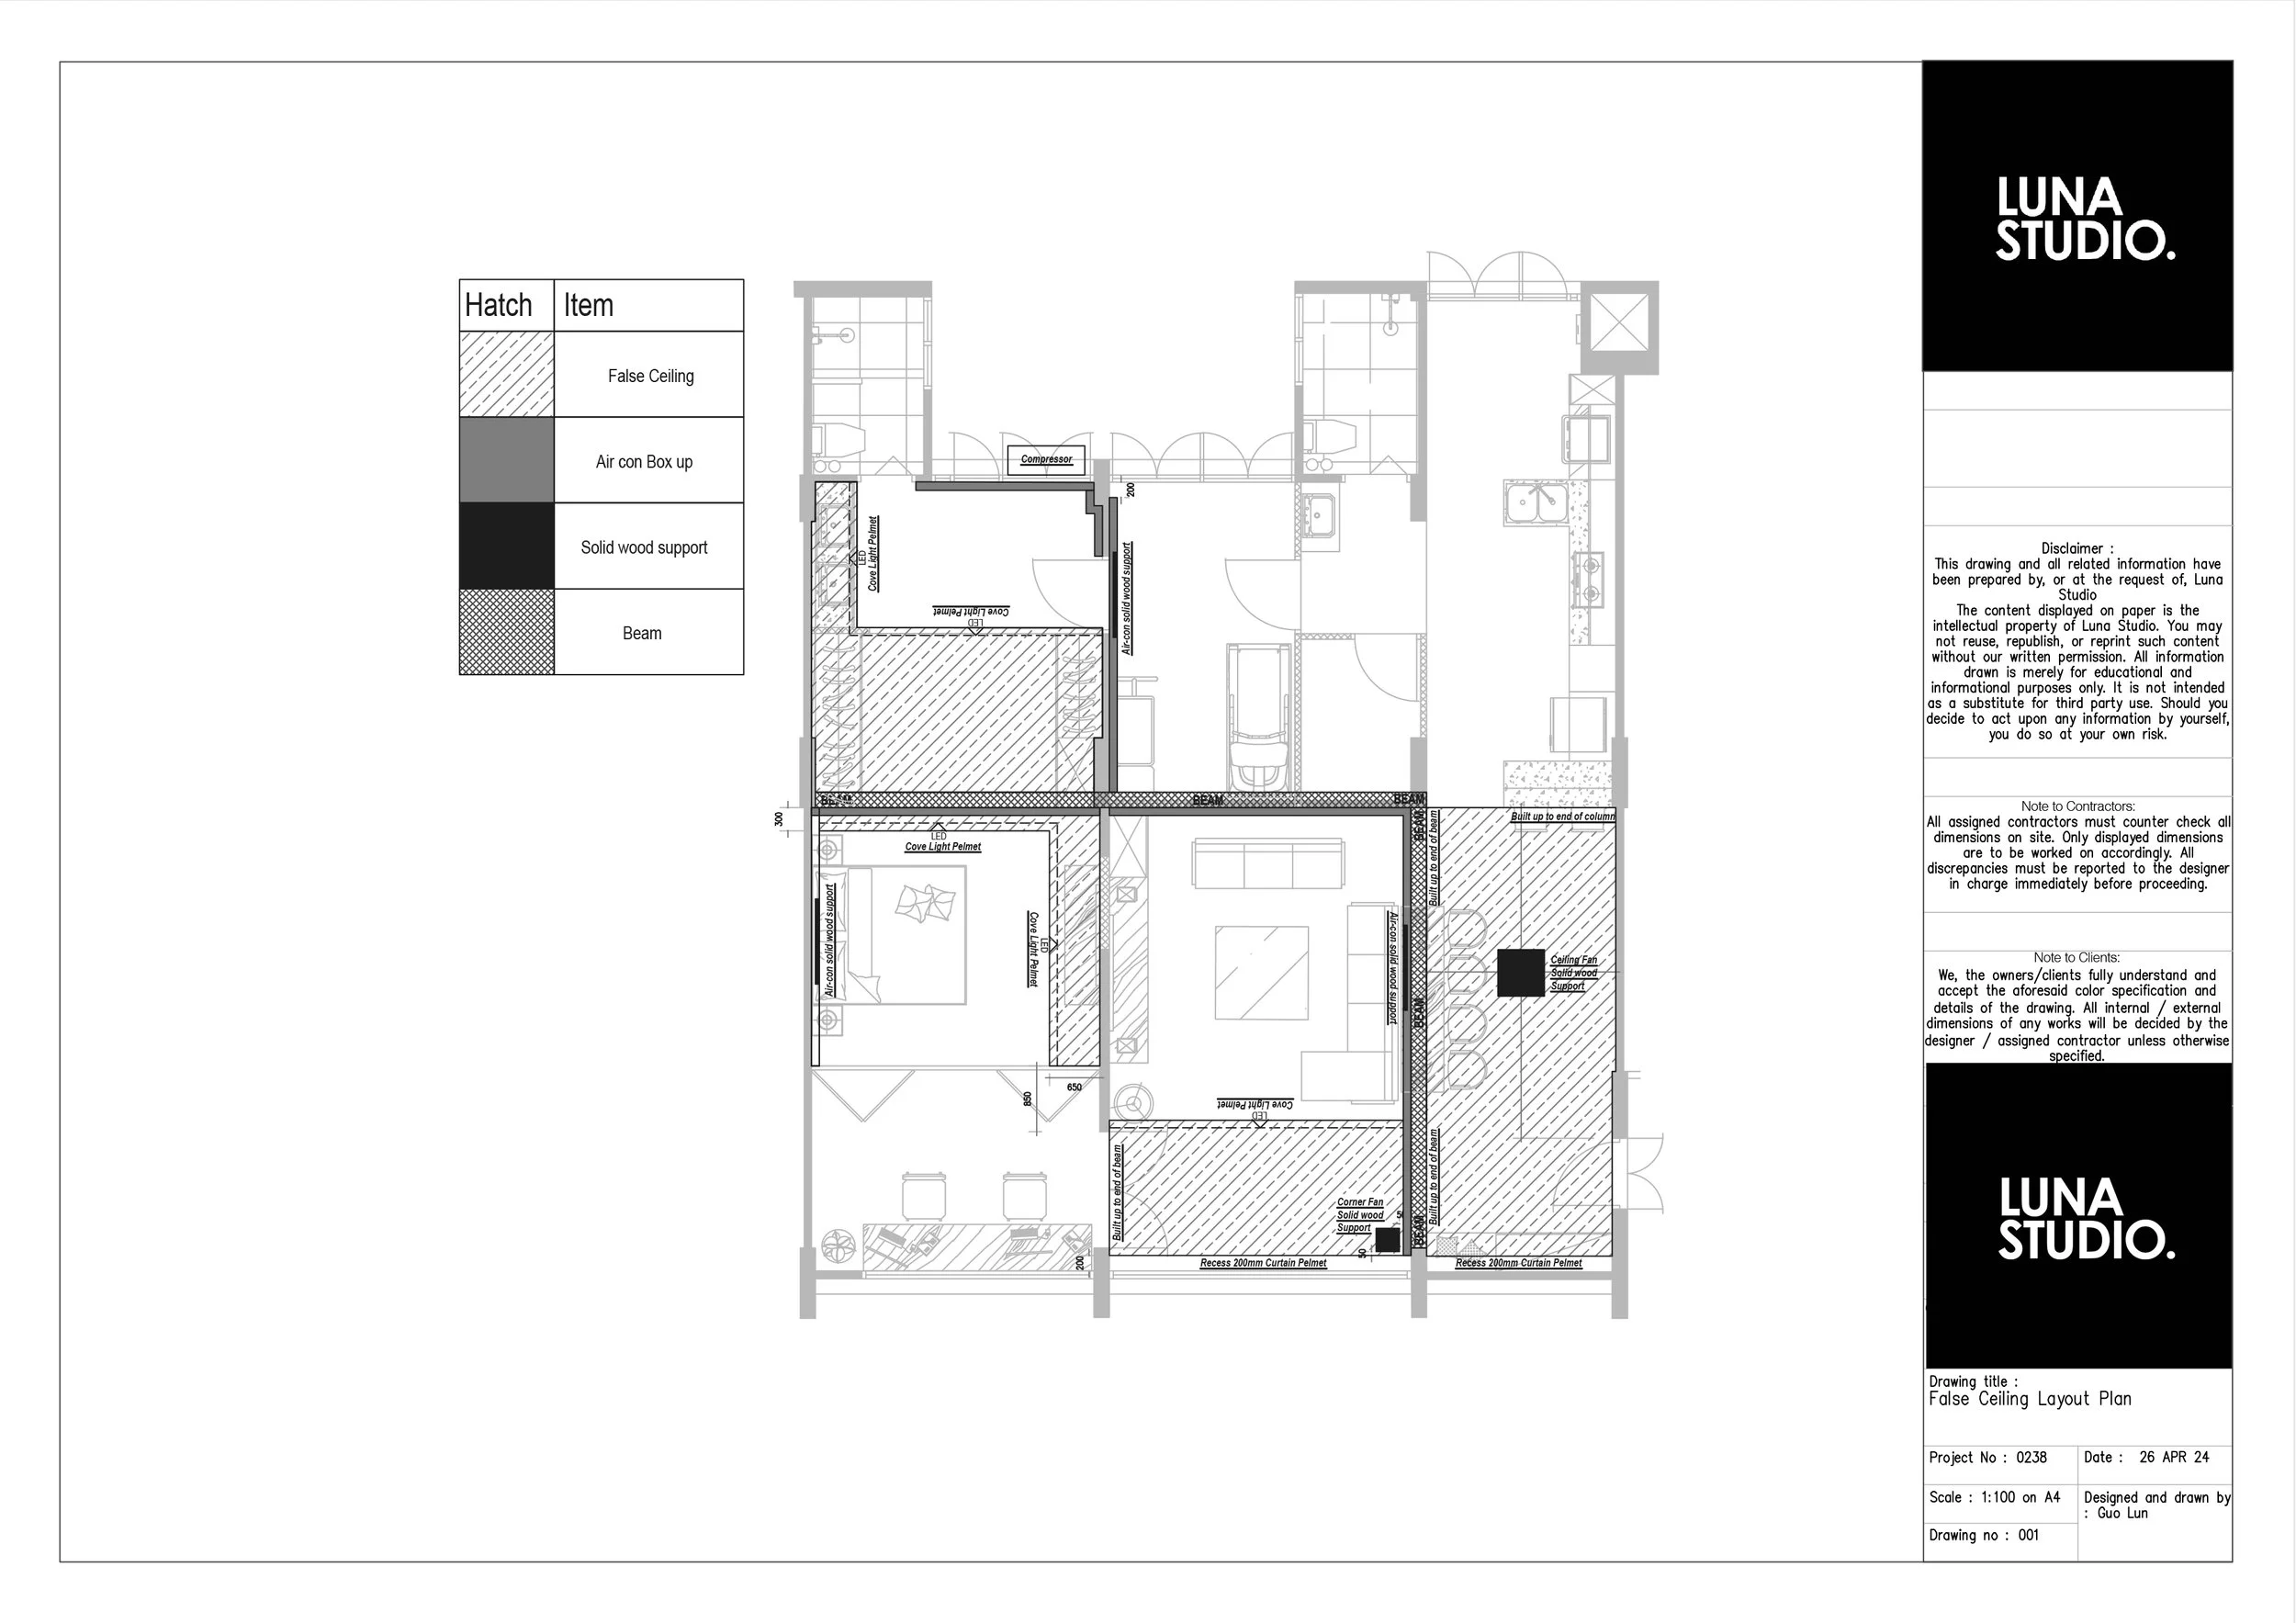
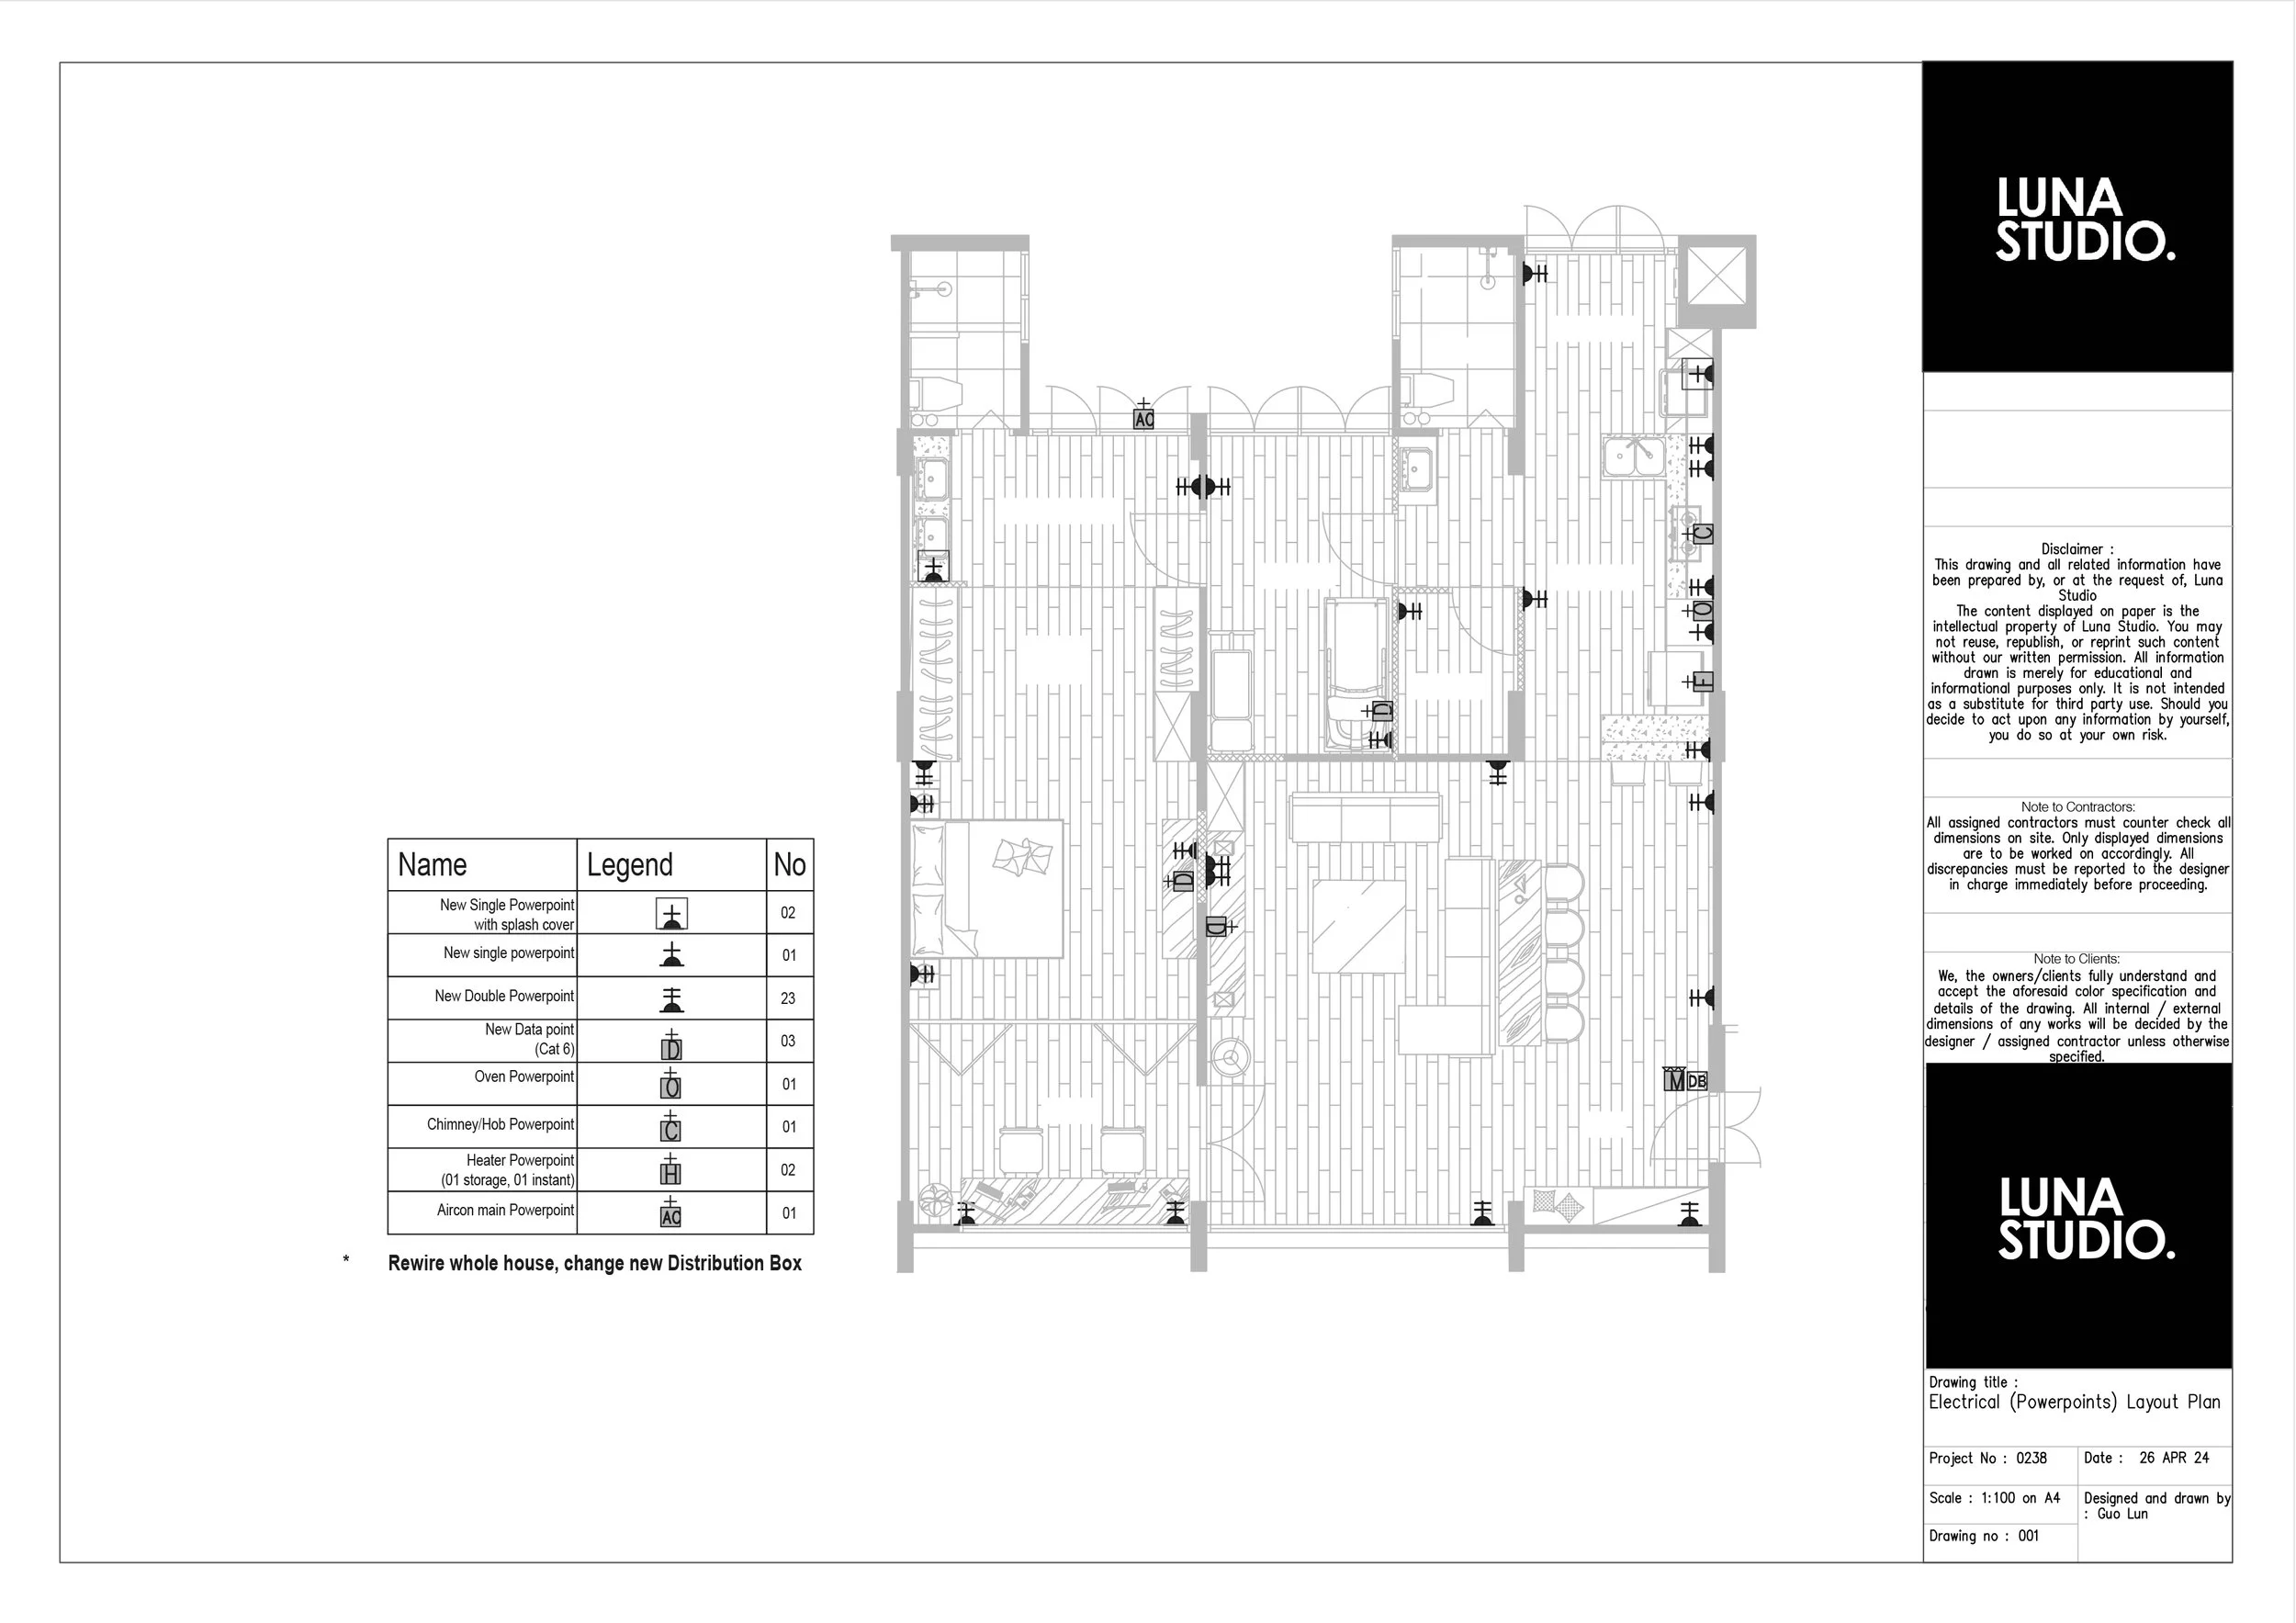


A renovation is a sequence.
The project was programmed across thirteen site weeks to handover, moving through demolition, service works, tiling, ceilings, flooring, carpentry fabrication, installation, worktops, final fittings, finishing and handover.
The schedule makes the dependencies between trades visible rather than treating renovation as a single undifferentiated phase.
The scope evolved.
Renovation decisions continued to evolve after the original contract. Two documented variation orders recorded additions and omissions across different parts of the work.
| Item | Amount |
|---|---|
| Initial Contract | S$84,000 |
| Variation Order 01 | +S$4,000 |
| Variation Order 02 | +S$5,000 |
| Total Documented Variations | +S$9,000 |
| Documented Value | S$93,000 |
Documented value is the initial contract plus the two documented variation orders.
The changes were documented item by item rather than being absorbed into an unexplained final figure.
Material
Selected material specifications changed during project development.
Function
Additional storage and cabinetry requirements evolved with the project.
Construction
Service related and installation details also required documented adjustment.
The Principle
Real renovation projects evolve. Good documentation keeps the decisions visible.
The home changed in four ways.
Deliberate Room Relationships
The plan was materially reworked instead of simply restyled.
More Functional Capacity
The revised configuration made greater use of the existing footprint.
A Consistent Material Language
Sage, stone and timber relate different rooms without making them identical.
A More Resolved Renovation
The design was carried through planning, documentation, construction sequencing and documented scope evolution.